Ask FFmpeg for the frame at 00:01:30 and you'll often get the one at 00:01:29.967 instead. The command exits cleanly, the file opens, and the image looks right at a glance. It's not the moment you asked for.
That isn't a bug in the tool. Compressed video doesn't store every frame independently, so a seek lands on the nearest keyframe at or before your timestamp and decodes forward from there. Frame acquisition is a decode operation, not an offset lookup, and the difference only becomes visible when you hold the still beside your player at the same timecode.
Four things decide whether a grab lands exactly where you aimed: where -ss sits relative to -i, whether the output is a single image or a sequence, whether the source is constant or variable frame rate, and whether you checked the presentation timestamp that came back. Get those right and frame extraction turns into a boring, repeatable pipeline step. Skip them and you'll ship a thumbnail showing the back of someone's head half a frame before they turn toward the camera.
Table of Contents
- Frame Extraction Commands at a Glance
- How to Grab a Single Frame at an Exact Timestamp
- How to Export Image Sequences at a Set Frame Rate
- Why a Grabbed Frame Can Land One Frame Off
- Select Frames by Scene Change, Keyframe or Interval
- Pick Frames That Represent the Video
- Confirm Your Frames Before Batch Processing
Frame Extraction Commands at a Glance
Six patterns cover nearly every job. Find your goal in the table, copy the pattern, then read the section that explains its timing behavior before you point it at a folder of clips.
| Goal | Command pattern | Output |
|---|---|---|
| One frame at 00:01:30 | ffmpeg -ss 00:01:30 -i input.mp4 -frames:v 1 frame.png |
Single PNG |
| One frame per second | ffmpeg -i input.mp4 -vf fps=1 frame_%04d.png |
Numbered PNG sequence |
| Every frame | ffmpeg -i input.mp4 frame_%04d.png |
Full sequence, large output |
| Keyframes only | ffmpeg -i input.mp4 -vf select='eq(pict_type\,I)' -fps_mode vfr key_%04d.png |
Sparse I-frame stills |
| Scene changes | ffmpeg -i input.mp4 -vf select='gt(scene\,0.35)' -fps_mode vfr scene_%04d.png |
One still per cut |
| Exact frame by index | ffmpeg -i input.mp4 -vf select='eq(n\,120)' -fps_mode vfr frame_%04d.png |
One PNG, frame 120 |
The input path always comes after -i, and everything after -vf operates on decoded frames rather than on the container. The %04d token is what makes a sequence work, because FFmpeg increments it per image and writes frame_0001.png, frame_0002.png and so on. Drop the token and every new frame overwrites the last, which is how people end up with a folder holding exactly one image and no error message explaining why.
Filter expressions need escaped commas. select='eq(pict_type\,I)' parses; the same expression with an unescaped comma either fails or selects something you didn't intend.
The tell: a folder filling with thousands of images means
-frames:v 1is missing from a single-frame job.
The last three rows all want -fps_mode vfr, or -vsync vfr on older builds. Without it, FFmpeg pads the output back to a constant rate by duplicating frames, and a 12-cut clip becomes hundreds of near-identical stills.
How to Grab a Single Frame at an Exact Timestamp
This is the command needed first, and it fails in five predictable ways. Work through the steps in order.
Confirm the timestamp in your player first. Read the timecode in
hh:mm:ss.msform, then copy it. Writing00:01:30,500with a comma instead of a period is the most common slip, and it either errors out or parses as a value you didn't mean.Run the extraction.
ffmpeg -ss 00:01:30.500 -i input.mp4 -frames:v 1 frame.pngwrites a lossless still at the source resolution. Swap the extension to.jpgand add-q:v 2when you want a small file; without that flag the JPEG encoder falls back to its default quality and you get a soft image you'll blame on the video.Keep
-ssbefore-ifor speed. Placed there, FFmpeg jumps to a nearby earlier position and decodes forward to your timestamp. Placed after-i, it decodes every frame from the beginning, which turns a fraction of a second into minutes on a two-hour file.Always include
-frames:v 1. It tells FFmpeg to stop after one image. Omit it and the encoder writes every frame from the seek point to the end of the clip, filling the disk on a 1080p source.Compare the still against your player at the same timecode. Open both side by side and confirm the subject, the mouth position, the ball in flight. If the image lands a frame early or late, that's seek behavior rather than a typo in your command.
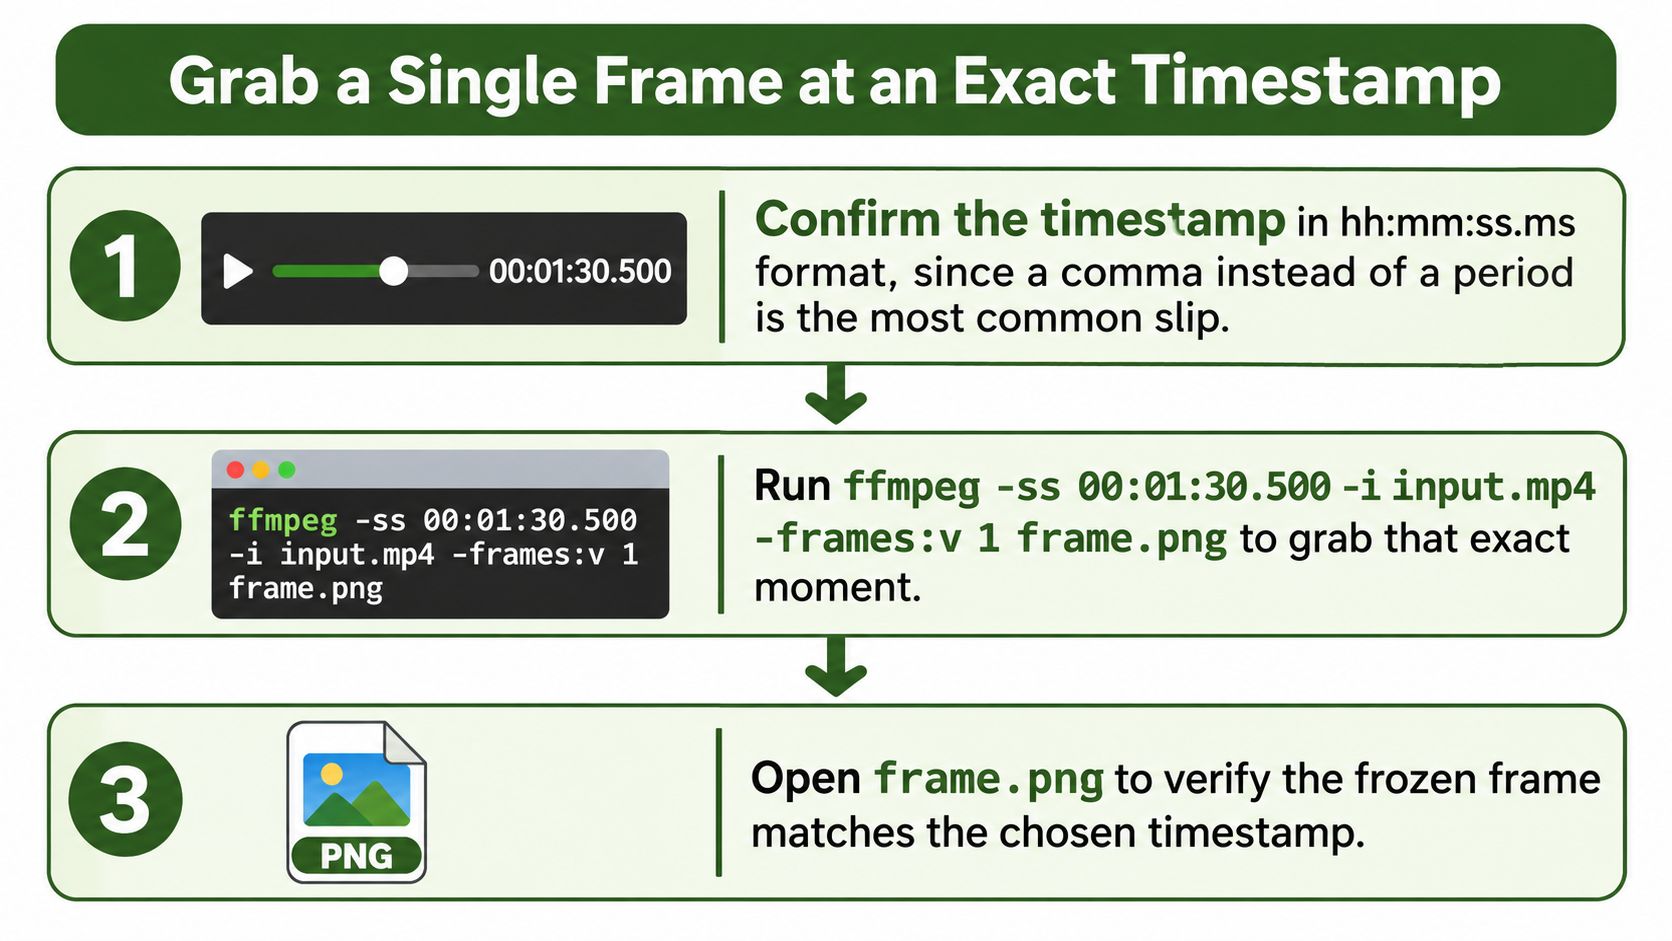
The quick check that proves the command worked is a single listing. Confirm the file exists, confirm its pixel dimensions match the source, and confirm the subject matches the player frame. If all three hold, the command is sound and you can reuse it. When the still needs to become a 9:16 asset rather than a wide grab, the export settings for vertical clips cover the framing and codec decisions that follow extraction.
How to Export Image Sequences at a Set Frame Rate
A 60-second clip at 30 fps contains 1,800 frames. The fps filter does not write that native sequence. It resamples to a target rate by dropping or repeating frames, so the file count falls fast.
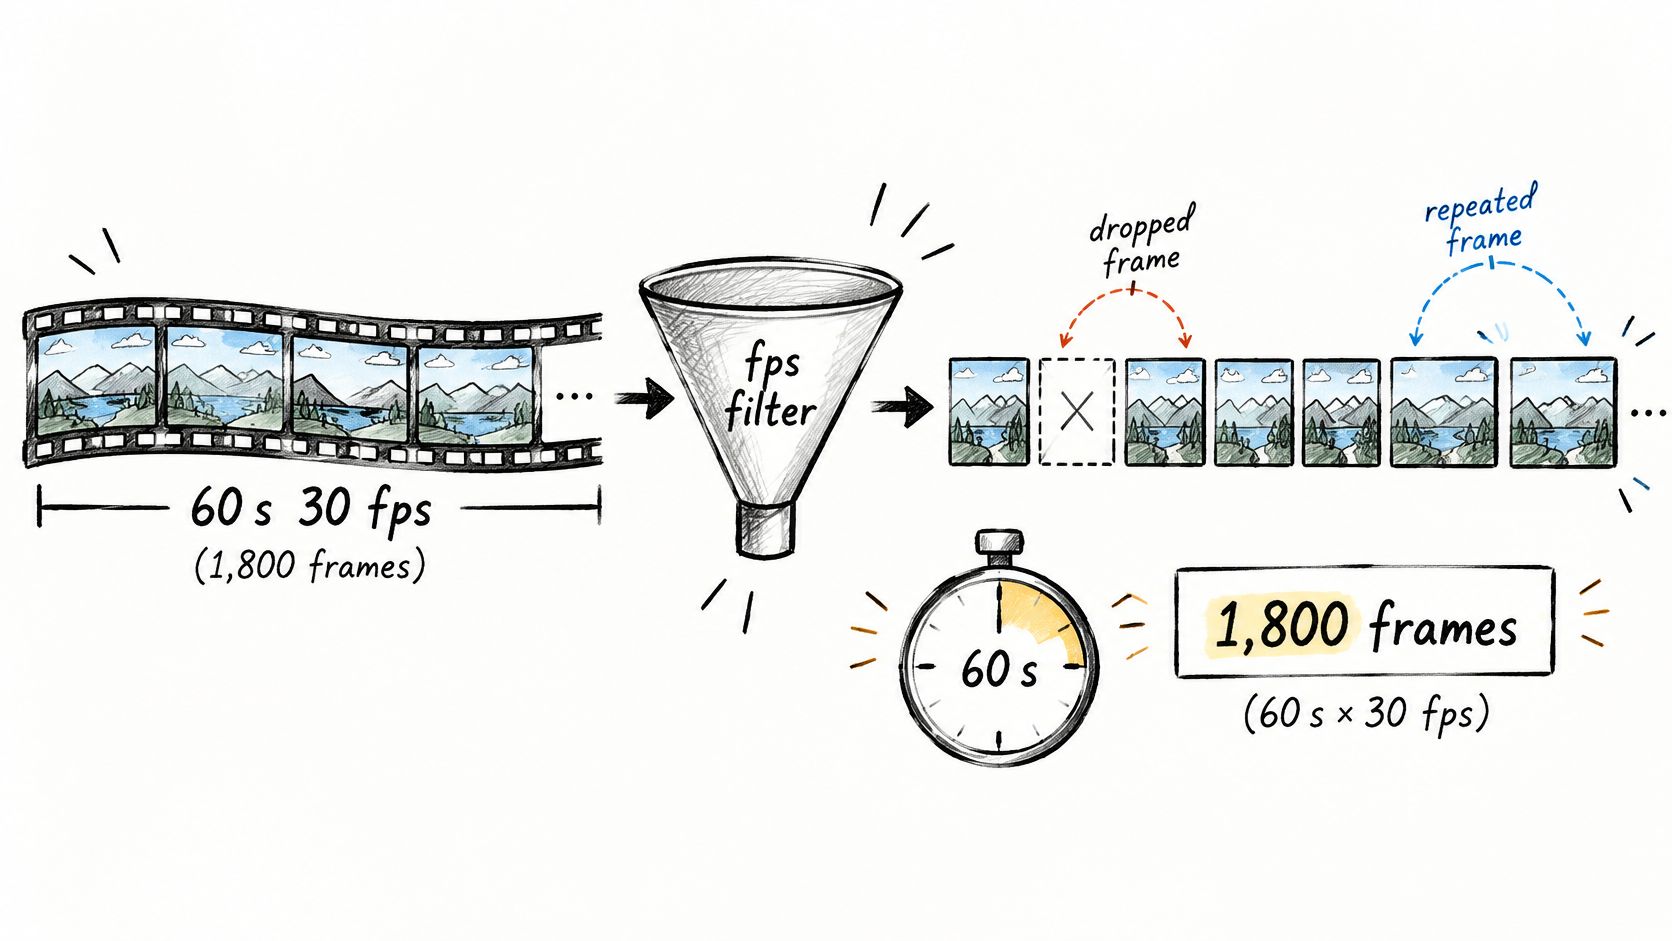
| Filter setting | Frames written | Best for |
|---|---|---|
| No filter (native rate) | 1,800 | Full motion review |
| fps=10 | 600 | Movement analysis |
| fps=1 | 60 | Timeline contact sheets |
| fps=1/5 | 12 | Long-form overviews |
ffmpeg -i input.mp4 -vf fps=1 frames_%04d.png
Keep the %04d token. %03d breaks sorting past frame 999, and %d breaks it at frame 10. Add -start_number 240 when you are appending to an existing sequence. Add -y when FFmpeg should overwrite the previous run instead of stopping for confirmation.
Naming and resampling details
Phone and screen recordings usually arrive at a variable frame rate, so resampling them to a constant rate produces duplicate images. If a 60-second screen recording yields 61 stills at fps=1, the resampler is evening out irregular timestamps. Your arithmetic is not the problem.
Cap long jobs with -frames:v 500. A three-hour source at fps=5 will otherwise write 54,000 images and fill the disk before you notice. When you only need one passage, place -ss 00:00:10 -t 5 before the input and combine it with -vf fps=2. That writes 10 frames from the five-second window.
Match the rate to the question the images answer. Motion review wants 10 fps or more. Timeline previews want one frame per second. Long overviews want one frame every few seconds. The mechanics of frame rate conversion show how a new constant rate is built by dropping and repeating source frames.
For sequences that end up as previews rather than stills, the output format drives file size far more than the extra frames do. choose export formats for animated ads before you settle the sampling rate.
Why a Grabbed Frame Can Land One Frame Off
A frame arriving a few milliseconds early or late is the normal result of how inter-frame codecs work, not an edge case. The decoder can't start at an arbitrary point, so it begins at a preceding random-access point and walks forward. Seek placement decides whether that walk is cheap or exact: -ss before -i is fast but can be imprecise on some inputs, -ss after -i decodes from the start and is exact but slow on long files. Modern FFmpeg combines both by taking a coarse input seek and a fine output seek in the same command.
The OpenCV video I/O documentation describes VideoCapture as grabbing, decoding and returning the next frame, which is the honest mental model: you're stepping through a decode, not indexing a byte offset. That's also why pict_type-based extraction produces sparse keyframe samples instead of time-accurate captures, and why motion blur, interlaced combing, ignored rotation metadata and HDR clipping show up in batches that "worked".
Prove the drift with two exports
Export the frame at 00:01:30.000 and again at 00:01:30.033, then compare both against your player at the same timecode. If they're identical, the seek landed on the same decoded frame twice. If the second matches the player, your target sits between frames at the rate you assumed.
A technically successful command can still return the wrong moment. Verification is part of extraction, not a separate QA step.
For the ground truth, list actual presentation times with ffprobe -select_streams v -show_frames -show_entries frame=pts_time input.mp4 and match the nearest entry to your target. FFmpeg's own main documentation treats presentation timestamps and keyframe state as separate frame properties, which is the distinction your automation has to carry too. If the frame you need has a known index, skip the seek entirely and select on n; that path is reproducible across runs. Variable frame-rate phone footage and rotation-metadata files are where this bite is hardest, because frame numbers, timestamps and wall-clock time all diverge at once.
Select Frames by Scene Change, Keyframe or Interval
A cut, a keyframe, and a one-second tick can each return a different still from the same file. The select filter evaluates a rule against every decoded frame and forwards only the frames where that rule is true, so you keep a match instead of a nearby guess.
| Method | Filter expression | Best for | Main risk |
|---|---|---|---|
| Fixed interval | fps=1 |
Even timeline previews | Duplicates and blurred frames |
| Keyframe only | select='eq(pict_type\,I)' |
Fast sparse samples | Frames sit far from the target moment |
| Scene change | select='gt(scene\,0.35)' |
Cut-based summaries | Fades and flashes trigger false positives |
| Exact frame index | select='eq(n\,120)' |
Reproducible single frames | Needs known frame numbers |
| Scene plus dedupe | Scene filter, then a similarity check | Clean shot lists | Extra code to maintain |
Speech-driven edits depend on the scene threshold, and that value is easy to set too loosely. FFmpeg's filter reference documents scene as a 0 to 1 score for the likelihood that the current frame starts a new scene. About 0.3 to 0.5 is a common practical starting range. Tune it on your footage. The score is measured on a decoded frame, so the hit can land one frame after the cut you saw in the player.
Tuning the scene score
Treat the range as a place to start, not a fixed setting. Run three thresholds, 0.25, 0.35 and 0.5, across ten representative clips and log how many stills each one keeps. Fades, camera flashes, burned-in subtitles and animated overlays all fire the detector. A talking-head clip with a lower-third graphic can yield a burst of nearly identical frames. Raise the threshold until those bursts shrink, then check that real cuts still survive.
Keyframe-only extraction saves work. It does not rank importance. An I-frame can sit seconds away from the line or product shot you wanted, which is acceptable for a review strip and wrong for a precise screenshot.
Cap density with a maximum frame count so a strobing sequence does not write thousands of assets. Follow that with a similarity check, drop near-duplicates, and keep the sharpest frame in each cluster. The same selection logic underpins automated video highlights, where the right moments matter more than capturing every moment.
Interval sampling covers the timeline evenly. Scene change builds cut-based summaries. Frame index is the path when the same still has to come back on a second run.
Pick Frames That Represent the Video
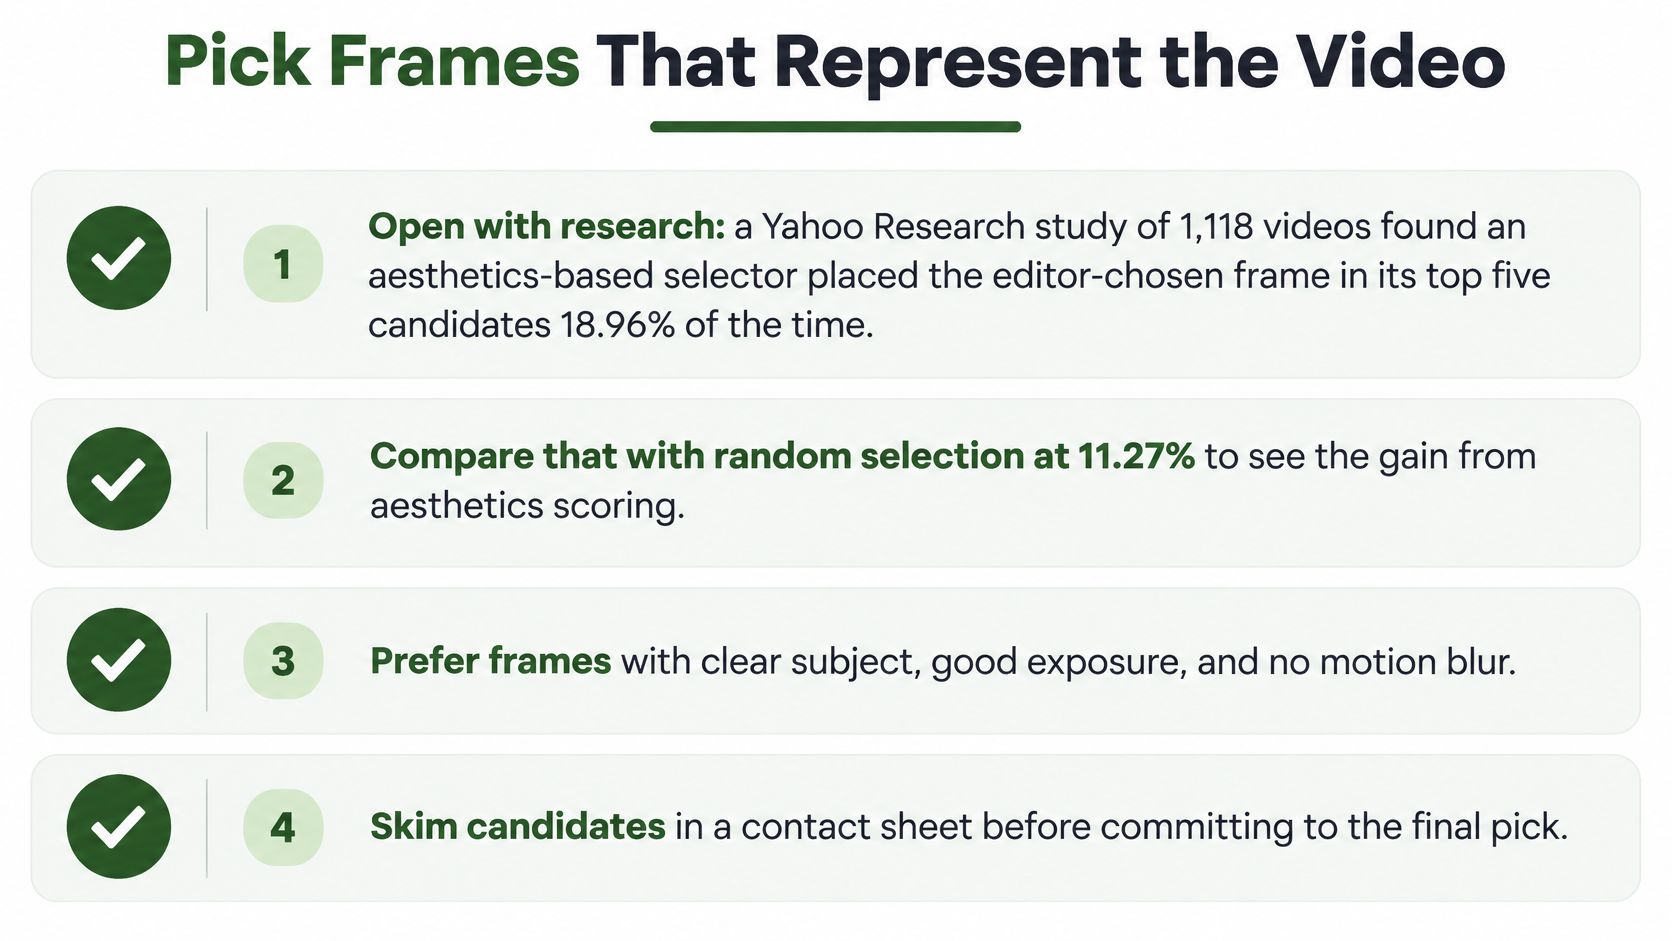
The first frame, the middle frame and any other fixed timestamp are weak defaults, because editorial choice isn't positional. A Yahoo Research study of 1,118 videos whose thumbnails could be compared directly with extracted frames found that an aesthetics-based selector placed the editor-chosen frame within its top five candidates 18.96% of the time, against 11.27% for random selection, as reported in the Mark Studios thumbnail statistics compilation. The absolute gain is 7.69 points, but the more useful design lesson is that even a good selector rarely ranks the winner first.
Scale makes the same point. The Micro-video Thumbnail Selection benchmark, described in the arXiv-hosted study of micro-video thumbnail selection, covers 35,148 micro-videos from 18,279 publishers. The posted thumbnail's nearest neighboring frame averages about 93.8% visual similarity, so viable candidates really are in the video. Yet random frame selection scored 14.09% accuracy while the strongest listed method reached 27.01%. Candidates are easy; ranking them is the job.
Reject candidates before you rank them:
- Black and near-black frames: measure mean luminance and drop anything far below the clip average, covering fades and slate cards.
- Title cards and lower thirds: typography-heavy frames look busy at thumbnail size and say nothing about the content.
- Motion-blurred frames: a sharpness score on the center crop filters these faster than your eyes can.
- Duplicates: discard frames within a second of a better-scoring neighbor.
- Transition frames: anything inside a dissolve or wipe reads as a double exposure.
Build a contact sheet and keep the timestamp
Sample 10 to 20 candidates across the middle 80% of the clip so opening and closing frames don't dominate. Then tile them for review with -vf fps=1/5,scale=160:-1,tile=5x4, which gives you one grid to scan instead of forty files to click. Teams already running AI-assisted short video editing can feed that grid into a ranking step rather than choosing by hand.
Store the chosen frame's timestamp next to the image. That single field makes the decision auditable and reproducible, and it's the same discipline behind any thumbnail image pipeline that has to defend its choices later.
Confirm Your Frames Before Batch Processing
A five-minute verification loop catches nearly every failure before it multiplies across a library.
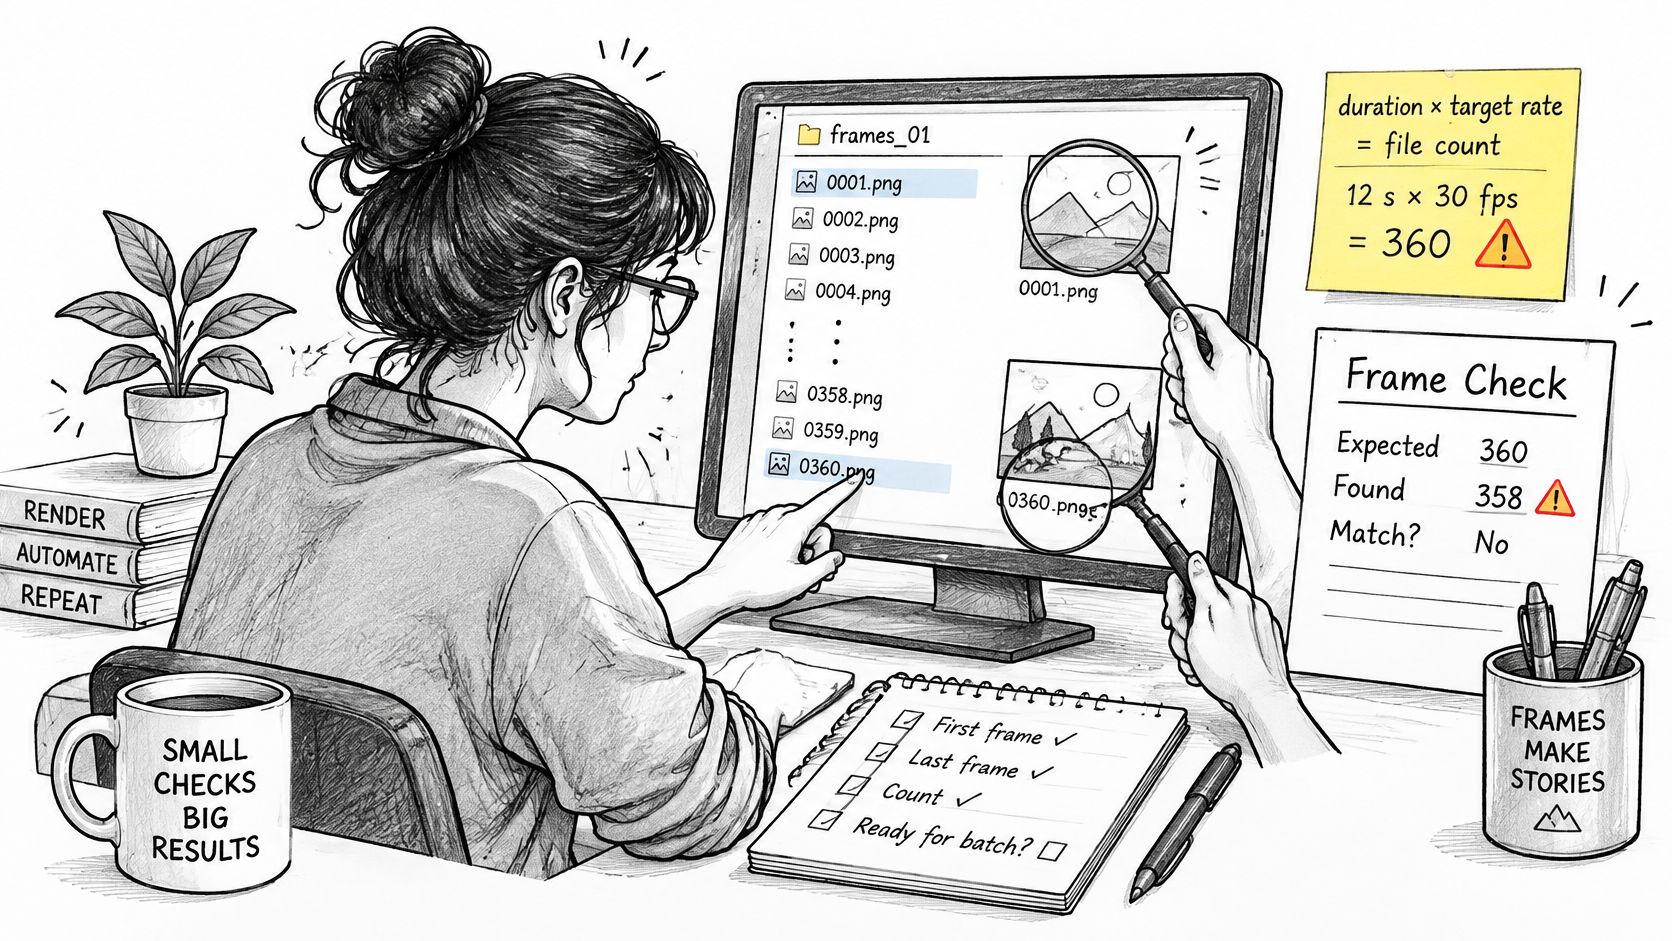
- Count the output. Duration multiplied by target rate should equal the file count. A mismatch means variable-frame-rate duplicates or a run that stopped early.
- List the presentation times. Compare the returned timestamps with the ones you requested; a systematic offset points at seek placement.
- Open five images. Three at random, plus the first and last. Check for black frames, sideways rotation and misframed subjects.
- Log a row per batch. Record the requested time, actual PTS, output dimensions and pixel format in a plain CSV so an off-by-one error stays traceable weeks later.
- Then loop. Run the single-frame command on one clip, pass it through steps 1 to 4, and only then wrap the same command in a folder loop.
Running batches through RenderIO shortens the logging side of that routine, because each result returns duration, codec, resolution and file size metadata alongside the files. Start with one clip today, confirm the frame matches your player, and let the verified command carry the batch.
RenderIO runs any FFmpeg 7.x command through a REST API, so the extraction pattern you tested locally becomes a job you can submit from a script, a webhook or an n8n workflow without provisioning a worker. You post the command, it executes in an isolated cloud sandbox, and the output files come back with metadata and signed URLs. Take the single-frame command from this guide, point it at one clip, and check the returned timestamps against your player at RenderIO.