You've got a talking-head clip with too much empty space, or a product shot that needs a gradual push toward the label. You enlarge the frame, and the composition improves, but the face looks softer, the captions disappear, or the vertical export cuts off the product.
Learning how to zoom video means deciding what you can remove without losing what viewers need. FFmpeg can make the crop static, animate it, or drive it from a tracked focal point. The useful limit comes from your source footage, delivery dimensions, and layout, not from how far the scale slider moves.
Table of Contents
- Choose the Zoom Method That Fits Your Shot
- Set a Fixed Zoom With Crop and Scale
- Build a Timed Push-In With zoompan
- Quality Checks That Keep a Zoom Sharp
- Social Crops for TikTok, Reels and Shorts
- Decide Between Local FFmpeg and an API
Choose the Zoom Method That Fits Your Shot
A tighter interview frame and a moving product close-up need different treatments. Before choosing a filter, decide whether the framing stays fixed, the magnification changes, or the subject moves through the shot.
Zoom methods compared
| Method | Best for | Motion | Quality risk |
|---|---|---|---|
| Static crop and scale | Fixed reframing of one shot | None | Low, one resample |
| Animated push-in with zoompan | Timed, smooth zoom on a centered subject | Linear or eased, frame based | Medium at high zoom |
| Keyframed zoom in an editor or pipeline | Custom timing and moves that follow a subject | Multi-point curves | Medium, source detail and interpolation set the limit |
A static crop is the simplest choice when the speaker stays put. Set the composition once, then resize directly to the delivery frame. It's easier to inspect because you don't have changing crop boundaries throughout the shot.
Use zoompan when the movement itself adds emphasis, such as gradually tightening on a product while the presenter explains a feature. Its timing is explicit, but you must distinguish output frames from input frames.
Choose keyframes when the subject changes position or the zoom needs pauses and changes of pace. In DaVinci Resolve, Premiere Pro, or a custom pipeline, animate position alongside scale rather than enlarging around the image center and hoping the subject stays visible.
Choose the composition before the magnification
A modest close-up that preserves the speaker's hands can communicate more than an extreme face crop. Likewise, a product demonstration fails if the enlarged label looks impressive but the demonstrator's action happens outside the frame.
The ClickyApps guide to platform aspect ratios emphasizes keeping important elements inside platform-dependent safe zones and allowing room for alternate crops. Make that a framing requirement before you animate anything.
Practical rule: Pick the method by what must move, not by how dramatic the zoom looks.
There's no universal safe magnification for every master. Focus, compression, camera movement, and the delivery size all affect the result, so judge an exported sample rather than trusting the preview.
Also distinguish player magnification from editing. Pinch-to-zoom on a phone enlarges your view during playback. It doesn't change the video file you send or publish.
Set a Fixed Zoom With Crop and Scale
Start with the highest-quality master, not a proxy or a previously cropped social export. A fixed zoom is a crop followed by a resize, so the useful decisions are the crop dimensions, its position, and the final output size.
This workflow keeps those decisions in a single render.
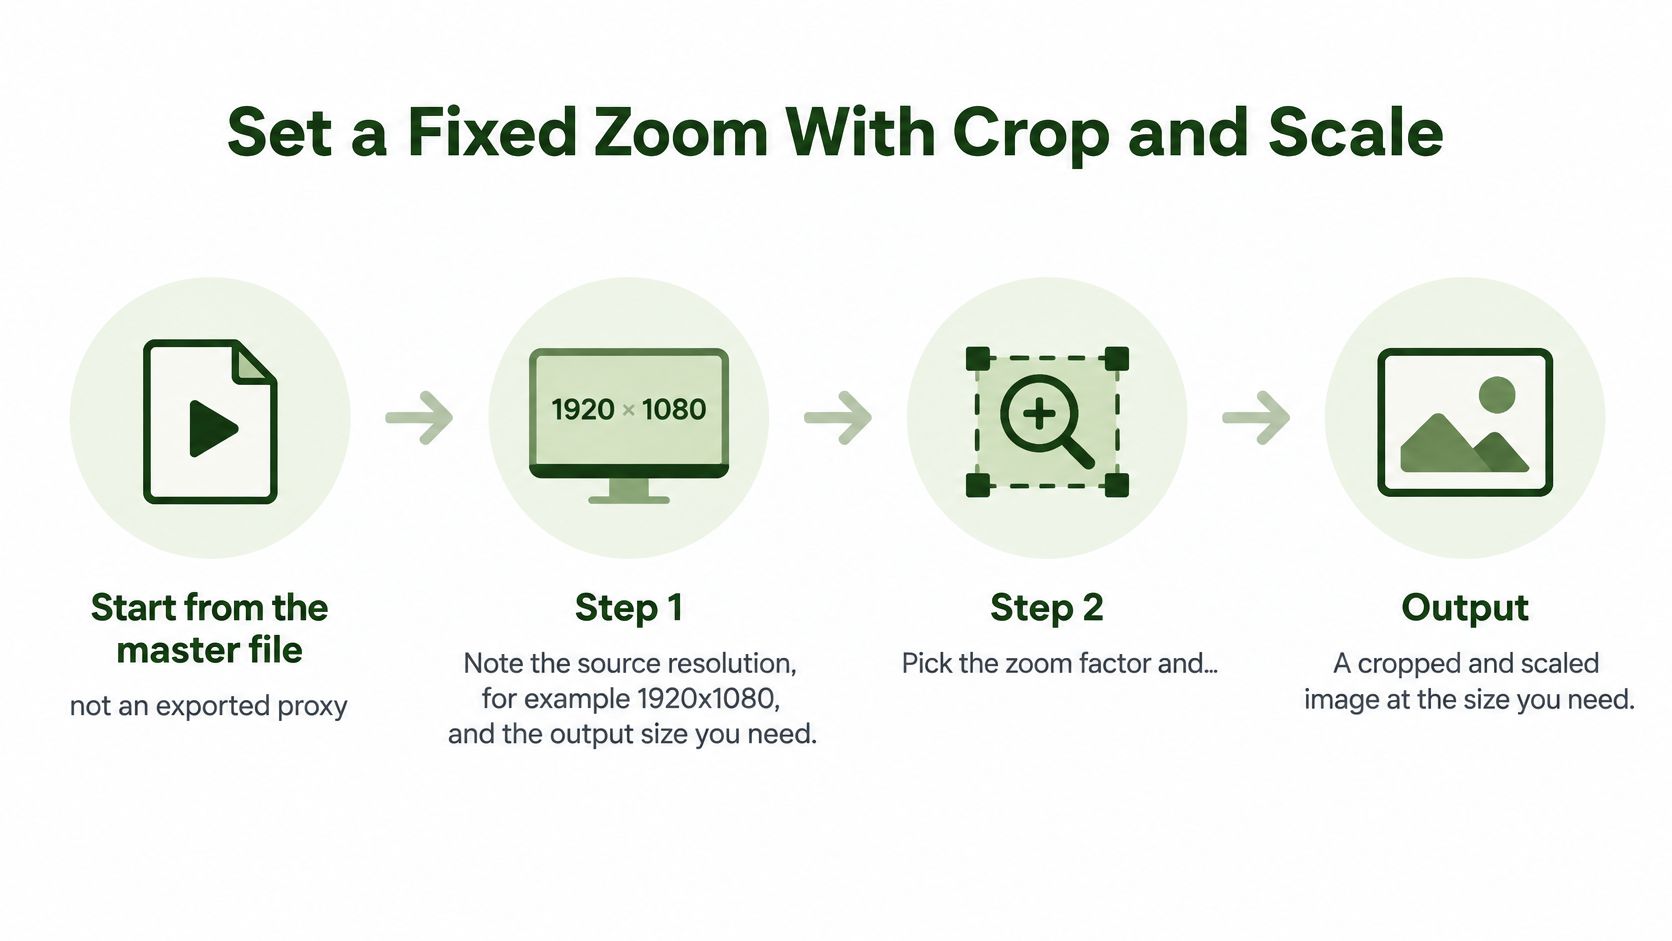
Calculate the crop before encoding
Read the source geometry. Inspect the file's dimensions, rotation, and sample aspect ratio before building the filter. For this worked example, assume a square-pixel
1920x1080master and an output with the same dimensions.Choose the crop size. For a hypothetical
1.25xzoom, divide the source width and height by1.25. In FFmpeg expressions,iwandihmean input width and input height.Keep the geometry even. Use
trunc(iw/1.25/2)*2for width and the equivalent expression for height. This rounds downward to even dimensions suitable for common chroma-subsampled delivery formats.Center the actual crop. Position it using
(iw-ow)/2and(ih-oh)/2, whereowandohare the crop's output dimensions. If rounding changes the crop, these expressions still center the resulting rectangle.Resize and encode in the same command. Feed the crop straight into
scale, then encode the output. Don't save a cropped intermediate just to resize it in another application.Inspect the exported file. Confirm the intended dimensions and watch the entire shot, particularly where the speaker leans or gestures. A centered rectangle isn't necessarily a well-composed rectangle.
For the example above, run:
ffmpeg -i input.mp4 -vf "crop=trunc(iw/1.25/2)*2:trunc(ih/1.25/2)*2:(iw-ow)/2:(ih-oh)/2,scale=1920:1080:flags=lanczos" -c:v libx264 -crf 18 -pix_fmt yuv420p output.mp4
Here, -crf 18 is an encoding choice, not a way to restore crop detail. -pix_fmt yuv420p selects a broadly compatible delivery pixel format. This basic command leaves audio handling to FFmpeg's output defaults, so specify audio settings separately when your delivery requirements demand them.
Understand how much frame you retain
The retained area is calculated as 1 / zoom², before rounding crop dimensions. These are geometric calculations, not measured sharpness scores.
Crop size and retained frame by zoom factor
| Zoom factor | Area kept |
|---|---|
| 1.5x | Approximately 44.4%, calculated as 1 ÷ 1.5² |
| 2.0x | 25%, calculated as 1 ÷ 2² |
If the subject isn't centered, change the crop position rather than adding another scale operation. The guide to cropping a video covers that distinction in more detail.
The static zoom is ready when the composition holds throughout playback, the output matches your delivery frame, and no unintended edge bars appear. Existing bars baked into the source require their own crop adjustment.
Build a Timed Push-In With zoompan
zoompan changes the sampled region across output frames. Its most important timing detail is easy to miss: d specifies how many output frames the filter generates for each input frame, not the total length of an ordinary video clip.
Use the diagram to separate the changing crop from the fixed delivery frame.
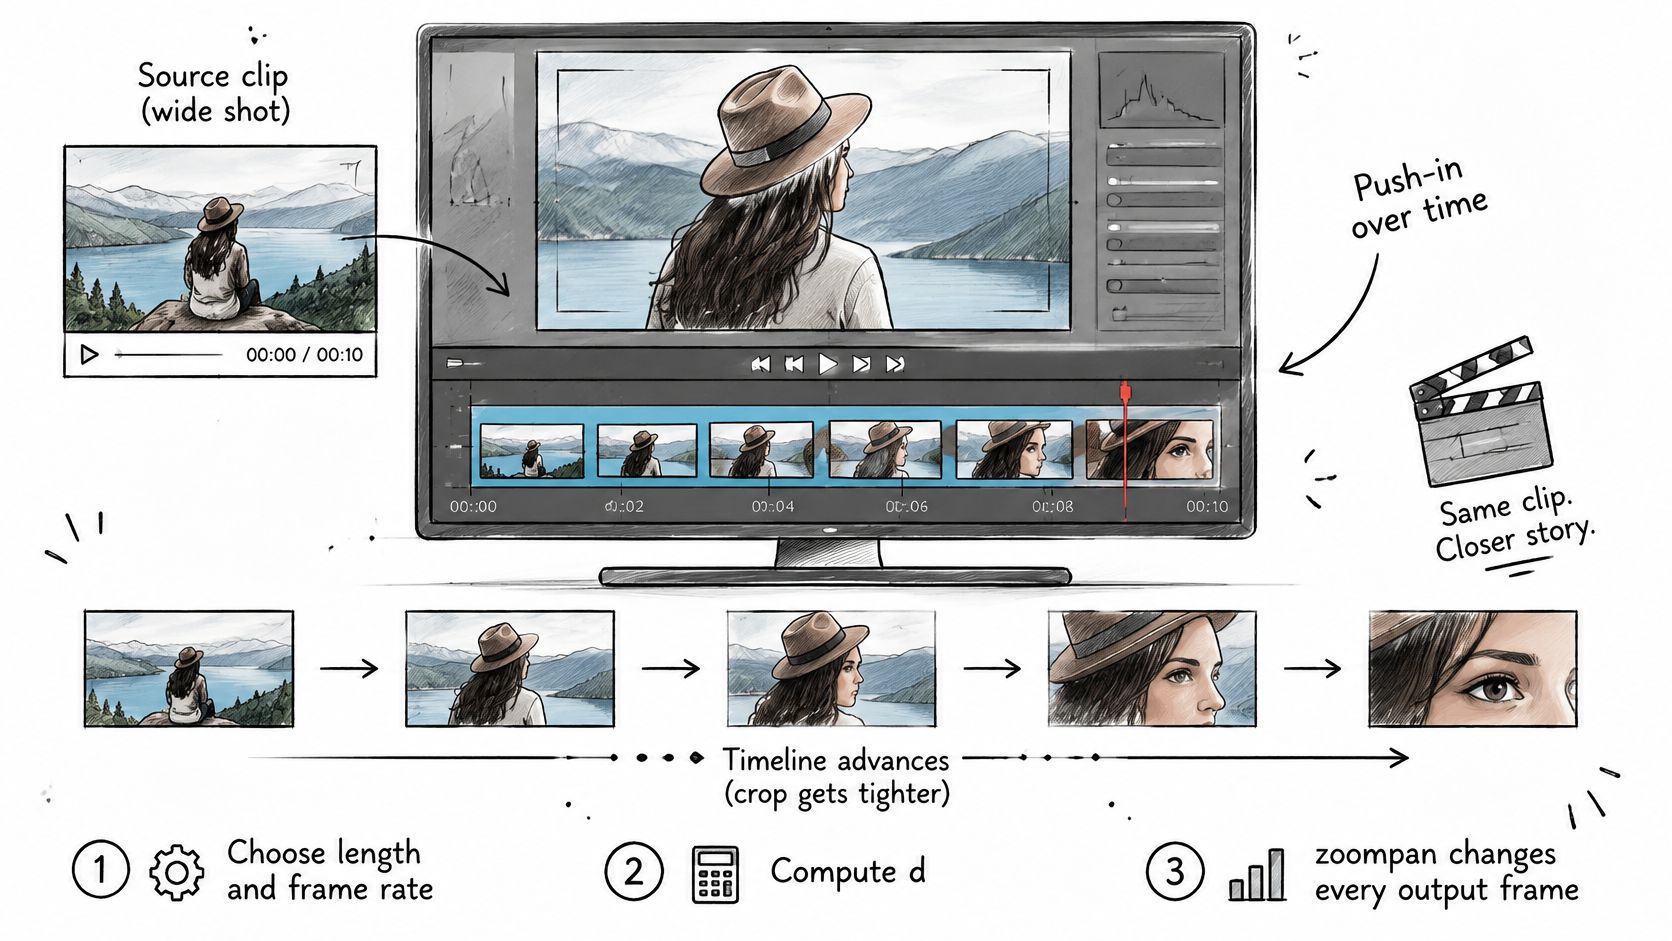
The FFmpeg zoompan documentation defines the zoom, position, duration, size, and frame-rate controls; for a worked push-in, 150 output frames at 30 fps produce five seconds, while the same frame count at 25 fps produces six seconds. Explicitly set the output rate rather than relying on the default.
Animate a held frame
For a still image, or a deliberately frozen frame from a video, use this sequence:
Choose the output duration and rate. Calculate the required frame count as duration multiplied by frame rate. A held-frame animation can generate the whole move from that single input frame.
Set the zoom expression. In this example,
min(zoom+0.0033,1.5)increases magnification gradually and caps it. The cap is a limit, not a guarantee that the final frame lands exactly on it.Keep the crop centered. Use
iw/2-(iw/zoom/2)forxand the corresponding height expression fory. For a different focal point, replace the source-center terms with the subject's coordinates and keep the resulting crop inside the image.Specify size and rate. Set
sandfpsexplicitly so your render doesn't inherit an unintended delivery format.Limit the input to the intended frame. For a frozen push-in from a video, select a single frame before applying
zoompan.
A complete frozen-frame example is:
ffmpeg -i input.mp4 -vf "select='eq(n,0)',zoompan=z='min(zoom+0.0033,1.5)':x='iw/2-(iw/zoom/2)':y='ih/2-(ih/zoom/2)':d=150:s=1920x1080:fps=30" -an -c:v libx264 -crf 18 -pix_fmt yuv420p output.mp4
This freezes the first video frame and omits audio. It isn't the correct command for preserving the source's moving action.
Preserve motion in a video clip
For moving footage, normalize the input cadence and generate a single output frame per input frame. Base magnification on the output frame counter, on, so it progresses across the clip:
ffmpeg -i input.mp4 -vf "fps=30,zoompan=z='min(1+0.5*on/149,1.5)':x='iw/2-(iw/zoom/2)':y='ih/2-(ih/zoom/2)':d=1:s=1920x1080:fps=30" -t 5 -c:v libx264 -crf 18 -pix_fmt yuv420p output.mp4
This worked example assumes the source is long enough for the requested duration. Unlike using d=150 on every video frame, it doesn't stretch each source frame into a separate held sequence.
For a visual editing reference, compare how the movement begins and settles.
Inspect the result with:
ffprobe -v error -select_streams v:0 -count_frames -show_entries stream=width,height,avg_frame_rate,nb_read_frames:format=duration -of default=noprint_wrappers=1 output.mp4
If the clip runs unexpectedly long, inspect frames generated per input frame before changing the encoder. If the subject drifts, revise the focal-point path rather than increasing magnification.
For a stylized transition rather than a literal crop, the Veo3 AI Earth zoom effect from Veo3 AI is a separate creative reference. Don't confuse that kind of effect with preserving detail in the source footage.
Quality Checks That Keep a Zoom Sharp
Digital zoom cannot recover detail the camera didn't capture. The crop removes pixels, and interpolation estimates the pixels needed for the delivery frame. An encoder can preserve that result more or less faithfully, but it can't turn an unfocused crop into a detailed close-up.
Choose your scaler deliberately. Lanczos is useful when you want crisp resizing, particularly downscaling; bilinear is faster but usually softer. Neither is the correct answer for every texture or edge.
The media-os FFmpeg filter reference reports a bicubic-versus-Lanczos upscaling comparison with PSNR of 28.70 dB versus 28.77 dB, and SSIM of 0.730 versus 0.735, respectively. That small advantage in one test doesn't establish a universal visual winner.
Inspect edges, motion, and text
Use a paused frame to locate problems, then play through the same passage. Some defects are unobtrusive when still but distracting when the crop moves.
- Ringing around edges: Look for bright or dark outlines beside lettering, glasses, and product edges. A sharper scaler or added sharpening can make these halos more visible.
- Aliasing on fine patterns: Watch fabric, railings, and diagonal lines for crawling or flickering. Judge them during the zoom, not only at its endpoints.
- Mosquito noise around detail: Inspect compressed edges and textured dark regions for moving speckles. Compare against the master to distinguish existing compression damage from export damage.
- Softened text: Read labels, slides, and screen recordings at the actual delivery size. Recognizable shapes aren't enough if viewers need to read the words.
- Unstable motion: Look for small stepping movements in a slow push. Crop-coordinate rounding can become conspicuous even when individual frames appear sharp.
A smaller crop from a clean master is usually a better repair than aggressive sharpening applied to an already enlarged export.
Separate resolution limits from encoding problems
A source with more usable pixels gives you more room to reframe, but nominal resolution alone isn't a quality guarantee. Poor focus, motion blur, noise reduction, and heavy compression can leave a large frame with little useful detail.
Compare the same moment in the master and export. If the master is clear but the export shows blocks or smearing, investigate encoding settings. If the crop itself lacks detail before encoding, reduce the magnification or choose another shot.
For a broader diagnosis, the guide to improving video quality helps distinguish source problems from processing problems.
Also check filter geometry when a render fails rather than merely looks soft. Keep crop positions within the source, and use even dimensions and aligned coordinates for chroma-subsampled output. A valid command that completes successfully still needs a visual check, especially on hair, thin type, and moving hands.
Social Crops for TikTok, Reels and Shorts
A vertical export can require substantial enlargement before you add any animated zoom. A wide composition may contain ample headroom yet offer very little horizontal room around the speaker once you isolate a portrait-shaped slice.
For this worked example, assume a square-pixel 1920x1080 master. The following dimensions are calculated from that hypothetical source and the chosen delivery frames, not platform upload limits.
Social output sizes and crop limits
| Target format | Output size | Crop from 1920x1080 | Upscale needed |
|---|---|---|---|
| Widescreen 16:9 | 1920 x 1080 | Full frame | None |
| Square 1:1 | 1080 x 1080 | 1080 x 1080 | None |
| Vertical 9:16 for TikTok, Reels and Shorts | 1080 x 1920 | 608 x 1080, rounded to even width | Approximately 1.78x in each dimension |
The vertical crop's mathematically exact width falls between whole pixels, so the even-width version is an approximation. The final scale makes the delivery frame exact, with a negligible aspect adjustment.
Build the vertical preset
- Position the subject. In the example, a centered crop starts at
x=(1920-608)/2, giving656. Replace that coordinate when the speaker or product sits off-center. - Resize directly to the vertical output. Use Lanczos for this preset, then inspect the result rather than assuming the filter name guarantees sufficient clarity.
- Encode the delivery file. Keep the original master available for other formats instead of creating them from this portrait export.
ffmpeg -i input.mp4 -vf "crop=608:1080:656:0,scale=1080:1920:flags=lanczos" -c:v libx264 -crf 18 -pix_fmt yuv420p vertical.mp4
If the subject walks outside that narrow slice, a fixed preset won't work. Animate the horizontal position, split the shot into separately framed segments, or use a layout that retains more of the original image.
The video aspect ratio guide helps separate a change of frame shape from a change of resolution.
Place captions after reframing
Captions are part of the composition, not an export accessory. An XR Global caption survey reported that 87% of Americans use captions at least sometimes, while 42% prefer them even when audio is perfect.
- Reserve space: Keep the face, relevant gestures, and essential product details clear of the caption region.
- Reflow after cropping: Regenerate line breaks for the final frame instead of enlarging wide captions with the footage.
- Check overlays: Preview with the destination's interface visible where possible. Don't assume one margin works across every platform.
- Test on a phone: Read the captions at normal viewing size and watch for text covering expressions or demonstrations.
For interview teams, podcast distribution strategies from Podmuse provide context for planning repurposed clips alongside the full episode.
We can resize videos for TikTok, batch process video variations, and convert any format with RenderIO. Supply a focal point and caption layout for each variation so automation preserves the editorial decisions rather than merely producing files of the right size.
Decide Between Local FFmpeg and an API
Run locally when the work needs hands-on judgment. Use an API when the same approved decisions must run repeatedly. Moving a command to a server doesn't improve the framing by itself; it makes a defined transformation repeatable.
Local FFmpeg is a good fit when you control the machine, have a manageable set of files, and expect to adjust individual shots. You can scrub the source, revise the crop, and inspect a new render without building an orchestration layer.
Choose by workflow, not by filter
| Use local FFmpeg when | Choose an API workflow when |
|---|---|
| Each shot needs manual composition | Approved crop rules must run automatically |
| Files already live on your workstation | Incoming assets trigger processing jobs |
| You're still testing zoom expressions | Multiple destinations need repeatable variants |
| You can supervise failures directly | A system must record failures and retry safely |
For automation, keep editorial inputs separate from command syntax. Store the focal point, target shape, zoom path, and caption region as job inputs. Have your script validate them against the source dimensions before constructing the filter graph.
The processing sequence should be explicit: inspect the source, calculate the crop, submit the command, collect completion status, and validate the output. Use polling or a completion callback according to the service's documented options, rather than assuming that submitting a job means the file is ready.
Deployment check: Save the command, source metadata, and full FFmpeg error output together. A failed job is much easier to reproduce when those records stay attached.
Confirm the current endpoint, authentication requirements, input-file handling, and callback options in our documentation before building the integration. Keep API keys out of client-side code and shared command logs.
To start with RenderIO, sign up, generate an API key, and run an actual FFmpeg command against the API. Compare the result with your local render using the same source and settings. Only expand to a batch after the framing, duration, captions, and audio all match your intended output.
RenderIO runs FFmpeg commands through an API and offers a native FFmpeg + Zapier integration for triggering commands from workflows. Visit RenderIO, generate an API key, and test a real crop or push-in command before automating your next set of video variations.