You've got a long recording, a list of clips to deliver, and a file that plays perfectly before you touch it. After splitting, one part starts late, another opens on a frozen frame, and the captions still use timestamps from the original recording.
Learning how to split videos means choosing which properties must survive the cut. Picture quality matters, but so do independent playback, audio sync, subtitle timing, and the shape of the final frame. The fastest command is useful only if its outputs still work where you're sending them.
Table of Contents
- Choose the Right Method for Your Video
- Split Into Fixed Segments Without Re-encoding
- Trim One Clip Between Two Timestamps
- Batch Split a Folder of Videos
- Split at Scene Changes, Silences or Transcript Lines
- Keep Captions, Audio and Aspect Ratios Intact
- Common Split Problems and How to Fix Them
- Run Your First Split on a Test Clip
Choose the Right Method for Your Video
The delivery requirement picks the method, and export speed comes second. An archive chunk can tolerate a nearby keyframe boundary. A spoken excerpt that starts on a specific word usually can't, so decide what the cut must guarantee before you pick a command.
Splitting methods by situation
| Situation | Method | Re-encodes? | Cut accuracy |
|---|---|---|---|
| Same codec, fixed intervals, bulk archive | FFmpeg segment muxer with stream copy | No | Starts on keyframes |
| Quick clip from a long file, keyframe cut acceptable | FFmpeg stream-copy trim | No | Uses an existing seek keyframe, often before the requested start |
| Frame-exact cut at any timestamp | FFmpeg trim with re-encoding | Yes | Frame-accurate within the source frame grid |
| One-off clip, no command line | Desktop or browser video editor | Yes on normal export; no with supported lossless cutting | Timeline precision on export; keyframe-limited for lossless cutting |
| Many files, no local FFmpeg | RenderIO API running FFmpeg commands | Set per command | Same as the FFmpeg command sent |
Use segment muxing for repeated intervals and stream-copy trimming for a single rough excerpt. Both preserve the encoded media instead of compressing it again, and both inherit the source's keyframe positions as the only boundaries where copied video can start cleanly. That inherited boundary is also the catch: a stream-copy trim can open earlier than you asked, with lead-in frames the viewer was never meant to see.
Re-encode when the exact frame matters and you accept the quality and time cost. Choose an editor when reviewing the timeline manually is easier than writing commands, or route the same commands through an API when files already move through an automated workflow. RenderIO runs FFmpeg commands on submitted inputs and returns the processed outputs.
Delivery requirements can override an otherwise sensible choice. Apple's HLS authoring specification specifies nominal six-second media segments, which makes segment timing part of the output contract rather than an editing preference.
For editorial guidance beyond file mechanics, Taja AI's guide to turn long recordings into social clips offers a useful companion perspective on deciding which moments are worth extracting at all.
Choose before cutting: Check whether codecs and frame rates match across sources, whether boundaries must be frame-exact, and whether you'll run the job once or repeatedly.
Split Into Fixed Segments Without Re-encoding
Start with a probe, not a split command. The existing keyframe layout determines where independently playable copied video segments can begin, and the source's timestamps determine whether those segments behave sensibly.
The FFmpeg segment-muxer guide explains the central constraint: accurate segmentation requires keyframes aligned with the intended split times. Stream copy preserves encoded quality, not arbitrary cut accuracy.
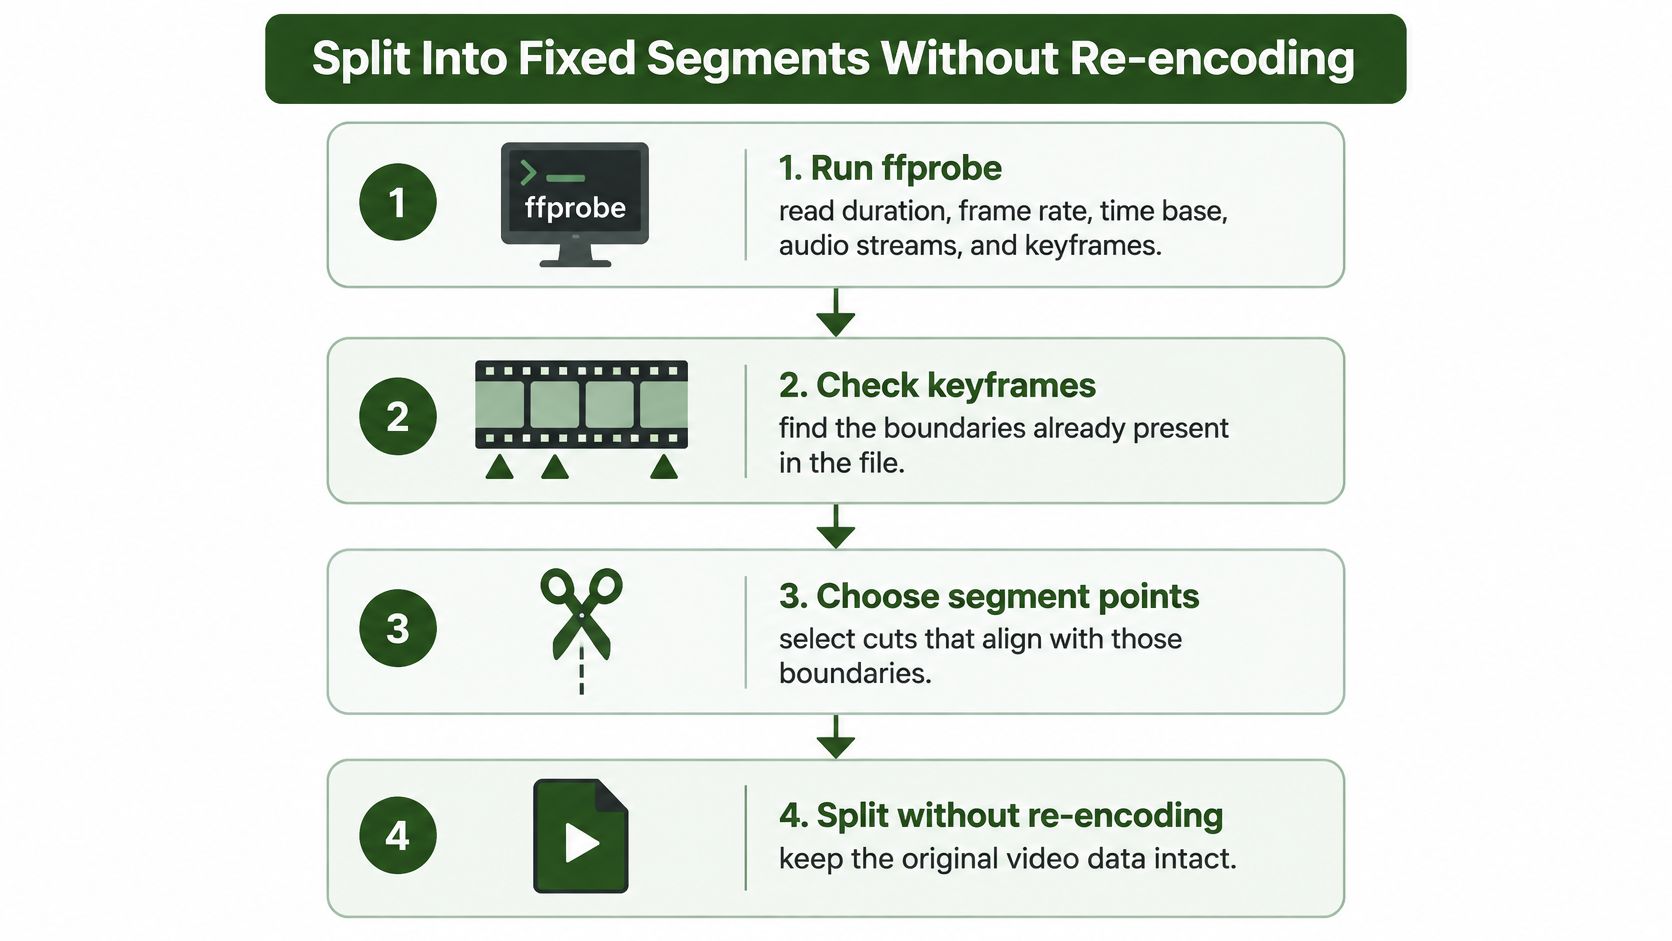
Inspect the source and its boundaries
Read the container and stream metadata. Run
ffprobe -v error -show_format -show_streams -of json input.mp4. Inspect duration, codec names,time_base,start_time, audio tracks, and bothr_frame_rateandavg_frame_rate. Don't treat a mismatch between those frame-rate fields as definitive proof of variable frame rate, but investigate it before bulk processing.List candidate keyframes. Run
ffprobe -v error -select_streams v:0 -skip_frame nokey -show_frames -show_entries frame=best_effort_timestamp_time -of csv=p=0 input.mp4. Compare those timestamps with your intended boundaries. A long GOP, the group of pictures between keyframes, leaves fewer usable starting points.Check stream compatibility. Identify subtitle, data, and alternate audio streams before choosing MP4 outputs. Mapping a stream doesn't make its codec compatible with the destination container. If you need every source stream, choose a container that can hold them.
Split and verify the results
Run the segment muxer. Use
ffmpeg -i input.mp4 -map 0 -c copy -f segment -segment_time 10 -reset_timestamps 1 output_%03d.mp4. Here, the segment duration is a requested target, not a guarantee. The numbered output pattern gives each piece a separate filename.Preserve streams and usable timestamps.
-map 0explicitly selects all input streams; without explicit mapping, FFmpeg's automatic selection can omit alternate tracks.-reset_timestamps 1brings each segment's timestamps near zero, which helps standalone playback. Neither flag repairs broken source timestamps.Probe and decode every output. Inspect each part with
ffprobe -v error -show_format -show_streams output_000.mp4. Then runffmpeg -v error -i output_000.mp4 -f null -to test decoding. A successful metadata probe alone doesn't prove every packet decodes cleanly.
Pay attention to audio and video start times, not just the container duration. Some differences come from codec priming or presentation metadata, so confirm suspected sync problems by listening and watching rather than forcing every reported timestamp to match numerically.
Reject segments whose actual boundaries exceed your delivery tolerance. Re-encode those jobs instead of repeatedly adjusting the same stream-copy command and expecting new keyframes to appear.
A healthy run produces files that decode, retain the intended streams, and play in sync. Boundary deviations should be explainable by the keyframe map, with a shorter final remainder expected.
Trim One Clip Between Two Timestamps
Use a trim when you need an excerpt rather than a complete set of parts. The important command-line distinction is source position versus output duration.
Say you want the passage from 00:01:30 to 00:02:10. For a fast stream-copy attempt, use:
ffmpeg -ss 00:01:30 -i input.mp4 -t 00:00:40 -map 0 -c copy clip.mp4
Placing -ss before the input enables input seeking. With stream copy, material from an earlier seek point can remain, and container edit lists or player behavior can affect the visible opening. Inspect the first frame and first spoken word before delivering it.
Use
-tfor the clip's duration when seeking before the input. Don't assume an output-side-tostill represents the original file's absolute end timestamp.
When the exact opening matters
For a decoded, frame-accurate video trim, use:
ffmpeg -i input.mp4 -ss 00:01:30 -t 00:00:40 -map 0:v:0 -map 0:a? -c:v libx264 -crf 18 -preset medium -c:a aac -b:a 192k clip.mp4
These are example encoding settings, not universal delivery requirements. The command selects the main video and available audio, while deliberately leaving subtitle handling separate. Re-encoding costs processing time and introduces another compression generation, but it lets you start on a decoded frame rather than an existing seek boundary.
For a manual job, DaVinci Resolve, Adobe Premiere Pro, or a browser editor can serve the same purpose:
- Set the range: Mark in and out points while listening to the sentence.
- Control the export: Keep the intended frame rate and use a codec accepted downstream.
- Review the edges: Play the opening and ending, rather than checking only the middle.
Transcript timestamps can supply candidate positions, but confirm their offset against the actual media before using them as edit decisions.
Batch Split a Folder of Videos
Run this Bash loop from the folder containing your MP4 sources:
for f in ./*.mp4; do [ -f "$f" ] || continue; name="${f##*/}"; out="split/${name%.mp4}"; mkdir -p "$out"; ffmpeg -n -i "$f" -map 0 -c copy -f segment -segment_time 60 -reset_timestamps 1 "$out/part_%03d.mp4" || break; done
Quote every path. Recording names commonly contain spaces, and an unquoted variable can turn a valid filename into several unrelated shell arguments. The file check also prevents an unmatched wildcard from becoming a fake input.
Keep outputs traceable
Each source gets its own directory under split, so output names don't collide across recordings. The example segment duration is a workflow choice; replace it with your target. -n refuses to overwrite existing outputs, while || break stops the loop when FFmpeg reports a failure.
- Separate reruns: Use a clean output directory when changing settings, or old parts can remain beside new ones.
- Retain logs: Save stderr per source so you can distinguish a container failure from a damaged input.
- Record actual boundaries: Add
-segment_listwith a per-source CSV path if downstream systems need a manifest. - Inspect mixed sources: Group phone recordings, screen captures, and edited exports by their timing characteristics before applying one processing policy.
Variable-frame-rate footage deserves special attention. Don't convert every source reflexively, but normalize timing when your downstream editor or delivery contract requires constant frame rate. That conversion requires re-encoding; -c copy can't change the frame cadence.
Move the same work into remote jobs
Our submission process uses a POST request containing the FFmpeg command and input and output file mappings. Commands reference mapped files using placeholders such as {{source}} and {{clip}}, or angle-bracket aliases.
A concrete single-output command is ffmpeg -ss 00:01:30 -i {{source}} -t 00:00:40 -c copy {{clip}}. Associate source with the input file reference and clip with the output file reference. The parallel request structure uses a commands array whose entries contain ffmpeg_command, input_files, and output_files; follow the batch-processing guide for the complete request structure.
Don't assume a numbered local output pattern automatically registers every generated file with a remote job. Define the required outputs explicitly, or submit independent trim jobs when that better matches your output mappings.
For a hypothetical folder of forty recordings lasting about three minutes each, minute-long targets suggest roughly a hundred and twenty parts. Treat that as a planning estimate, not an acceptance test: remainders and keyframe placement can change the result.
Split at Scene Changes, Silences or Transcript Lines
A talking-head interview can survive a rough picture cut better than a broken answer. Say a fixed-duration boundary lands while the guest is explaining the qualification that makes the previous sentence accurate. The resulting excerpt may play cleanly while communicating the wrong thing.
A pause-based cut could preserve the sentence. A transcript-based cut could preserve the question, answer, and conclusion, even if that makes neighboring clips unequal in length.
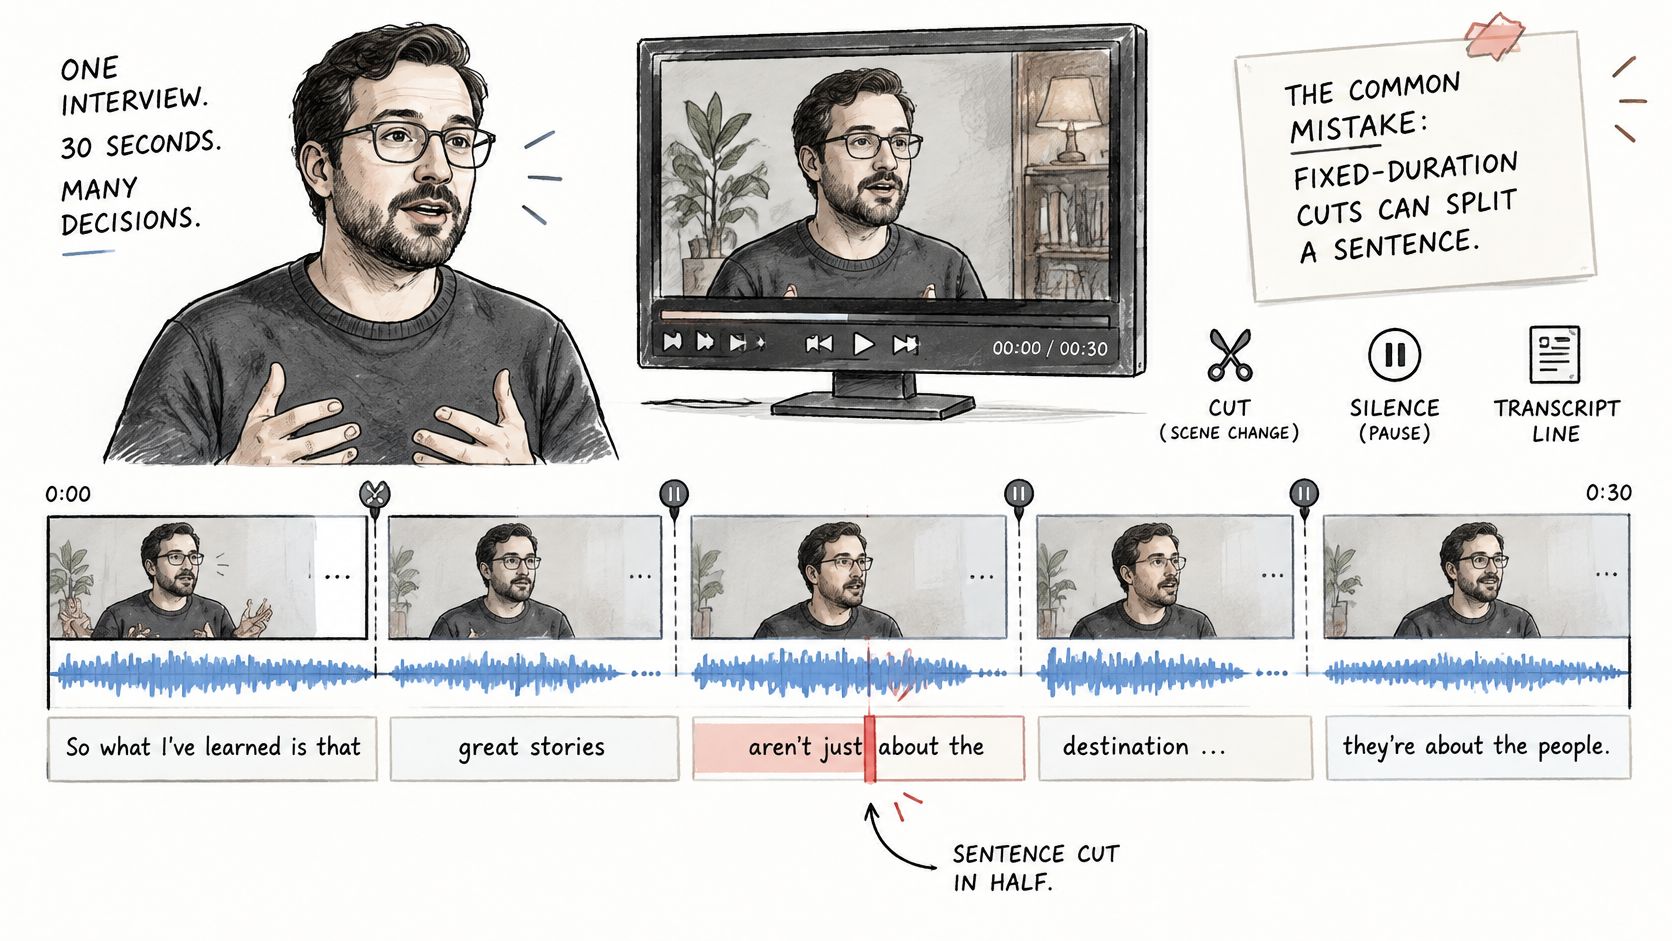
Boundary methods and their failure cases
| Boundary method | Strength | Failure case |
|---|---|---|
| Fixed duration | Predictable clip lengths | Cuts mid-sentence |
| Shot-change detection | Splits at real visual cuts | A long static shot can hide several topics |
| Silence detection | Cuts between sentences in talking-head video | A pause mid-sentence triggers a false cut |
| Transcript-based | Keeps setup, answer, and conclusion together | Inaccurate captions produce bad boundaries |
| Hybrid rules | Combines the strengths of the above | More rules to test and tune |
An EMNLP industry paper on automatic clipping treats the task as multimodal, incorporating scene segmentation, dialogue matching, narrative analysis, and highlight selection rather than timestamp cutting alone. That distinction matters when you're selecting publishable excerpts instead of dividing storage objects.
Build an editorial boundary pipeline
Extract audio or reuse a reliable caption track, then transcribe with timestamps. Identify sentence endings, pauses, speaker transitions, and topic changes as candidate boundaries, not automatic commands.
- Keep the setup: Include the question or premise when the answer can't stand alone.
- Protect the conclusion: Don't stop before a qualification, correction, or final recommendation.
- Resolve timing: Compare transcript positions with the media timeline and select a supported video frame.
- Validate the excerpt: Check duration, audio continuity, the opening image, and whether the clip makes sense without its neighbors.
Silence detection works poorly when music continues under speech or a speaker pauses for emphasis. Shot detection can overreact to camera switching while missing topic changes in an uninterrupted shot.
The best editorial split isn't necessarily the most visible cut. Preserve a complete thought before optimizing for equal clip lengths.
Use hybrid rules to propose clips, then reserve review for ambiguous boundaries rather than pretending a single detector understands the whole recording.
Keep Captions, Audio and Aspect Ratios Intact
A clip can decode perfectly and still fail after publication: the crop removes the speaker, interface controls cover the subtitles, or the opening caption belongs to the previous sentence. Splitting and reframing need one delivery plan.
Caption handling isn't a minor finishing task. Coverage of Wistia's video report by CMS Critic reports that caption use increased 572% since 2021.
Treat these as common output layouts, not universal platform mandates:
| Destination layout | Typical frame shape | Caption placement priority |
|---|---|---|
| Vertical short-form feed | Portrait, commonly 9:16 | Keep text clear of top and bottom interface overlays |
| Landscape web player | Widescreen, commonly 16:9 | Leave lower-frame margins and check player controls |
| Square feed post | Square, 1:1 | Keep text inside the crop with margin on every side |
Validate the delivered presentation
- Resolve subtitle boundaries: Move the cut where practical, or split and retime a cue that crosses it. Subtract the clip's actual source start from retained cue times.
- Preserve accessibility: Carry over compatible timed text or regenerate it. The caption-format guide helps distinguish editable captions from text already burned into the picture.
- Leave handles: Retain a little breathing room around speech when the destination allows it, rather than clipping consonants or breaths.
- Match loudness deliberately: Use an appropriate loudness workflow, such as FFmpeg's
loudnorm, instead of independently peak-normalizing every excerpt. - Render crops separately: Check the speaker, demonstrations, graphics, and captions in each layout.
Burned-in captions can't be recovered by copying a subtitle stream. If the crop removes them, you'll need a different crop or a clean source and a new text render.
Review the actual platform preview when possible. Safe placement depends on the destination's interface, not just whether the text fits inside the encoded frame.
Common Split Problems and How to Fix Them
A segment starts noticeably later than requested. Before changing seek flags at random, compare its source start with the next usable keyframe: the segmenter may have reached the first boundary available to it.
The correct repair depends on whether you have a boundary problem, timestamp problem, stream-selection problem, or container problem. They can look similar in a player but require different changes.
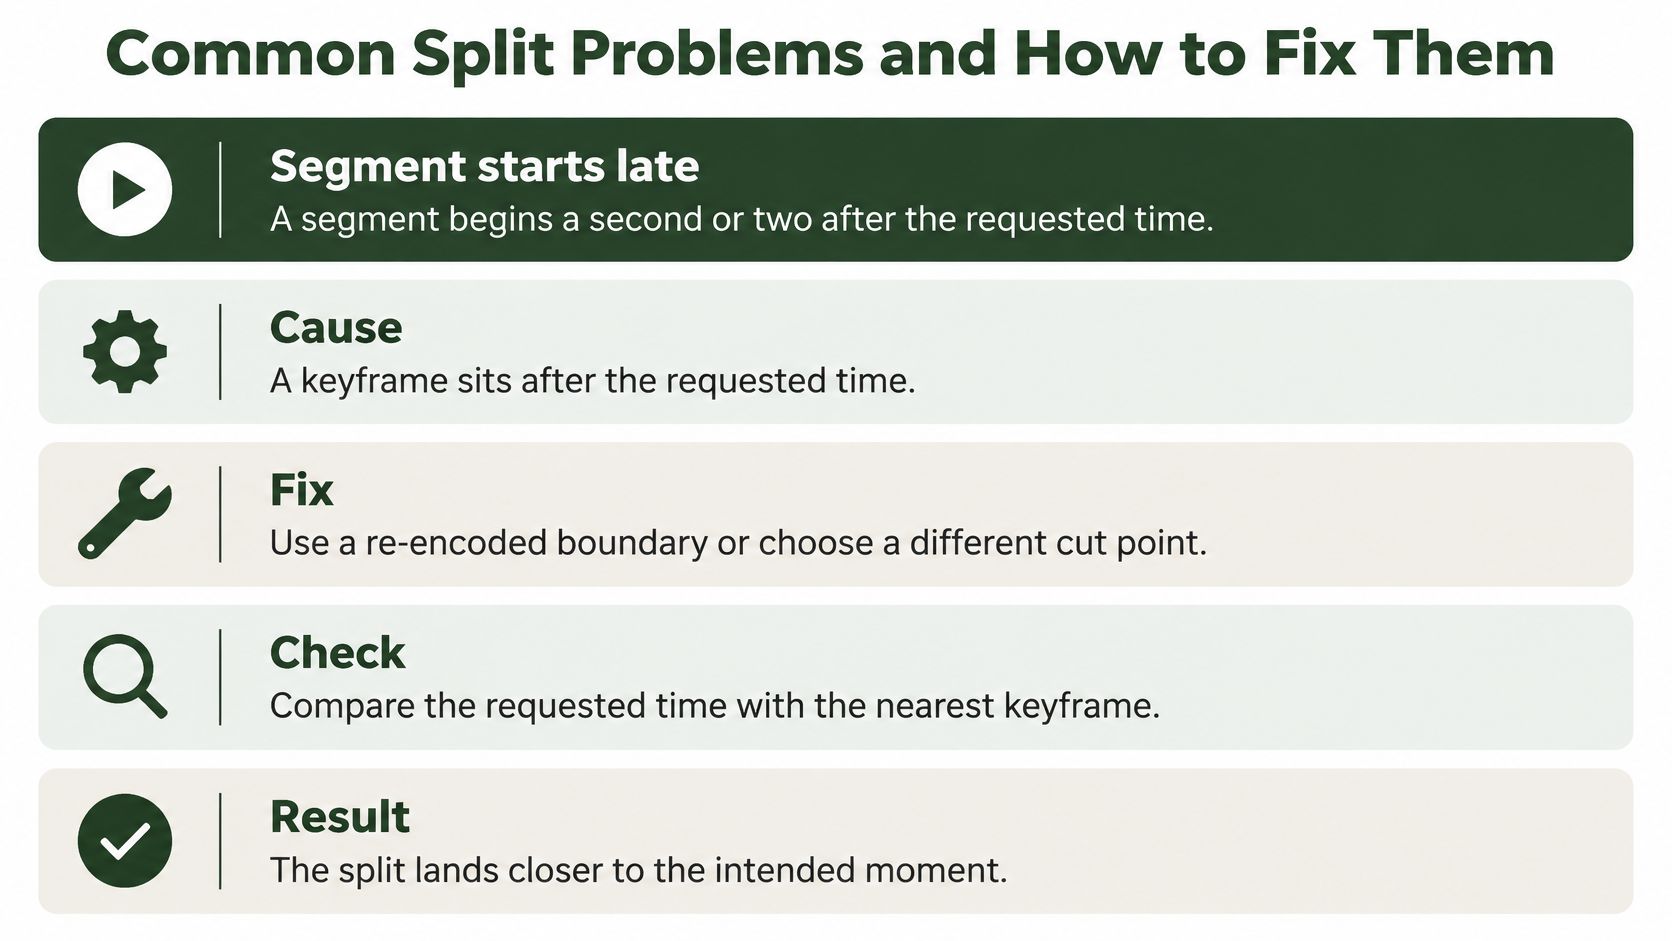
Split symptoms, causes and fixes
| Symptom | Likely cause | Fix |
|---|---|---|
| Segment starts late | Keyframe sits after the requested time | Re-encode with -force_key_frames aligned to target boundaries, or choose another cut |
| First frame freezes or stutters | Retained timestamps or an unsuitable opening | Rerun with -reset_timestamps 1, then inspect decoding if it persists |
| Audio drifts out of sync | Different start offsets or broken timing | Check start_time with ffprobe; correct a measured offset with atrim, asetpts, or -itsoffset |
| Output has no audio | Audio stream wasn't selected | Add -map 0, provided every mapped stream fits the output container |
| Segments have uneven lengths | Long GOP or variable frame rate | Re-encode with an appropriate fps filter and aligned keyframes |
| Copy fails with a container error | Codecs don't fit the output container | Use compatible codecs such as -c:v libx264 -c:a aac, or change the container |
Repair the cause, not just the symptom
A constant audio offset isn't the same as progressive drift. Trimming or shifting a track can fix a constant displacement, but growing desynchronization requires investigating timestamps, sample timing, or source damage. Don't apply independent PTS-STARTPTS resets blindly, because they can erase an intentional relationship between tracks.
Likewise, constant-frame-rate conversion alone doesn't guarantee equal segments. The encoder must also put keyframes where the segmenter needs them; use -force_key_frames with the intended boundary schedule.
Mapping and timestamp-policy mistakes usually need only a rerun. A long GOP requires new encoded keyframes, while a container mismatch may need nothing more than a different output extension and muxer. Re-export from the original editing project when that gives you a cleaner source, but don't assume every packaging failure requires rebuilding the video.
Run Your First Split on a Test Clip
A single test clip reveals more than a hundred batch runs against the wrong file. Pick a representative recording from your own library, ideally one carrying the audio tracks, captions, and timing behavior your production jobs will encounter. Probe it with ffprobe, check where its keyframes fall, and run the stream-copy segment command before submitting a whole folder.
Decide what passing means before looking at the results. A loose archive boundary and a precisely timed spoken excerpt should not share the same acceptance criteria, so write the tolerance down first.
- Playback passes: Every output opens and decodes without unexpected errors.
- Timing passes: Boundary differences fit your tolerance and agree with the source's keyframe spacing.
- Sound passes: Speech remains synchronized at the beginning and end.
- Completeness passes: Required tracks survive, and caption timing matches the local clip.
- Presentation passes: Each crop keeps the intended subject and text visible.
If the outputs pass, expand the batch gradually and keep per-source logs so a single bad input stays traceable instead of hiding inside aggregate output. If the cut misses your tolerance, switch that job to re-encoded trimming rather than weakening the requirement to accommodate stream copy.
Teams without local FFmpeg can submit the same tested commands through the RenderIO API, which downloads your inputs, runs FFmpeg in an isolated container, and returns the outputs. Moving a known command from self-hosted execution is mostly mechanical, but its file mappings still need testing against a real clip.
RenderIO runs FFmpeg commands through an API, letting you automate splitting alongside resizing, transcoding, thumbnail generation, and other media operations. Visit RenderIO, generate an API key, and test your actual split command with a representative recording before connecting the rest of your library.