You've trimmed a clip to the exact three seconds that matter. Then the converter hands back a huge, washed out GIF with flickering skin tones, and the chat app, doc page, or ticket you wanted to drop it into rejects it or renders it badly. That failure usually isn't about the export button. It's about settings chosen after the fact.
Learning how to make a GIF from a video means treating GIF as a compromise. Frame rate, width, length, and color control decide file size, banding, and whether the loop is safe to publish. Get those decisions right first, and FFmpeg's two-pass palette workflow will do the rest reliably.
Table of Contents
- Choose Frame Rate, Width and Length Before You Convert
- How to Run the Two-Pass FFmpeg Conversion
- Shrinking a GIF That Comes Out Too Large
- Diagnosing Banding, Color Shifts and Halos
- Checking Flashing and Motion Safety Before Publishing
- Choosing GIF or Video and Exporting at Scale
Choose Frame Rate, Width and Length Before You Convert
Don't start by asking which converter to use. Start with the row that matches your clip, then adjust one variable at a time.
| Clip type | Frame rate | Width | Max length |
|---|---|---|---|
| Screen recording or UI demo | 8-10 fps | 480 px | 5 seconds |
| Talking head or simple motion | 8 fps | 320-400 px | 3-4 seconds |
| Gesture or fast transition | 12-15 fps | 480 px | 3 seconds |
| Product shot with slow pan | 10 fps | 480 px | 4-5 seconds |
Why These Defaults Work
The constraint is old and fixed. Created by CompuServe and publicly released on June 15, 1987, GIF uses indexed color, and the GIF format history and specification describes the limit as up to 8 bits per pixel and a maximum of 256 colors selected from the broader 24-bit RGB color space. Your video frame may contain millions of possible colors, so conversion has to reduce it to that palette. Smooth gradients, shadows, and skin tones may show banding or dithering.
That's why shortening, narrowing, and sampling fewer frames usually matter more than any later compression step. 30 fps is rarely worth it for ordinary footage. It adds frames your eye barely reads in a tiny loop and inflates the file. If you need help reasoning about sampling before conversion, use this guide on converting video frame rates without judder and then choose the lowest rate that still reads clearly.
Practical rule: If motion looks choppy, add 2 fps. If the file is too big, shorten the clip before you touch anything else.
Set width only and let height follow, as in scale=480:-1, so the subject isn't stretched. The same aspect ratio discipline applies everywhere you publish, whether you're sizing a looping clip or checking optimal YouTube thumbnail dimensions for a still frame. A clip that looks sharp as video can still band badly as a GIF. These caps keep the palette focused on fewer pixels, fewer frames, and less change.
How to Run the Two-Pass FFmpeg Conversion
Before step one, run ffmpeg -version in your terminal to confirm FFmpeg is installed. Put input.mp4 in the folder where you'll run the commands, so every path resolves without edits.
The visual below summarises the sequence before you run it in full.
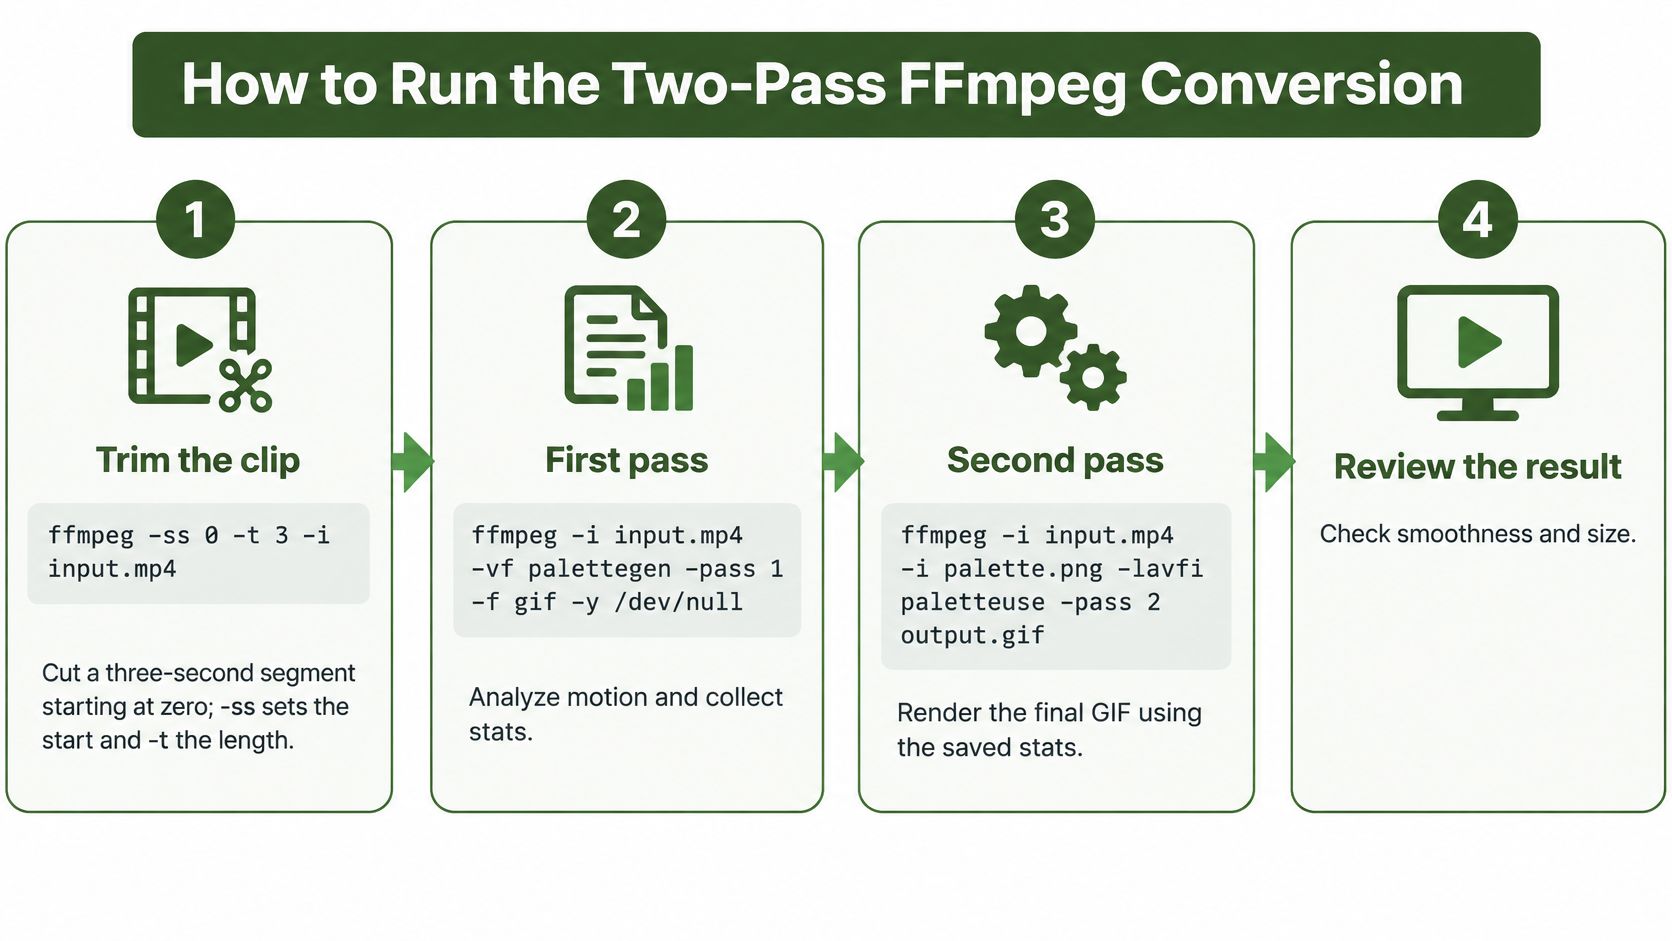
The Five Steps
Trim the clip. Run
ffmpeg -ss 0 -t 3 -i input.mp4as the basis for both passes. -ss sets the start point and -t sets the length, so this example takes three seconds starting at zero. Trimming first is the cheapest way to cut size because no palette trick can recover frames you never needed.Generate a global palette. Run
ffmpeg -ss 0 -t 3 -i input.mp4 -vf "fps=10,scale=480:-1:flags=lanczos,palettegen" palette.png. This builds one shared palette from the exact filtered frames you'll encode, which keeps colors stable across the loop. ImageMagick's video and animation documentation likewise treats global color reduction and frame optimization as central GIF techniques.Render with that palette. Run
ffmpeg -ss 0 -t 3 -i input.mp4 -i palette.png -filter_complex "[0:v]fps=10,scale=480:-1:flags=lanczos[x];[x][1:v]paletteuse=dither=sierra2_4a" output.gif. Keep fps and scale identical to step two, otherwise the palette describes different pixels than the ones you're encoding. Lanczos preserves edge detail, while sierra2_4a dithering trades a little spatial noise for smoother gradients.Check the result in a browser. Open output.gif, watch the loop point several times, and compare the file size with your target for the destination. Don't judge it only in a desktop preview, because browsers and embed contexts expose flicker and awkward loops more clearly.
Adjust one variable at a time. Change dither before frame rate, then rerun only the second pass. You can reuse palette.png while the trim, fps, and scale stay the same. If you change any of those inputs, regenerate the palette.
What a Good Result Looks Like
You're looking for smooth skin tones, no color pumping between frames, and text that stays crisp. If high contrast overlays ring or shimmer, test bicubic scaling against Lanczos for that source. If gradients step visibly, try a different dither setting before you raise the frame rate.
I would keep the palette file beside the source while you iterate. It makes comparisons honest. Each rerun then tests one decision, not a new set of colors plus a new scaling choice. That discipline is the difference between a repeatable workflow for how to make a GIF from a video and a folder full of near identical exports you can't explain.
If the palette pass and the render pass don't use the same filters, you don't have a color problem. You have a mismatched workflow.
Shrinking a GIF That Comes Out Too Large
There's no meaningful GIF quality slider hiding in FFmpeg. Size is governed by duration, frame rate, dimensions, and how much of each frame changes, and this FFmpeg GIF conversion and optimization guide gives a practical starting benchmark of 8 to 12 frames per second and 320 to 480 pixels wide for short social or documentation clips. Pull the levers in order.
Pull the Biggest Lever First
- Shorten duration first: Tighten -ss and -t before anything else. Each second contains a full set of frames, so removing a second usually saves more than a small width reduction. If you're cutting longer streams into moments, a guide to repurposing Twitch highlights is useful context for picking a tight moment before you encode.
- Reduce width second: Move from 480 px to 360 px, then to 320 px for small embeds, using scale=360:-1 to preserve aspect ratio. Regenerate the palette after changing scale.
- Lower frame rate third: Step from 15 to 10, then 8 fps for simple motion. Watch hands, cursor moves, and transitions after each change, because that's where lost frames show first.
This order protects perceived quality. A shorter, slightly narrower GIF usually looks better than a long one mangled by aggressive dithering. For the broader trade offs in source compression, see these FFmpeg video compression settings and trade offs.
Remove Change the Encoder Can't Reuse
Camera grain and noisy dithering defeat frame differencing. If nearly every pixel changes, the encoder can't store only the changed regions, even when the scene looks static to you. A light hqdn3d denoise before the palette pass can help on noisy footage, but don't overdo it or faces turn waxy.
Lower dither strength if flat areas look speckled. Transparency and frame disposal optimisation help only when the background remains completely still. A locked off screen recording benefits, while handheld footage with constant micro movement usually doesn't.
If the GIF still won't fit after duration, width, and frame rate cuts, stop squeezing it. At that point the honest fix is a shorter moment or a different format. Continuing to crush palette and dither settings mostly produces a smaller file that no longer shows what you needed it to show.
Diagnosing Banding, Color Shifts and Halos
Banding is the complaint you'll meet first, usually in skies, shadows, gradients, and skin. Steps appear where the video had a smooth ramp because the palette is too general for the frames or because each frame was quantized separately. Separate quantization also causes color pumping, where a cheek, wall, or shirt changes hue from frame to frame even though the source doesn't.
| Symptom | Likely cause | Fix |
|---|---|---|
| Banding on skies, shadows or skin | Palette too general for the frame | Generate a palette from the same filtered frames and use stats_mode=diff for moving scenes |
| Colors shift between frames | Each frame quantized separately | Use one global palette in the palettegen and paletteuse passes |
| Halo around white text or UI | Lanczos ringing on high-contrast edges | Compare with bicubic scaling and keep the better result |
| Speckled noise on a static background | Strong dithering on flat areas | Lower the dither strength or switch the dither mode |
Match the Fix to the Cost
Dither changes are cheap. You can usually rerun only the second pass and compare results quickly. A new palette, a new scaler, new fps, or a new scale means a full re-encode from palette generation onward, because the filtered pixels have changed.
palettegen=stats_mode=diff can help moving scenes by emphasising colors that change between frames. It's worth testing on pans, gestures, and gameplay. On a mostly static UI recording, the default palette statistics may be steadier, so compare rather than assuming.
Read the Symptom Correctly
- Banding with stable colors: The palette is shared, but it lacks enough intermediate shades for that gradient. Try stats_mode=diff or a different dither mode.
- Banding plus flicker: Frames are probably being quantized independently, or the palette came from different filtered frames. Rebuild the palette from the exact render chain.
- Crisp footage with ugly text: Suspect the scaler, not the palette. Lanczos sharpens edges but can ring around white text, cursors, and UI overlays.
- Noise everywhere: Suspect dither or source grain. Reduce dither first, then consider gentle denoise before palette generation.
Don't fix halos by adding frames, and don't fix color pumping by shrinking the GIF. Those moves change size without touching the cause. A shared palette generated from the same filtered frames fixes most color problems in one clean pass.
Checking Flashing and Motion Safety Before Publishing
A GIF plays automatically, loops without asking, and normally gives the viewer no pause button. That makes it riskier than a video player for people sensitive to motion or flashing. The check below takes minutes and should happen before the file goes on a page, in docs, or inside a product.
This checklist shows the checks to run before you publish.
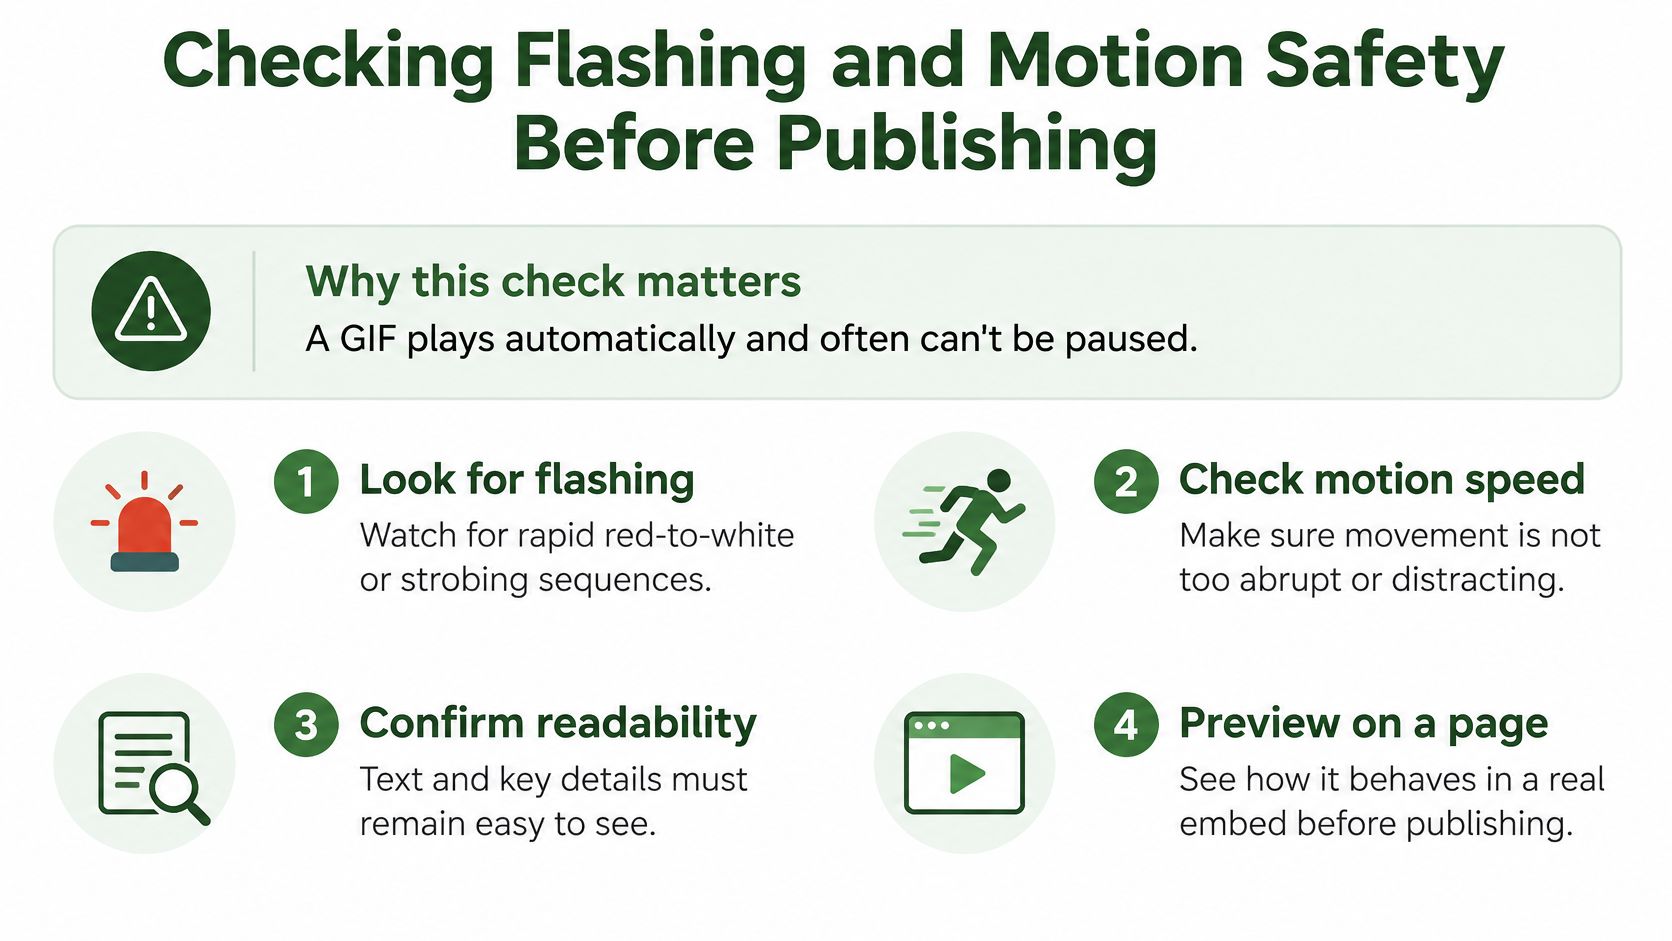
Run the Safety Checklist
- Look for flashing: Step through the source at its native frame rate and count bright to dark or red to white swings in each second. MDN's seizure disorder accessibility guidance states that flashing content should stay below three flashes per second, and automatically playing content that runs longer than five seconds should be pausable, stoppable, or hideable. If any second exceeds that flashing threshold, cut or redesign that part.
- Measure loop length: A long autoplay loop isn't just heavy. It's motion the viewer didn't choose and may not be able to stop.
- Create a poster frame: Run
ffmpeg -i input.mp4 -ss 1 -frames:v 1 poster.pngand pick the cleanest representative moment. The poster gives non-moving contexts a useful still. - Write meaningful alt text: Describe what the motion shows and why it matters, not a generic label such as animation or demo. Say what changes, what action completes, or what result appears.
- Honor reduced motion: Use
@media (prefers-reduced-motion: reduce)to swap the GIF for the poster image. Let the viewer start the animation on demand instead of forcing playback.
Decision rule: If the clip flashes, strobes, or needs a long loop to make sense, publish video with controls instead of a GIF.
This isn't a legal review, and it doesn't replace proper accessibility testing. It is a production gate. Short, calm, purposeful motion can pass it. Rapid cuts, explosions, camera flashes, lightning effects, and high contrast transitions deserve extra scrutiny, even when the GIF is only a few seconds long.
Choosing GIF or Video and Exporting at Scale
Use this decision rule before you batch anything.
The illustration below frames that format choice at a glance.
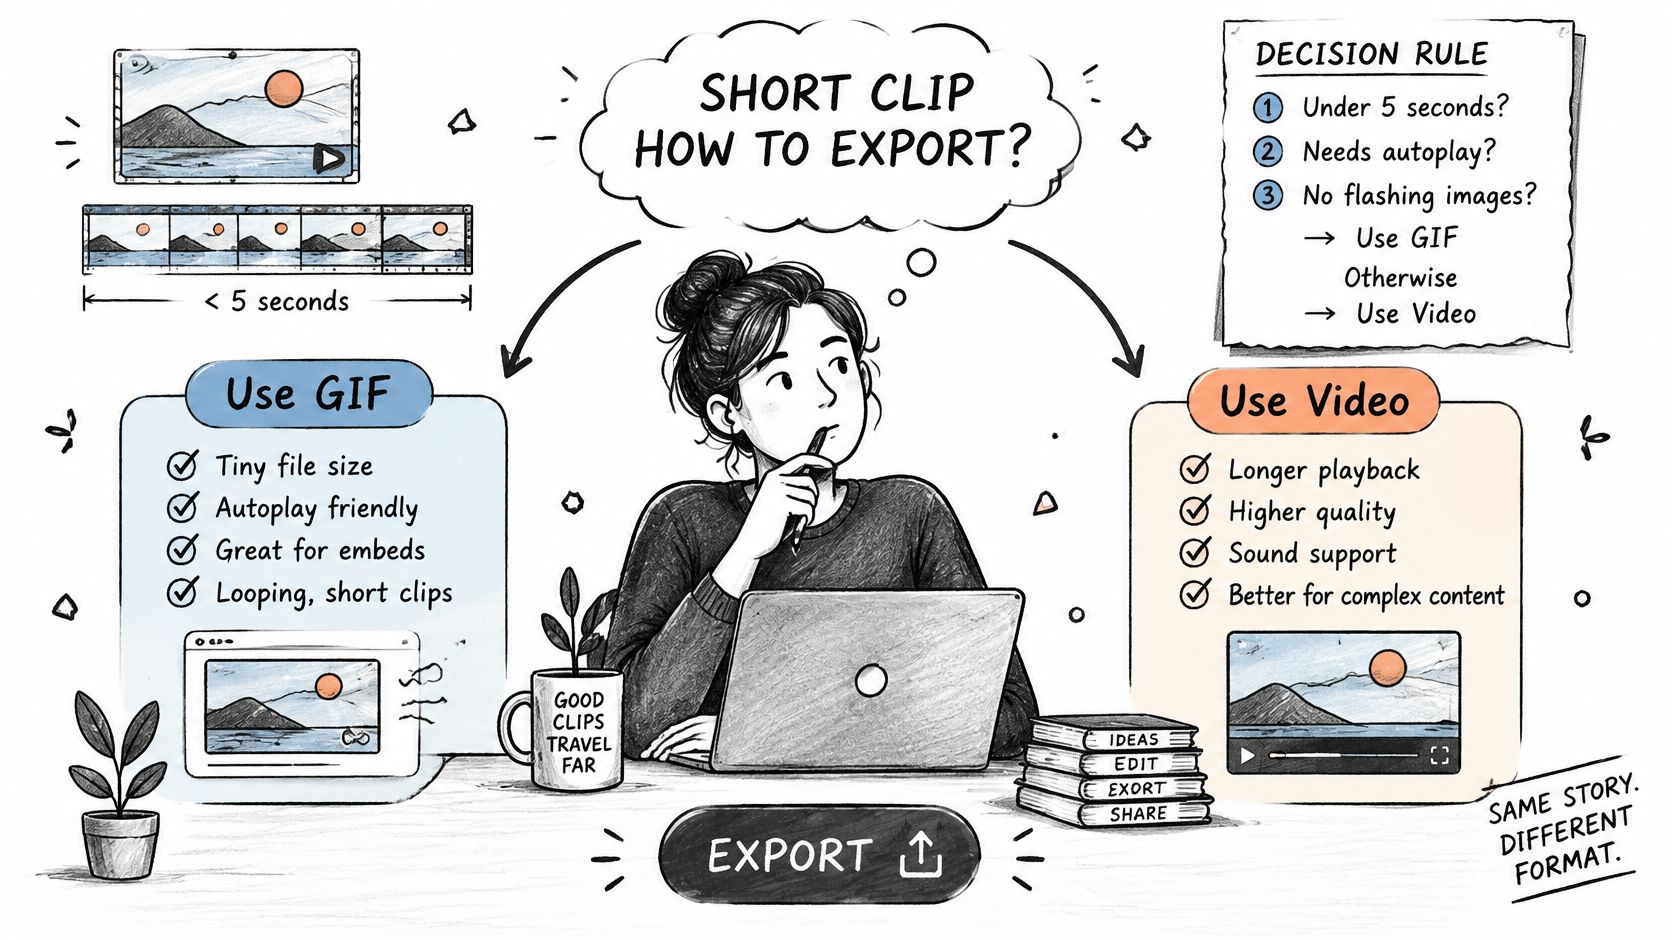
- Choose GIF narrowly: Use it when the clip is under five seconds, has no flashing, and must autoplay in a plain embed. Ship a poster frame with it.
- Choose video by default: For anything else, export MP4 with H.264 or WebM with VP9, plus a poster image and alt text.
- Generate GIF only on demand: Make one for a destination that requires it, such as a chat app or legacy embed, not for every clip automatically.
| Format | Typical size | Colors | Playback control | Best use |
|---|---|---|---|---|
| GIF | Large, grows fast with length | 256 per frame | None, always loops | Chat apps and legacy embeds |
| MP4 (H.264) | Much smaller for the same motion | Full color | Play, pause and mute | Web pages, email links and social uploads |
| WebM (VP9) | Small, close to MP4 | Full color | Play, pause and mute | Modern browsers and web delivery |
| Animated WebP or APNG | Smaller than GIF | Full color for WebP | Browser-dependent | Where the platform supports it |
BBC accessibility guidance on animated images notes that GIFs are difficult to compress, often produce large files, and can consume comparatively high mobile-device energy when rendered. That's the trade off many tutorials skip. GIF looks universal, but the viewer gets no pause or mute, while a muted MP4 of the same moment is often smaller and easier to control. If you already have GIF assets, these steps for converting GIF files to MP4 with FFmpeg cover the reverse path.
The walkthrough below is useful for comparing a rendered loop against a controllable video embed before you standardise outputs.
Standardise the Batch
Keep one set of FFmpeg commands for every clip so trim points, palette settings, and filters stay identical. Test one representative clip locally, including a difficult gradient or UI overlay, then move those same commands into your pipeline without rewriting them. Where narration matters in the video version, settle audio before batching and consult voiceover setup guidance rather than treating sound as an afterthought.
Our site lists tools including Convert MP4 to GIF, Resize Video, Compress Video, Trim Video and Resize for TikTok. To start with RenderIO, sign up at renderio.dev, run your actual FFmpeg commands against the API, and generate an API key. A 1 GB file with a simple transcode typically finishes processing in under 60 seconds, which makes local to hosted testing straightforward.
Turn your proven two-pass commands into a repeatable pipeline with RenderIO, where you can run the same FFmpeg workflow through an API instead of converting clips one by one. Start with one GIF, poster frame, and MP4 derivative, verify the outputs, then scale that exact recipe across your library.