You've got a folder of clips that should already be one video. Three phone takes, a screen recording, maybe a download in a different container, and the first merge you ran froze at the join or drifted out of sync two minutes in. That's the normal starting point for combining videos with FFmpeg, and it's rarely a bad command. It's usually the wrong method for the clips you have.
FFmpeg gives you three concat tools that look interchangeable and aren't. Pick the concat demuxer for matching streams and you'll finish in seconds with no quality loss. Pick it for mismatched phone and screen-recording exports and you'll get silence, gaps, or a file that plays in one player and breaks in an editor. The fix is boring and reliable. Probe first, compare the streams, route the set to stream copy or the filter, then test a short pair before you touch the full batch.
Table of Contents
- Pick Stream Copy or Re-Encoding Before You Merge
- How to Merge Same-Format Clips Without Re-Encoding
- Merging Clips With Different Resolutions or Frame Rates
- Diagnosing Merge Errors and Testing Before Full Runs
- Automating Merges Through an API
Pick Stream Copy or Re-Encoding Before You Merge
Start with this routing decision, not with a command you found and hope fits. If you want to combine videos with FFmpeg without wasting an encode or corrupting a seam, the inputs determine the method every time.
Concat Method by Clip Situation
| Situation | Method | Re-encodes? |
|---|---|---|
| Same codec, resolution and frame rate | Concat demuxer with -c copy |
No |
| Different codecs or resolutions | Concat filter | Yes |
| Variable frame rate phone clips | Concat filter with fixed fps | Yes |
| Existing .ts or HLS segments | Concat protocol | No |
| Audio-only files | Concat demuxer or concat filter | No for matching codecs |
Stream copy doesn't decode your video. FFmpeg copies the encoded packets into a new container, so there's no new compression generation and the job is mostly reading and writing data. That only works when the streams already agree on codec, resolution, frame rate, time base, and audio layout.
The FFmpeg project history records the project's release date as December 20, 2000, and its concat support still splits cleanly into those two operating models. Compatible files can be placed sequentially without re-encoding in a mode described as lossless and faster because packets are copied, while files that differ in resolution, frame rate, time base, or codecs should be re-encoded into a common format. I would treat that distinction as a hard gate, not a preference.
Two Cases That Show the Trade-Off
Say you've got three exports from the same phone, shot back to back with identical settings. Same H.264 video, same AAC audio, same size and frame rate. Run those through the demuxer with -c copy and you'll get one file in seconds, bit-identical inside each segment.
Now say you're joining a 30 fps screen recording to a 60 fps phone clip at a different resolution. Copy mode is the wrong choice here. It can't reconcile those parameters, so you either get a broken seam or output that downstream tools misread. The filter path costs CPU time and one generation of compression, and in exchange every segment arrives at the concat step already normalized.
Practical rule: If you can't say, from actual probe output, that every stream matches, don't use copy mode.
One more detail matters for planning. Concat scripts can carry explicit duration directives, which helps when source metadata is wrong and seeking goes sideways. If your merged file will be published and shared, it's also worth knowing how to create timestamped links on any device so viewers land on the right segment instead of scrubbing blind.
Do one thing before you write any command. Run ffprobe on the first two clips, compare codec, resolution, frame rate, time base, and stream count, and match them to a row in the table. That single comparison routes the whole job.
How to Merge Same-Format Clips Without Re-Encoding
This is the fast path, and it stays fast only if you respect its one condition. Every input must already match.
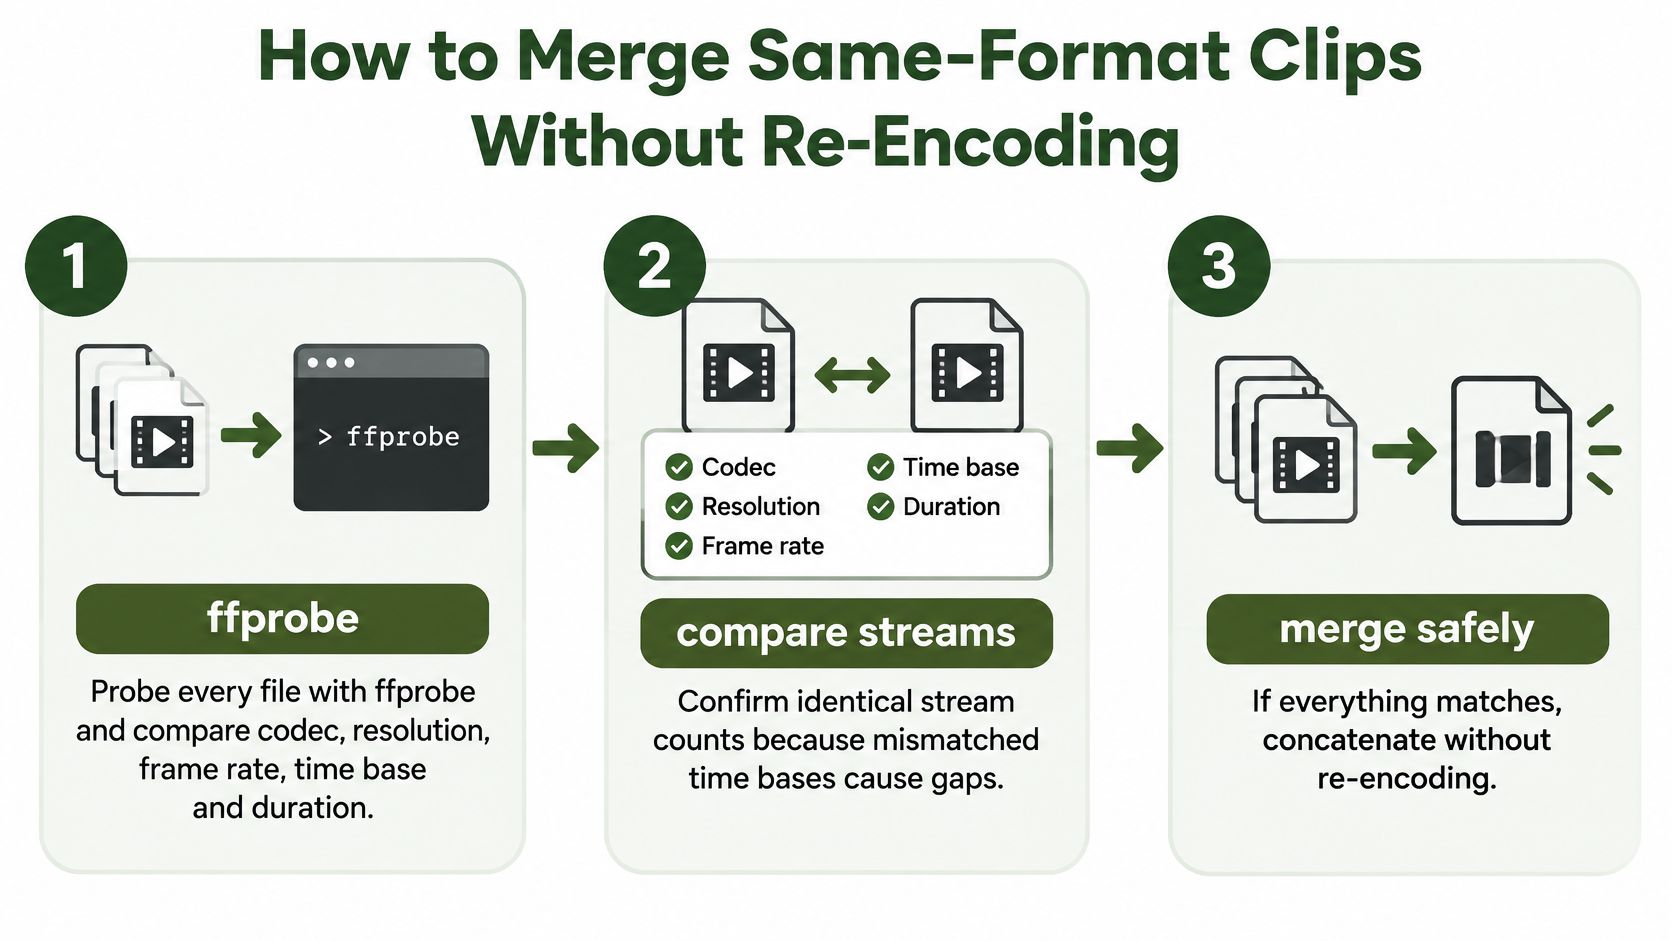
The workflow below breaks that check into a short numbered path you can repeat for any same-format set.
The Demuxer Procedure
Probe every file first. Run
ffprobeon each clip and compare codec, resolution, frame rate, time base, and duration. Confirm identical stream counts too, because mismatched time bases and missing audio streams are where gaps come from. Matching.mp4extensions tell you nothing on their own.Write the manifest in playback order. Create a text file with one line per clip, such as
file 'part01.mp4'followed byfile 'part02.mp4'. The demuxer plays files in list order, so this file is your edit decision list. Check it before you run anything, especially if you generated it from filenames.Run the copy command. Use
ffmpeg -f concat -safe 0 -i list.txt -c copy output.mp4to read the list and copy the streams without re-encoding. The-safe 0flag allows absolute paths and names the default safety check rejects, so use it only for lists you generated and validated yourself. I wouldn't run it against a manifest that came from an untrusted source.Verify total duration and every seam. Add up the input durations and compare them with the output. Then scrub to each join point and play a few seconds either side. A command that exits cleanly can still leave a frozen frame or a pocket of silence at a transition.
Fix unequal stream lengths at the source. If a clip's audio ends before its video, or the other way round, expect a small gap at that seam. Don't paper over it in the merge. Correct or re-export that one source file, then rerun the list.
Why Timestamps Make or Break This Method
The mechanics explain most failures. According to the FFmpeg FAQ, the concat demuxer adjusts timestamps globally so the first file begins at time 0 and each subsequent file begins when the preceding file is considered to finish. Inputs must have matching codecs and time bases, and incorrect or truncated duration metadata can create timestamp gaps or visible artifacts.
That one sentence should shape how you debug. If clip two carries a wrong duration, everything after it shifts. Clip three starts early and overlaps, or late and leaves dead air, even though clip three itself is perfectly fine. When a seam looks wrong, check the duration of the clip before it, not just the clip after it.
The same guidance separates the demuxer from the concat protocol. The demuxer is more flexible and can work across different container formats, but it still requires compatible streams. So three MP4 clips sharing the same video codec, audio codec, frame rate, and stream parameters are a clean stream-copy job. A phone clip, a screen recording, and a social export usually aren't, no matter how similar they look in a file browser.
If you're assembling teaching material rather than raw takes, the same list-based approach works well when you join lesson clips with FFmpeg, provided each lesson segment was exported with matching settings.
The TS and HLS Variant
Existing transport stream segments are the one case where the concat protocol earns its place. Use a pipe-separated list, for example ffmpeg -i 'concat:part01.ts|part02.ts' -c copy output.mp4. It reads the segments as one continuous stream, which suits HLS parts that were split from a single encode.
Don't treat that simplicity as permission to skip probing. Every segment still needs the same codec and parameters, and arbitrary .ts files from different sources fail the same way mismatched MP4s do. Probe them first, exactly as in step one.
A clean result is easy to recognize. You get one file at the correct total length, audio stays in sync across every join, seeking lands where you expect, and there's no frozen frame or silence at any seam. If any of those checks fail, your clips weren't as identical as they looked, and the filter path is the honest answer.
Merging Clips With Different Resolutions or Frame Rates
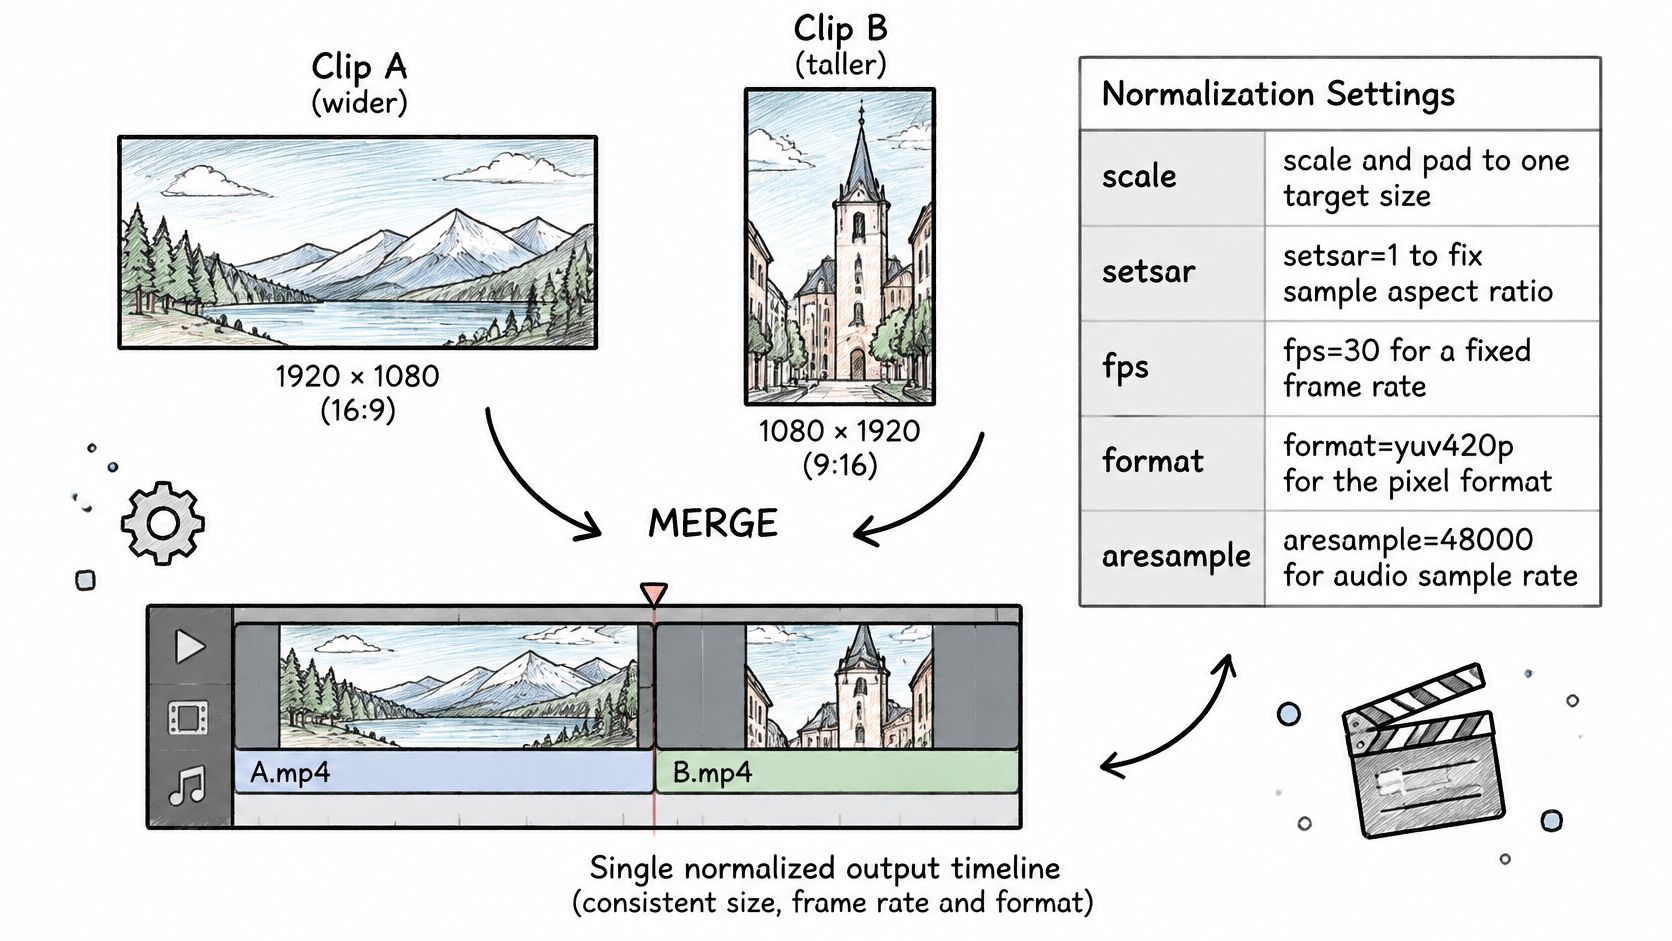
When streams don't match, stop trying to copy them. Normalize every segment to one target spec, then concatenate. That's the whole job, and the table below is the checklist.
Normalization Filters for Each Mismatch
| Mismatch | Normalize with | Example filter |
|---|---|---|
| Different resolution | Scale and pad to one size | scale=1280:720:force_original_aspect_ratio=decrease,pad=1280:720:(ow-iw)/2:(oh-ih)/2 |
| Non-square pixels | Fix sample aspect ratio | setsar=1 |
| Mixed frame rates | Fixed output frame rate | fps=30 |
| Mixed pixel formats | One pixel format | format=yuv420p |
| Different audio rate or layout | Resample audio | aresample=48000 |
| Missing audio in one clip | Add a silent track | anullsrc |
The diagram below shows that normalization happening per clip before the segments meet in a single output.
A Two-Clip Command You Can Adapt
This joins a horizontal MP4 and a MOV into one 1280x720 file at a fixed frame rate.
ffmpeg -i a.mp4 -i b.mov -filter_complex '[0:v]scale=1280:720:force_original_aspect_ratio=decrease,pad=1280:720:(ow-iw)/2:(oh-ih)/2,setsar=1,fps=30,format=yuv420p,setpts=PTS-STARTPTS[v0];[1:v]scale=1280:720:force_original_aspect_ratio=decrease,pad=1280:720:(ow-iw)/2:(oh-ih)/2,setsar=1,fps=30,format=yuv420p,setpts=PTS-STARTPTS[v1];[0:a]aresample=48000[a0];[1:a]aresample=48000[a1];[v0][a0][v1][a1]concat=n=2:v=1:a=1[v][a]' -map '[v]' -map '[a]' -c:v libx264 -crf 22 -c:a aac output.mp4
Read it in the order it runs. Each video branch scales down without distorting, pads to the exact target frame, sets square pixels with setsar=1, forces a constant rate with fps=30, and converts to yuv420p, which keeps playback compatibility broad. Each audio branch resamples to a shared rate so the concat step isn't trying to stitch together mismatched clocks.
Before choosing target settings for your own outputs, it's worth checking which video codecs your delivery targets actually support, because normalizing to a codec your platform rejects just moves the failure downstream.
The concat filter documentation is blunt about the requirements. Every segment needs the same number of audio and video streams and matching parameters for corresponding streams, resolution must be converted explicitly, and differing frame rates produce variable-frame-rate output unless you set a policy yourself. Filters are also incompatible with -c copy, so the filtered result must be encoded.
Where People Get Caught
The timestamp reset is the step most often skipped. Without setpts=PTS-STARTPTS, a clip that starts at a nonzero timestamp confuses the concat filter, which expects each segment to begin at zero. You get warnings, gaps, or output that's longer than the sum of its parts.
Say you're padding a 9:16 vertical phone clip into a 16:9 horizontal cut. The scale and pad chain keeps the person the right shape and fills the sides, instead of stretching them sideways. Skip setsar=1 on a clip with non-square pixels and that same person still comes out subtly wrong, even at the correct resolution.
If one clip has no audio, the filter fails on stream count before it fails on anything else. Add silence first.
Be honest about the cost. You're encoding once, so the output takes one generation of compression, and a long batch will take real CPU time. If that trade-off matters more than doing it yourself, comparing video editing services can help you decide what to hand off. For most pipeline work, though, -crf 22 with libx264 keeps the loss hard to see at delivery sizes.
Validate the result after muxing. Check total duration against the sum of the inputs, play across the seam for audio sync, and seek to several points to confirm the file responds cleanly. Those three checks catch nearly everything this method can get wrong.
Diagnosing Merge Errors and Testing Before Full Runs
Most merge failures announce themselves clearly if you know which symptom maps to which cause. Fix the cause you've got. Changing five flags at once teaches you nothing and usually breaks a second thing.
Merge Symptoms Causes and Fixes
| Symptom | Likely cause | Fix |
|---|---|---|
| Freeze or stutter at a seam | Unequal audio and video length, or wrong duration metadata | Correct durations or normalize the source |
| Timestamp warnings or nonzero start | Segments not reset to zero | Add setpts=PTS-STARTPTS in each chain |
| Silent section in the output | One clip has no audio stream | Add a silent track with anullsrc |
| Audio drifts out of sync | Mismatched audio sample rates | Resample with aresample=48000 |
| Choppy playback or sync errors in editors | Variable frame rate phone footage | Set a fixed fps=30 before concat |
| Invalid argument or stream specifier error | Stream counts differ between inputs | Normalize every input before concat |
Notice how few of these are true concat problems. A freeze at a seam is usually a duration problem in the clip before it. Drift that grows over time points at sample rates or variable frame rate, not at your choice of container. A silent stretch almost always means one source never had an audio stream and nobody checked.
Variable frame rate phone footage deserves special suspicion. It plays fine on the phone that recorded it, then produces choppy motion or sync errors the moment an editor or a concat filter assumes a steady rate. Setting fps=30 before concatenation forces a decision about duplicated or dropped frames once, upfront, instead of letting every downstream tool guess differently.
Read the Probe Output Properly
Every diagnosis above starts with knowing what's inside your files. A good hands-on guide to reading ffprobe output will help you compare codec, time base, stream count, and duration side by side instead of eyeballing filenames. That comparison is where mismatches stop being mysterious.
Save the full FFmpeg stderr output from every failed run. It names the input and the stream that caused the failure, and it's far more useful than your memory of a warning that scrolled past. When a command fails on our side, we return the complete stderr for the same reason. Guessing from an exit code wastes runs.
Test first: A ten-second pair that fails costs you seconds. A full batch that fails costs you the whole encode.
The Test Routine Before Any Full Batch
- Match your clips to a decision row. Use the routing table to choose copy mode or the filter before writing a command.
- Probe two representative clips. Pick the most different pair in the set, not the two most similar, and compare codec, resolution, frame rate, time base, and stream counts.
- Run a ten-second test cut. Trim a short piece from each of those two clips and run the exact method you plan to use at full length.
- Check four things. Confirm total duration, play across the seam, listen for audio sync, and seek to several points.
- Run the full batch only after the test passes. No exceptions for deadlines. The test is what makes the deadline survivable.
- Fix one symptom at a time. If the test fails, find its row in the symptom table, apply that single fix, and retest the same short pair.
Two habits keep this routine trustworthy. Use -safe 0 only after the manifest has been validated in a workflow you control, since it exists to bypass a safety check. And use unique temporary manifests per job, so parallel runs don't overwrite each other's lists mid-merge.
If you run these merges often, keep your known-good commands somewhere reusable instead of reconstructing filter chains from memory. Our FFmpeg cheat sheet has 50+ commands that can be plugged directly into the RenderIO API, which is handy when a working local command needs to become a repeatable job. The point isn't the sheet. It's that tested commands should stay tested.
I would rather see you spend two minutes on a test pair than twenty minutes re-encoding a batch that was doomed at clip two. That's the entire argument for this routine.
Automating Merges Through an API
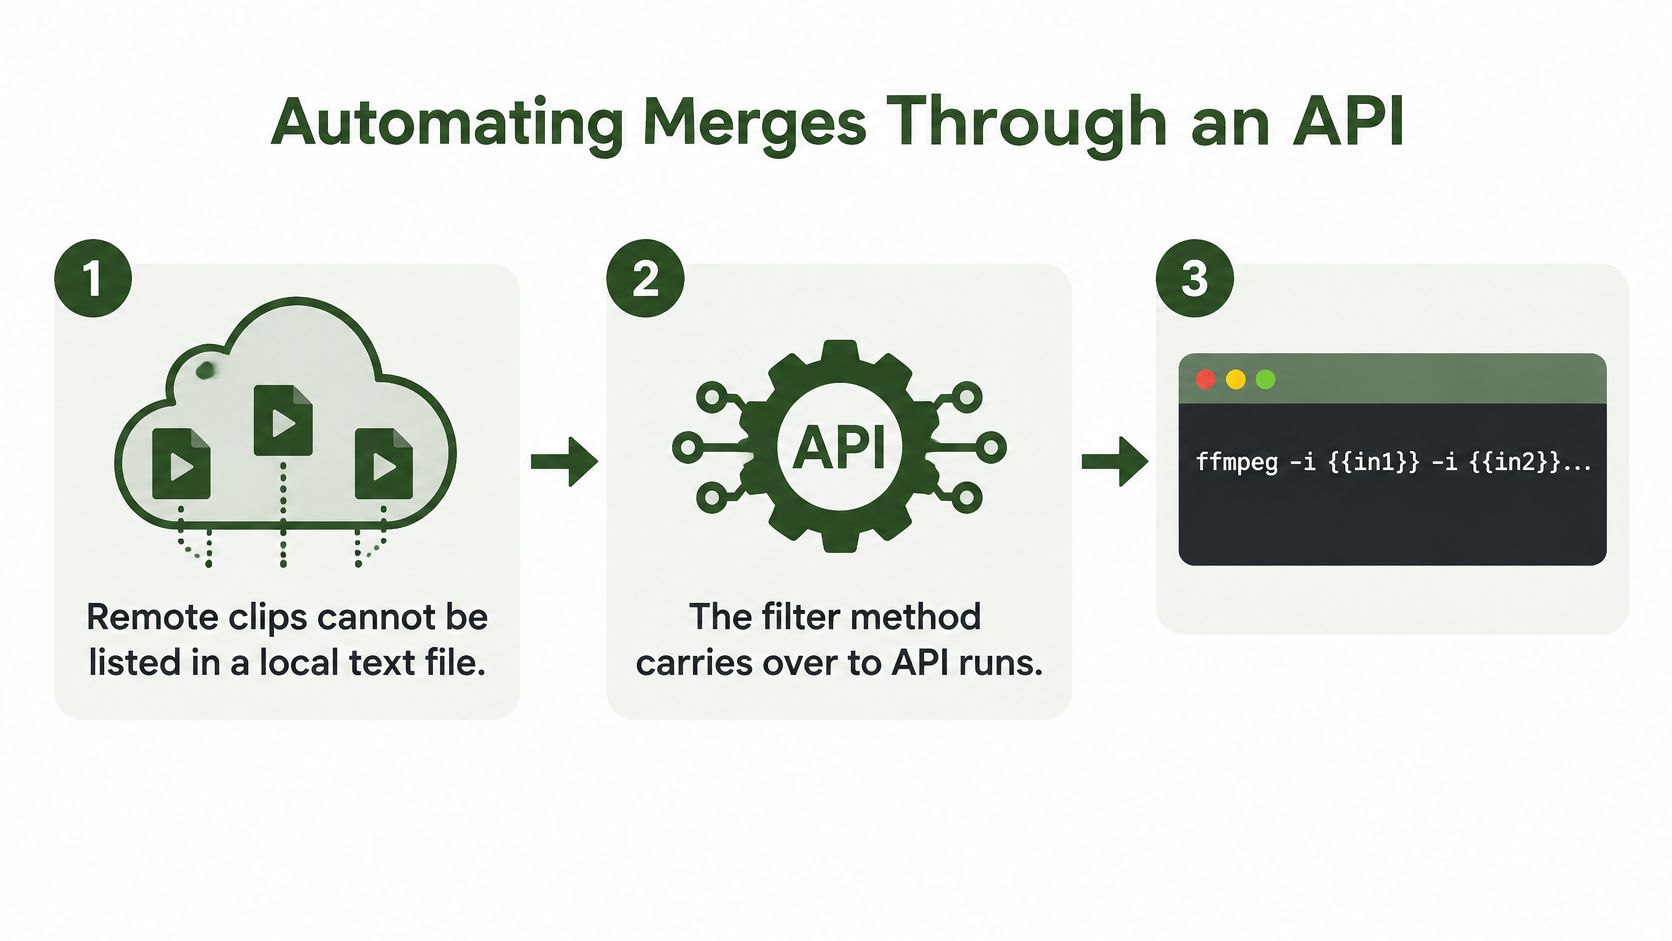
Local manifests stop working the moment your clips live somewhere else. You can't list remote files in a text file on a disk you don't control, so the filter method is the one that carries over to API runs, with each input passed explicitly.
The infographic below lays out that shift from local lists to placeholder-based remote inputs.
The Placeholder Model
The command shape stays familiar. You write ffmpeg -i {{in1}} -i {{in2}} -filter_complex '...' -map '[v]' -map '[a]' -c:v libx264 -crf 22 output.mp4, and each placeholder resolves to a real file at run time. Input and output files are referenced in the FFmpeg command with {{placeholder}} syntax, which maps them to file URLs, so your normalization chain doesn't change when the storage location does.
That separation is what makes templating practical. The filter graph, target size, frame rate, and encoder settings stay fixed in one template. Only the input mappings and the output key change per job. A merge that passed your ten-second test locally runs the same steps remotely.
If you want the broader picture of wiring this into an application, a walkthrough of video API integration patterns covers how these requests fit into a larger pipeline.
The Request Lifecycle
- Store the clip URLs and an output key for each merge, so every job is traceable to its inputs.
- Send a POST request with the command, the input and output file mappings, and your API key in the
X-API-KEYheader. You submit a job by sending a POST request with your FFmpeg command and input and output file mappings. - Receive a command_id straight away. Command endpoints return immediately with a command_id, and the FFmpeg processing runs in the background, so your app isn't holding a connection open during a long encode.
- Poll that command_id for status, or wait for a webhook notification if your system reacts to events better than it polls.
- Download the output from its signed URL before it expires, and store it wherever your delivery step expects it.
The short video below shows that submit, track, and retrieve flow end to end.
Running Batches Without Losing Control
For batches, generate one merge per account or per deliverable, each with its own clip order and output key, rather than building one giant job that's hard to retry. When one merge fails, you rerun that single job with its stderr in hand. The rest of the batch is untouched.
You don't need custom code to trigger any of this. No-code tools such as n8n or Zapier can fire the same request when new clips land in storage, which suits teams generating variations on a schedule. Keep the normalization chain in the template either way, so automated runs inherit the exact settings your test pair already proved.
Stop babysitting local encodes and fragile file lists. RenderIO runs your tested concat commands through a simple API, returns a command_id instantly, and hands back full stderr when something fails, so you can merge, normalize, and batch-process clips without managing servers. Bring the filter chain that already works for you and run it at scale with RenderIO.