Fastest way to join M4A files: FFmpeg's concat demuxer
Drop your track names into a text file, run a single command, and FFmpeg stitches them together without re-encoding. Quality stays untouched. A full album merge usually finishes in seconds.
Table of Contents
The concat demuxer
The demuxer treats your M4A files as a playlist — it reads the sequence and copies the streams verbatim. No decode, no encode, no quality loss.
Create inputs.txt in the same folder as your audio:
file 'intro.m4a'
file 'interview.m4a'
file 'outro.m4a'
Then merge them:
ffmpeg -f concat -safe 0 -i inputs.txt -c copy joined.m4a
-f concat selects the demuxer. -safe 0 lets you use relative or absolute paths without FFmpeg complaining. -c copy streams the audio data straight through — no transcoding involved.
Quick tip: Always wrap filenames in single quotes. Paths with spaces or apostrophes will break without them.
For absolute paths, just write out the full location:
file '/Users/alex/Audio/session one.m4a'
file '/Users/alex/Audio/session two.m4a'
On Windows, forward slashes tend to play nicer:
file 'C:/Audio/session one.m4a'
file 'C:/Audio/session two.m4a'
Fast join methods comparison
Each method trades off speed, quality, and compatibility differently:
| Method | Re-encode? | Speed | Best For |
|---|---|---|---|
| Concat demuxer | No | Fast | Compatible M4A tracks |
| Concat filter | Usually yes | Slower | Different audio properties |
| RenderIO command | Depends | Scalable | Automated pipelines |
Start with the demuxer — it's the fastest and preserves your original audio exactly. Move to the filter only when files refuse to cooperate. The RenderIO option makes sense when you're building automated workflows and don't want to manage local FFmpeg execution.
When the demuxer doesn't work
Stream copying assumes every source plays by the same rules. Codec, sample rate, channel layout, stream structure — they all need to match.
In practice, that means your interview recorded at AAC 44,100 Hz will merge cleanly with another AAC 44,100 Hz file. But if one track is Opus at 48,000 Hz or uses a different channel layout, FFmpeg will throw warnings or produce a file that skips, glitches, or won't open at all.
When you hit that wall, the fix is straightforward: normalize first, then concatenate.
Re-encode each track to matching parameters, then join the normalized outputs with the demuxer. You lose a generation on the normalized files, but the final merge stays clean and fast.
For a cloud-based approach, RenderIO's FFmpeg concat guide walks through running the same concat process via API. That's useful when you're building apps, wiring up n8n workflows, or processing batches where running FFmpeg locally doesn't make sense.
The principle doesn't change whether you're on a laptop or in the cloud: get the inputs compatible, merge them, verify the output plays through.
Before you join M4A files, confirm that they follow the same technical rules. The concat demuxer works best when every input uses the same codec, sample rate, channel layout, and stream structure.
Inspect each file with ffprobe:
ffprobe -v error -select_streams a:0
-show_entries stream=codec_name,sample_rate,channels,channel_layout
-of default=noprint_wrappers=1 track1.m4a
Repeat the command for every track, then compare the results. For example, AAC at 44,100 Hz stereo should match the other inputs. A 48,000 Hz file or a different channel layout may cause errors, gaps, or playback problems.
Build the Input List
Create inputs.txt and place tracks in the exact listening order:
file 'intro.m4a'
file 'interview.m4a'
file 'outro.m4a'
Keep the list in the same directory as your audio when possible. Single quotes protect filenames containing spaces, while -safe 0 allows broader path usage.
Input Preparation Checklist
Run through this checklist before executing your join command. It catches the most common mismatches that cause concat failures.
| Check Item | Required Value | How to Verify |
|---|---|---|
| Codec | Matching AAC or compatible codec | ffprobe |
| Sample rate | Identical, such as 44,100 Hz | ffprobe |
| Channels | Matching mono or stereo layout | ffprobe |
| Order | Correct playback sequence | Review inputs.txt |
If your files differ, normalize them before concatenation. A consistent sample rate often prevents the same compatibility issue seen when high-resolution audio failed until it was converted to 44,100 Hz. RenderIO's audio normalization guide explains the cloud workflow when local preparation becomes repetitive.
Best practice: Inspect first, normalize only when necessary, and keep the original files untouched as backups.
The concat demuxer is usually the cleanest way to join M4A files when their audio settings already match. It copies the streams directly, so the process is fast and avoids another lossy encoding pass.
Create inputs.txt with the tracks in playback order:
file 'track1.m4a'
file 'track2.m4a'
file 'track3.m4a'
Run the merge from that folder:
ffmpeg -f concat -safe 0 -i inputs.txt -c copy joined.m4a
Here's what the flags do:
-f concatselects FFmpeg's concat demuxer.-safe 0permits broader relative or absolute file paths.-i inputs.txtsupplies the ordered file list.-c copycopies the streams without decoding or re-encoding.
Key takeaway: Stream copying preserves the source quality, but it depends on compatible codecs, sample rates, channels, and stream structures.
For filenames containing spaces, keep each path inside single quotes. On Windows, forward slashes often avoid escaping problems:
file 'C:/Audio/session one.m4a'
file 'C:/Audio/session two.m4a'
If FFmpeg reports mismatched streams, don't force the merge. Normalize the files first, then repeat the demuxer command. A consistent sample rate matters because playback devices can reject unsupported values, as demonstrated in this real-world M4A sample-rate troubleshooting discussion.
Automate the Same Command with RenderIO
Developers can send this FFmpeg command to RenderIO's REST API instead of managing local processes. That approach fits upload pipelines, batch jobs, and no-code workflows where each new set of tracks should become one output file.
For request structure and concat-specific examples, read the RenderIO FFmpeg concat guide. After processing, verify that joined.m4a plays from beginning to end and inspect its duration with ffprobe.
Mismatched audio parameters are the number one reason M4A concatenation fails. When you're joining files, the codec, sample rate, channels, and bit depth all need to line up. Two AAC recordings at 44,100 Hz will usually merge without a hitch, but drop in a 48,000 Hz file and you'll get glitches, sync drift, or an output that simply won't open. In practice, converting high-resolution sources down to 44,100 Hz has solved playback issues across a range of devices — phones, browsers, media players, you name it.
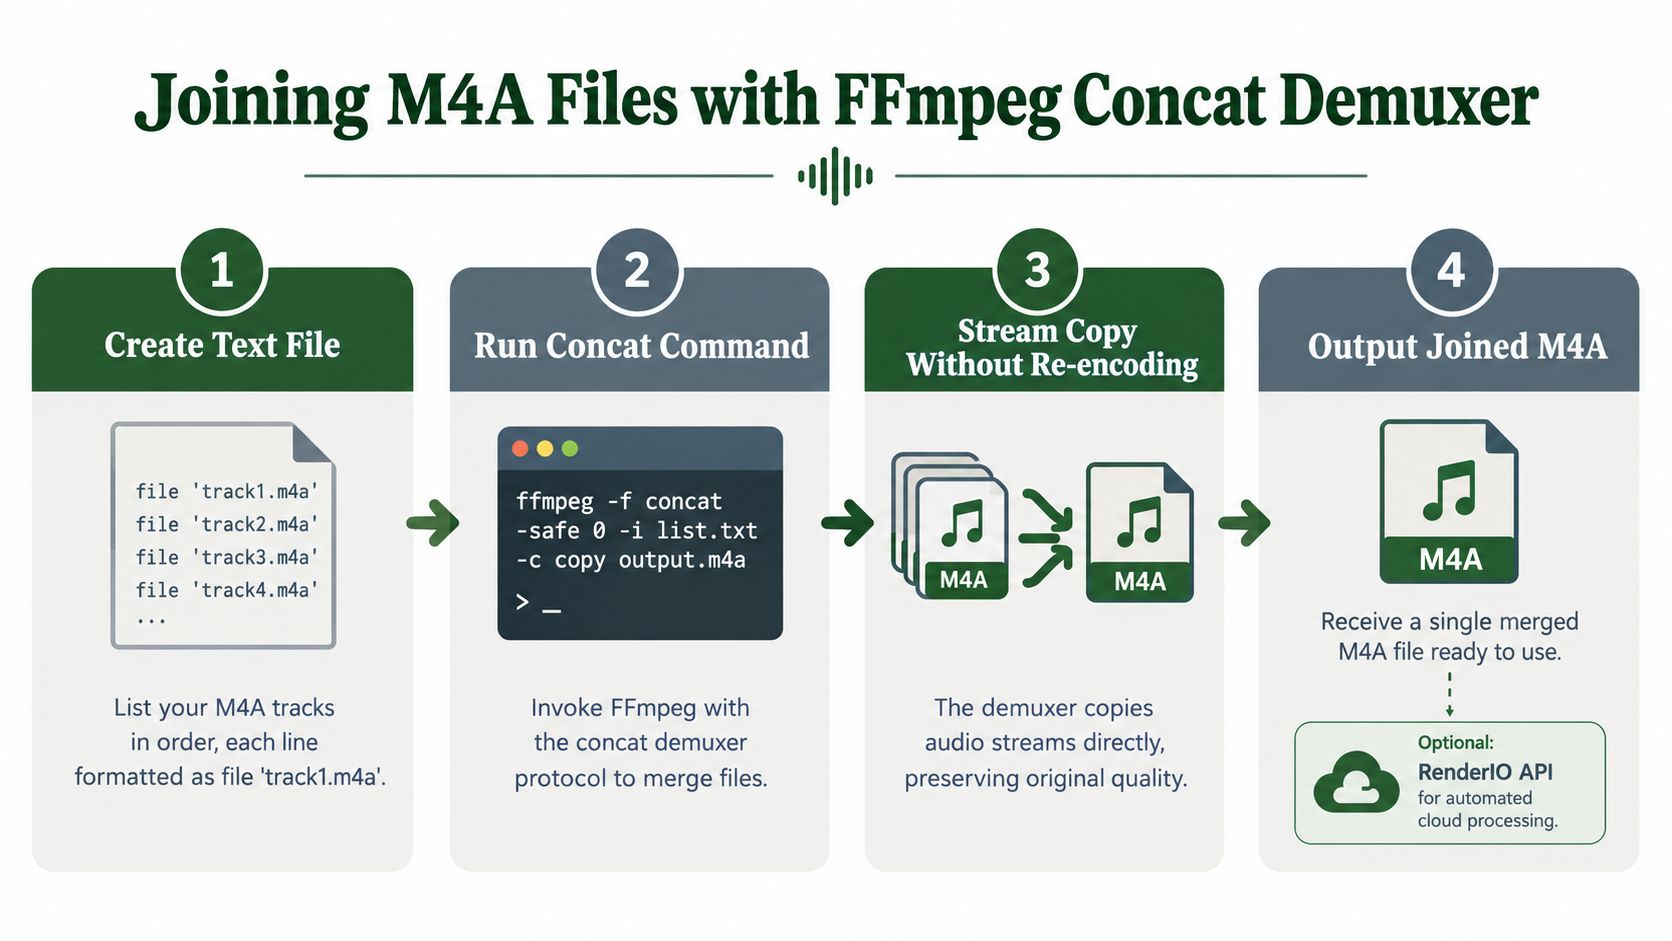
The infographic above walks through the full workflow: ordered text list in, FFmpeg processing, stream copying, and the final joined M4A output — with RenderIO as an automation option if you'd rather not run things locally. The core takeaway is straightforward: compatible inputs get copied fast, but mismatched files need normalization first.
Normalize Incompatible Audio
Start by creating a normalized AAC version of each source file:
ffmpeg -i track1.m4a -ar 44100 -ac 2 -c:a aac -b:a 192k normalized1.m4a
ffmpeg -i track2.m4a -ar 44100 -ac 2 -c:a aac -b:a 192k normalized2.m4a
The -ar 44100 flag locks the sample rate, -ac 2 forces stereo, and the AAC codec settings give every file the same encoding target. Run this for each input, then list your normalized files in inputs.txt and concatenate:
ffmpeg -f concat -safe 0 -i inputs.txt -c copy joined.m4a
Best practice: Keep the originals untouched, normalize only the tracks that don't match, and always inspect the output before deleting temporary files.
If you'd rather handle this in the cloud, learn more about normalizing audio with FFmpeg. That approach makes sense for batch jobs where uploads arrive with unpredictable settings. For a handful of files, local FFmpeg is still the quicker path.
Verify the Output
After joining, check what you actually got:
ffprobe -v error -show_entries format=duration:stream=codec_name,sample_rate,channels joined.m4a
Confirm the codec, 44,100 Hz sample rate, channel count, and total duration all look right. Then do the most important test — listen through the transitions, especially the points where one recording ends and another begins. That's where problems tend to hide.
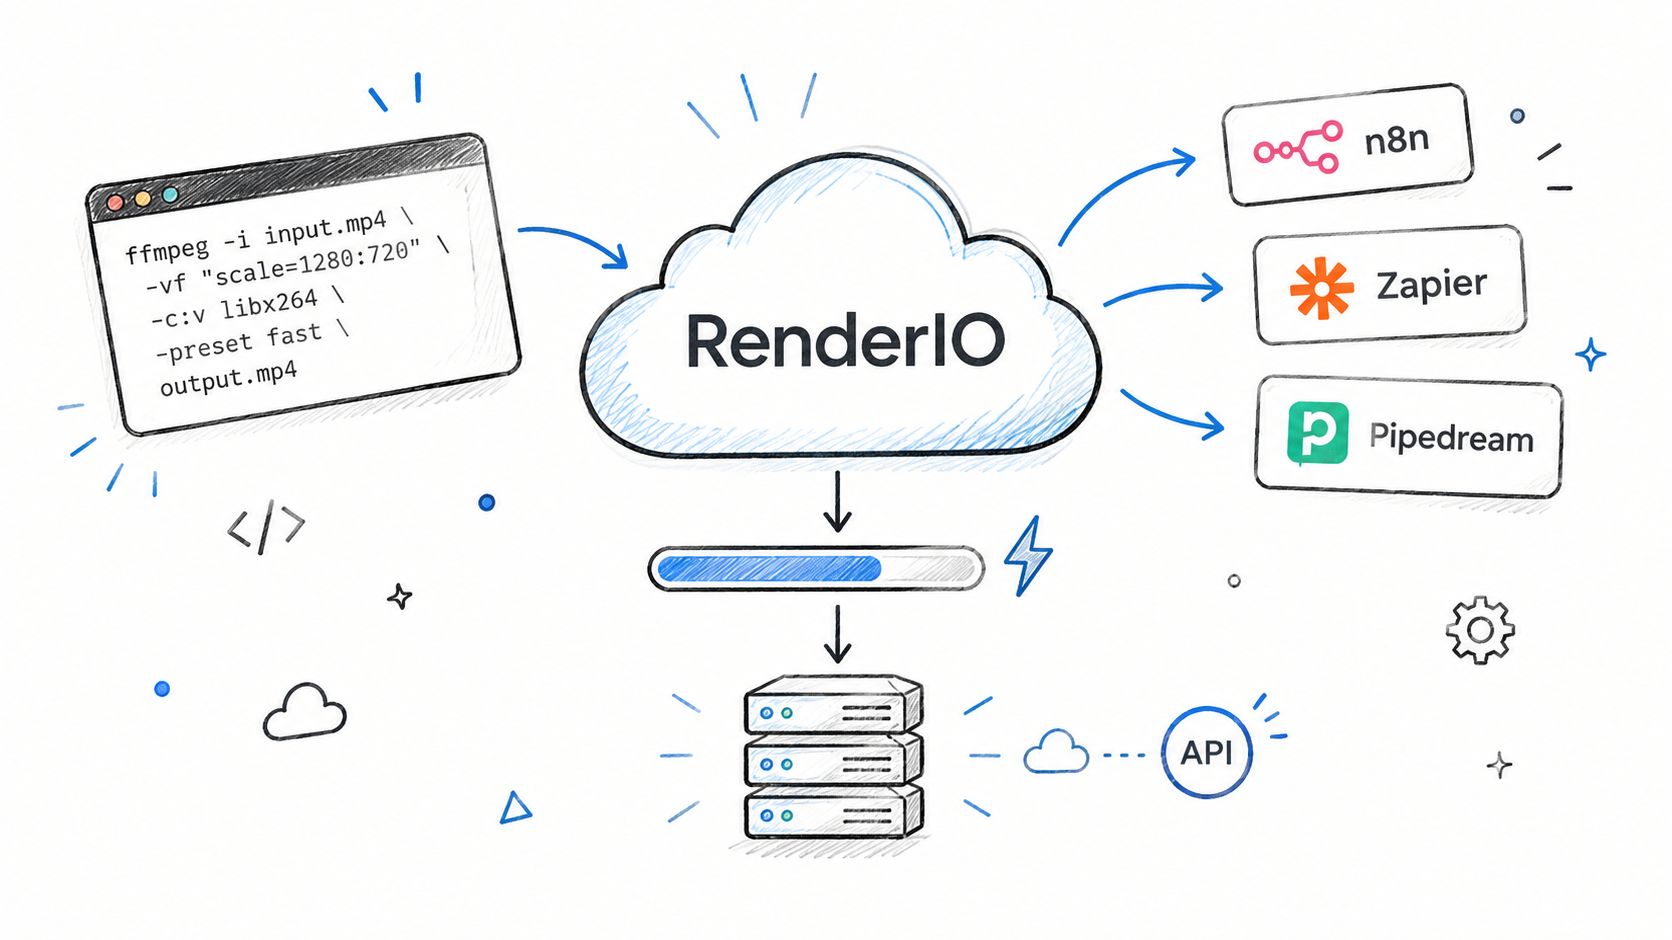
If you've ever found yourself manually firing off FFmpeg just to join M4A files, you know the drill gets old fast. RenderIO skips all of that — no servers to maintain, no local storage headaches, no queue management. You send a standard FFmpeg concat command to a REST endpoint and get your merged file back.
Send the Concat Command
Start by uploading your audio files (or pointing to them remotely), then build the same inputs.txt manifest you'd use locally:
file 'track1.m4a'
file 'track2.m4a'
file 'track3.m4a'
Post your FFmpeg command like this:
ffmpeg -f concat -safe 0 -i inputs.txt -c copy joined.m4a
The -c copy flag tells FFmpeg to pass the streams through untouched, so it won't waste time re-encoding tracks that already share the same AAC codec. For the full request schema, auth headers, and what the response looks like, check the RenderIO FFmpeg command API documentation.
Heads up: If your files have different codecs, sample rates, or channel layouts, normalize them before attempting a stream copy. The concat demuxer won't fix mismatched inputs — it'll just error out.
Track Processing Progress
Your app can poll the job status or set up a webhook to get notified when rendering finishes. Webhooks make sense for upload-triggered workflows where you don't want to keep pinging an endpoint. Polling works fine for a quick dashboard check or a one-off script.
Once the job completes, RenderIO hands back a signed URL for the output file. Your application downloads it or passes it along to the next stage in the pipeline. Automatic retries, idempotent requests, and full stderr logs mean failures don't slip through silently.
RenderIO Integration Options
Here's how different platforms fit into an automated audio processing workflow:
| Platform | Integration Type | Best For |
|---|---|---|
| n8n or Zapier | Visual workflow builder | Triggering concatenation after file uploads |
| Make or Pipedream | HTTP + webhook chaining | Connecting RenderIO to existing data pipelines |
| Custom application | Direct API calls | Programmatic batch processing |
A real example: a podcast platform collects uploaded segments from contributors, generates the inputs.txt manifest, fires off a single RenderIO job, and alerts the editor when joined.m4a is ready for review. No terminal commands, no babysitting FFmpeg processes — just the same concat syntax you already know, running in the cloud.
A successful FFmpeg exit code doesn't mean much until you've actually listened to the output. Play through joined.m4a from start to finish, zeroing in on each transition point. Listen for abrupt cuts, silence gaps, clicks, missing segments, or volume jumps — the kind of things a green terminal won't catch.
Then run ffprobe to inspect the technical details:
ffprobe -v error -show_entries format=duration:stream=codec_name,sample_rate,channels joined.m4a
Match the reported duration against the sum of your source file lengths. Small discrepancies are normal — encoder padding accounts for those. But a big gap is a red flag, pointing to a corrupted input, wrong list order, or stream parameters that didn't line up.
Tracking Down Common Join Errors
Before you rebuild the whole thing, check these usual suspects:
- Output file won't open: Every source needs to be a valid M4A container, and the destination folder has to allow writes.
- FFmpeg throws a safe-file error: Double-check
inputs.txtsyntax and keep-safe 0in the command if you're referencing files with broader paths. - Glitches between tracks: Run
ffprobeon each source and compare codec, sample rate, channels, and channel layout. - Duration comes up short: Filenames probably aren't quoted correctly, or one of the listed files doesn't actually exist.
Best practice: Don't delete anything yet. Keep the originals, normalized intermediates, manifest file, and FFmpeg error logs until the final file passes both playback and metadata checks.
When your source files don't match, normalize them to identical AAC settings before running concat again. Targeting 44,100 Hz also sidesteps compatibility headaches on players that choke with higher sample rates — something noted in this Sonos community discussion on hi-res M4A playback issues.
For automated workflows, always capture FFmpeg's stderr output. Otherwise failures just silently produce a truncated or empty file, and you'll have no clue what went wrong.
Can I Join M4A Files with Different Sample Rates?
Yes, but you'll want to normalize them first. Convert each track to matching settings—44,100 Hz, stereo AAC is a safe bet—then run the concat demuxer. Skipping this step is how you end up with gaps, glitches, or files that simply won't play back. This Sonos community thread documents some of the playback failures people have hit with unsupported high sample rates.
Does FFmpeg Re-encode M4A Files?
Not if you use -c copy. That flag tells FFmpeg to pass the streams through untouched—no decoding, no re-encoding, no quality loss. It's also fast.
ffmpeg -f concat -safe 0 -i inputs.txt -c copy joined.m4a
The catch: every input needs to share the same codec, sample rate, channel layout, and stream structure. If anything differs, the demuxer will fail.
What's the Fastest Way to Join M4A Files?
Write an ordered inputs.txt file listing each source, then run the concat command above. For files that are already in the same format, nothing's quicker since there's no decoding or re-encoding happening.
Tip: Run
ffprobeon every source before joining. It takes five seconds and saves you from cryptic errors halfway through a batch.
How Can I Automate M4A Joining?
RenderIO lets you send the same FFmpeg command through its REST API. You can poll for completion or set up webhooks, and the returned stderr output helps you debug failed jobs. It's built for batch uploads and plays well with automation tools like n8n, Zapier, Make, and Pipedream.
RenderIO can automate your audio processing pipeline. Start with RenderIO.