How do you generate a thumbnail that represents the video, survives a tiny mobile feed, and gives you enough evidence to improve the next version, rather than just exporting the first available frame?
That question exposes the weakness in most thumbnail tutorials. A screenshot is easy. A repeatable thumbnail pipeline is harder. You need to identify a useful moment, extract it without unnecessary quality loss, format it for the destination, and connect the result to click-through rate and watch-time data. For a single video, that might mean one FFmpeg command. For a content operation, it means automation, naming conventions, variant generation, and testing.
This guide treats thumbnail creation as a production problem. You'll learn how to select better timecodes, use FFmpeg for precise extraction, prepare images for horizontal and vertical platforms, automate jobs through an API, and evaluate whether a technically clean frame earns attention.
Table of Contents
- Why Your First Frame Is Usually the Wrong Choice
- Generating Thumbnails with FFmpeg Commands
- Sizing and Format Guidelines for Different Platforms
- Automating Thumbnail Generation with RenderIO
- Understanding Thumbnail Performance and A/B Testing
- Common Pitfalls and How to Avoid Them
- Final Recommendations for a Robust Workflow
Why Your First Frame Is Usually the Wrong Choice
You export a video, open the image, and find a black screen, a fade-in, or a title card with no useful visual information. The file is valid, the command worked, and the thumbnail is still a poor choice.
That happens because the first frame is a technical default, not an editorial decision. Video openings often contain animation, camera movement, an intro logo, or a transition before the host, product, or action becomes visible. A viewer scanning a feed doesn't know that the interesting moment arrives later. They judge the image in front of them.
Find the visual promise before extracting
Start by identifying the frame that communicates the video's promise without requiring playback. For a tutorial, that might be the finished interface or the result after a transformation. For an interview, it may be a clear expression from the guest. For a product demonstration, choose the moment where the product is visible and the outcome is obvious.
Scrubbing manually is often faster than trying to predict the right timestamp from the script. Note several candidate moments, not just one. A good candidate should meet three tests:
- Subject clarity: The main person, object, or screen is immediately identifiable.
- Low motion: Faces and important edges aren't blurred by movement.
- Topic alignment: The image supports the title instead of promising a different video.
A representative frame doesn't need to be the most dramatic frame in the source. It needs to make the viewer understand what they'll get after clicking. A technically sharp image of the wrong moment can underperform a simpler frame that makes the subject and benefit obvious.
Use timecodes as editorial metadata
Store the selected timestamp with the source filename, video title, and platform destination. That small habit prevents a common batch-processing failure: generating every thumbnail from a fixed offset even though videos have different intros and pacing.
For a first pass, extract candidates around the point where the main content begins, then inspect them at the actual display size. A frame that looks excellent at full resolution may become unreadable when reduced, especially if the subject is small or the background contains competing detail. Thumbnail generation starts with selection, not rendering.
Generating Thumbnails with FFmpeg Commands
FFmpeg gives you direct control over seeking, filtering, output format, and batch processing. Install it through your operating system's package manager, then confirm that the executable is available:
ffmpeg -version
For a single frame at a chosen point, use:
ffmpeg -ss 00:00:08 -i input.mp4 -frames:v 1 -q:v 2 thumbnail.jpg
-ss sets the seek position, -i specifies the input, and -frames:v 1 stops after one video frame. With JPEG output, -q:v 2 requests high visual quality. Lower quality values generally preserve more detail in FFmpeg's JPEG workflow, but you should inspect the resulting file rather than trust the flag alone.
The position of -ss affects the trade-off between speed and precision. Placing it before -i usually seeks quickly to an approximate location. Placing it after the input can seek more accurately, but may decode more of the file:
ffmpeg -i input.mp4 -ss 00:00:08 -frames:v 1 -q:v 2 thumbnail-accurate.jpg
For most editorial thumbnail work, fast seeking followed by visual inspection is practical. If the selected frame falls just before or after the desired moment, use the accurate form or adjust the timestamp.
Apply filters during extraction
You can resize and convert pixel format in the same command:
ffmpeg -ss 00:00:08 -i input.mp4 \
  -vf "scale=1280:720:force_original_aspect_ratio=decrease,pad=1280:720:(ow-iw)/2:(oh-ih)/2,format=yuv420p" \
  -frames:v 1 -q:v 2 thumbnail-1280.jpg
This keeps the image inside a 1280 by 720 canvas without stretching it. The pad filter adds space where the source aspect ratio doesn't match, while format=yuv420p improves compatibility with common image and video workflows.
To generate a frame every five seconds, use:
ffmpeg -i input.mp4 -vf "fps=1/5,scale=1280:-2" -q:v 2 candidates-%03d.jpg
This creates sequential files such as candidates-001.jpg and candidates-002.jpg. It's useful for reviewing a long video quickly, but it may capture transitions or motion blur. For a contact sheet, generate candidates first, then combine them with ImageMagick:
montage candidates-*.jpg -thumbnail 320x180 -tile 4x -geometry +8+8 sprite.jpg
If you want a command reference focused specifically on frame extraction, the FFmpeg thumbnail guide provides another practical starting point.
Choose copying or re-encoding deliberately
Thumbnail extraction doesn't re-encode the entire video. FFmpeg decodes the required frames and encodes the output image. That makes a single-frame job lightweight, but filters still add processing because FFmpeg must transform the decoded image.
For a batch folder on macOS or Linux:
for file in videos/*.mp4; do
  name=$(basename "$file" .mp4)
  ffmpeg -ss 00:00:08 -i "$file" -frames:v 1 -q:v 2 "thumbs/${name}.jpg"
done
On Windows PowerShell:
Get-ChildItem .\videos\*.mp4 | ForEach-Object {
  $output = ".\thumbs\" + $_.BaseName + ".jpg"
  ffmpeg -ss 00:00:08 -i $_.FullName -frames:v 1 -q:v 2 $output
}
The fixed timestamp is only a starting point. Production scripts should read per-video timestamps from a manifest or metadata file, because a single offset won't represent every edit equally well.
Sizing and Format Guidelines for Different Platforms
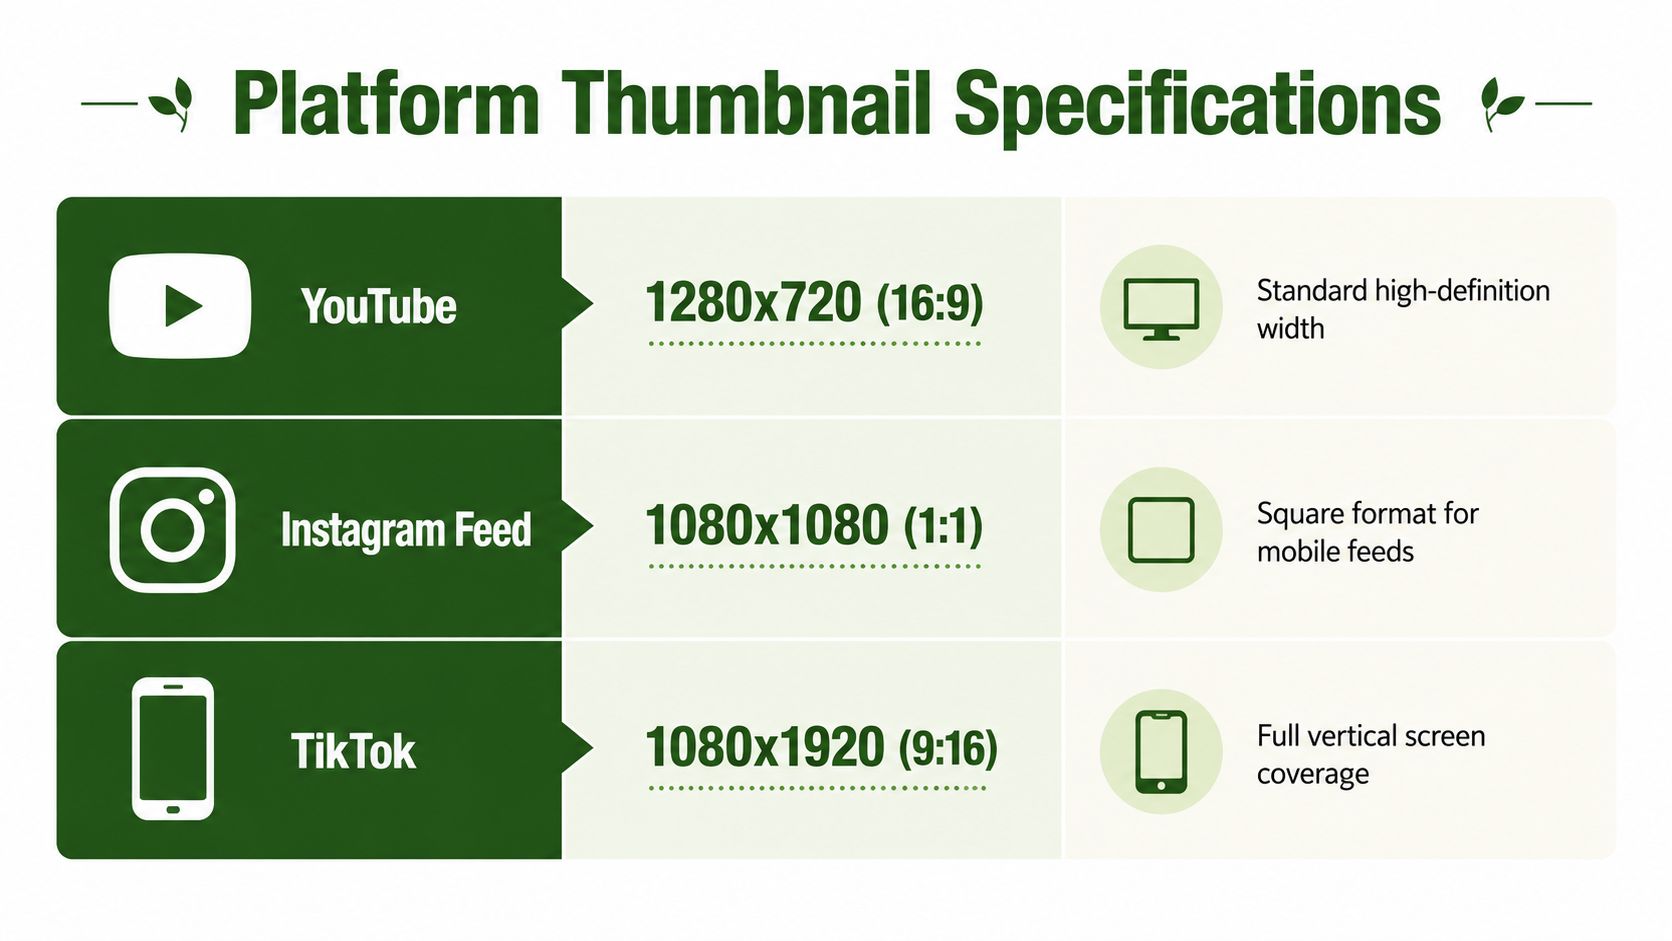
A thumbnail can be well composed and still fail because the canvas is wrong. Long-form YouTube content generally uses a 16:9 layout, while vertical short-form content needs a 9:16 composition. Instagram surfaces may use square or vertical presentation depending on the placement, so create the asset for the destination rather than assuming one master image will work everywhere.
Match the canvas to the viewing context
For a standard YouTube thumbnail, a 1280 by 720 canvas is a practical target. For vertical video, use a 1080 by 1920 canvas when the platform expects full-screen portrait content. A square 1080 by 1080 version can suit Instagram feed placements, but it may crop a horizontal composition aggressively.
Use FFmpeg to create a vertical version without distortion:
ffmpeg -ss 00:00:08 -i input.mp4 \
  -vf "scale=1080:1920:force_original_aspect_ratio=increase,crop=1080:1920,format=yuv420p" \
  -frames:v 1 -q:v 2 thumbnail-vertical.jpg
This fills the portrait canvas and crops the excess. The important trade-off is composition. A centered subject may survive the crop, while a person positioned at the edge may lose their face or the product detail. For that reason, platform-specific extraction or reframing is more reliable than resizing a finished horizontal thumbnail.
For additional guidance on vertical assets, use this Instagram Reels video format reference.
Keep text and detail readable
Mobile viewers often see a thumbnail at a small physical size. Long sentences, thin fonts, and subtle background elements disappear quickly. A low-text design with one dominant subject usually survives reduction better than a collage of small objects.
JPEG is generally suitable for photographic frames and keeps file sizes manageable. PNG works better when you need transparency, crisp interface elements, or graphic overlays, but it can produce larger files. Export both when necessary, then compare them at the final display size. The goal isn't maximum source quality. It's clear recognition after compression and reduction.
Automating Thumbnail Generation with RenderIO
A local FFmpeg command is enough for one file. It becomes awkward when uploads arrive continuously, source videos live in cloud storage, and several platforms require separate crops. At that point, treat thumbnail extraction as a job in a pipeline:
- Receive the source video and metadata.
- Select one or more timecodes.
- Submit extraction commands.
- Store the returned image with a deterministic filename.
- Send the result to review or publication.
- Record the job status and any FFmpeg errors.
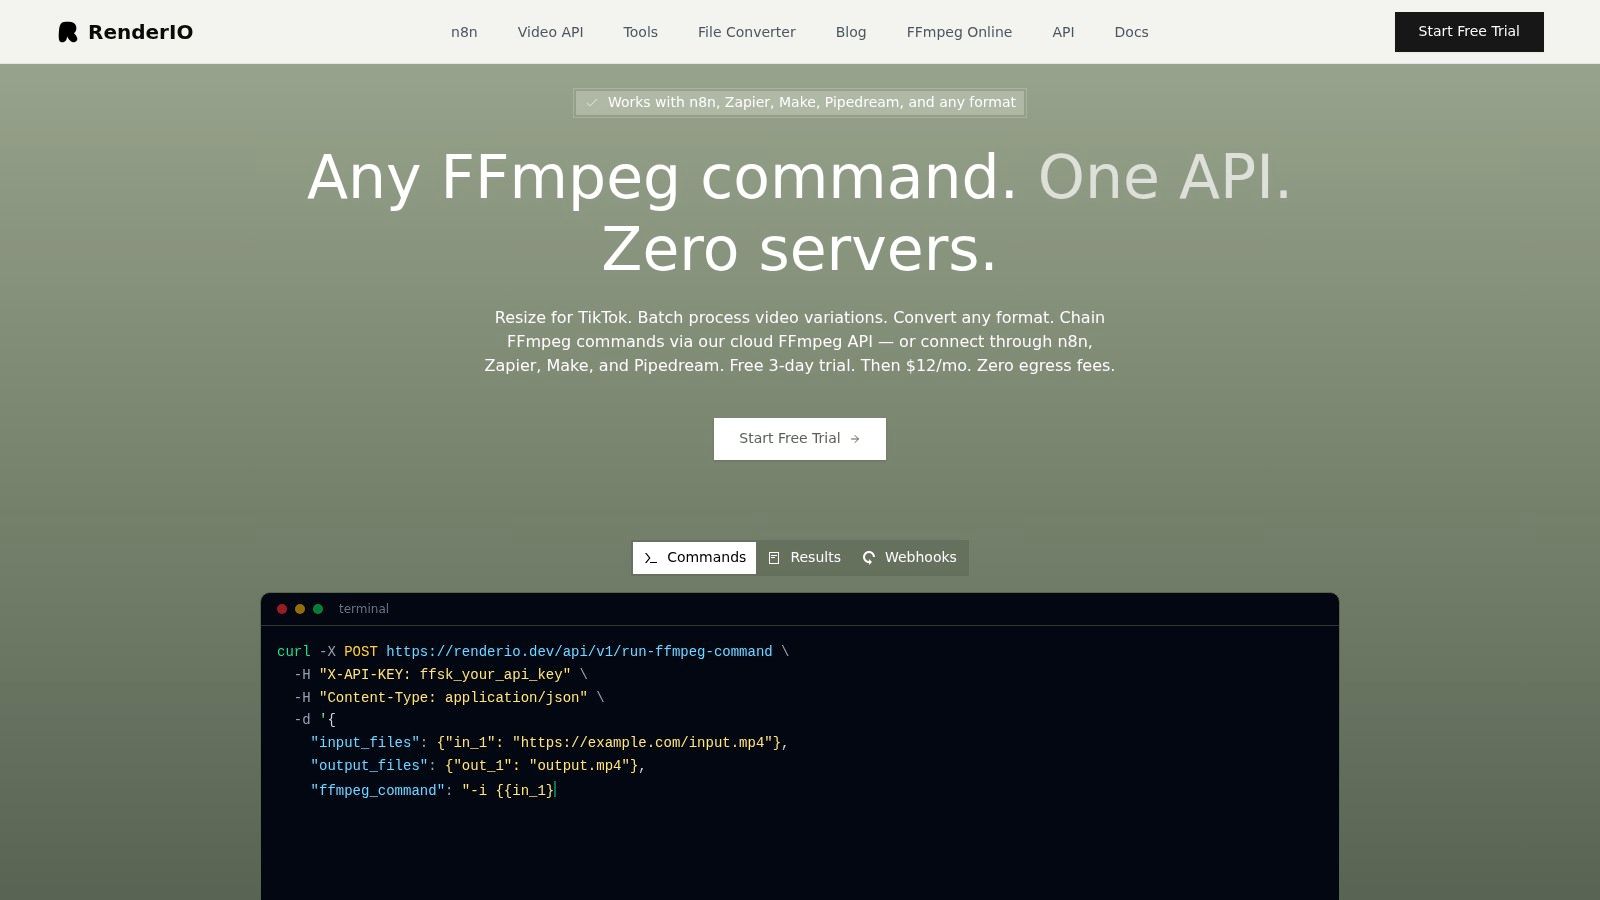
RenderIO accepts FFmpeg commands through a REST API, so the same extraction logic can run without maintaining your own worker process. Its documented thumbnail generation workflow is useful when you want to turn a local command into an automated job.
Submit commands with metadata
The exact request shape depends on the API endpoint and authentication setup, but the payload should contain more than an input URL and a command. Include the source identifier, requested platform, timestamp, output filename, and an idempotency key. That makes retries safer and helps you trace a thumbnail back to the original video.
A command passed to the service can use the same structure as your local test:
ffmpeg -ss 00:00:08 -i input.mp4 -frames:v 1 -q:v 2 thumbnail.jpg
For multiple variants, submit separate jobs or chain commands according to the workflow you need. A horizontal output and a vertical output shouldn't share a crop assumption just because they originate from the same frame. Keep the timecode consistent where the subject works in both formats, but allow a different crop or selected moment when the composition demands it.
A webhook is preferable to constant polling when your system already reacts to asynchronous events. On completion, your workflow can save the signed output URL, update a content record, and notify a reviewer. If a job fails, preserve the returned FFmpeg stderr. An error such as a missing stream, invalid filter, or inaccessible input is much easier to fix when the original diagnostic is available.
This walkthrough shows the broader pattern of sending media commands to a remote service:
Design the batch workflow around review
Automation shouldn't publish every extracted frame blindly. Generate a small candidate set, attach the source timestamp to each output, and place the images in a review queue. A human can reject black frames, awkward expressions, and misleading moments faster than a complicated visual-quality model can be built.
For no-code operations, n8n or Zapier can receive a new video event, call the rendering endpoint, and forward the output to cloud storage or a content database. For engineering teams, a queue-backed service can parallelize jobs, retry transient failures, and maintain a manifest of generated variants. The key design choice is to separate rendering from approval. FFmpeg can produce the file. It can't decide whether the image makes an honest promise about the video.
Understanding Thumbnail Performance and A/B Testing
A generated image is only a hypothesis about what viewers will click. YouTube defines thumbnail impressions click-through rate as how often viewers watched a video after seeing its thumbnail, and recommends checking it under Analytics, then Reach, with the first 24 hours serving as a useful diagnostic window for general audiences in YouTube Studio's analytics guidance.
Industry guidance commonly places average YouTube CTR around 3% to 4%, while strong performance is often 5% to 7% or higher, according to independent thumbnail performance analysis. A change from 4% to 6% represents a 50% relative increase in clicks when impressions remain constant, so a small visual improvement can matter even without additional distribution.
Diagnose before redesigning
Compare CTR by traffic source. Home and Suggested impressions behave differently from Search, and mixing them can make a thumbnail appear stronger or weaker for reasons unrelated to the image. If the title attracts the wrong audience, replacing the thumbnail alone won't repair the mismatch.
YouTube's Test & Compare capability makes multiple-thumbnail experiments part of the platform workflow. For a meaningful comparison, one recent guide notes that creators often need roughly 1,000 impressions per variant before drawing a conclusion, as explained in this Test & Compare overview. Treat that as a practical threshold, not a universal guarantee of certainty.
Test the variables you can control
Change one major visual idea at a time. Test a close face against a product detail, a clean background against a busy one, or a short promise against no text. Independent analysis of 500 breakout videos found that 69% featured at least one human face, 56% used high-contrast color, and 89% used one or both, while overlay text had a median of five words, as reported in this thumbnail design analysis.
Don't optimize CTR in isolation. A thumbnail can earn curiosity clicks and still disappoint viewers if the video doesn't deliver the visual promise. Pair click data with watch-time quality and audience retention before declaring a design the winner.
Common Pitfalls and How to Avoid Them
The most common failure isn't a broken command. It's a valid output that represents the wrong moment.
A timestamp can land during a camera move, leaving a face soft and a product half-hidden. Extract nearby frames and compare them side by side. If the source uses a fade or fast transition, move beyond the transition instead of trying to rescue a blurred image with sharpening.
Local FFmpeg and cloud rendering
Local FFmpeg gives you immediate control, predictable command-line behavior, and easy debugging on files already stored on your machine. It's the right fit for development, one-off jobs, and pipelines where you already operate workers.
A cloud service reduces the operational burden when videos arrive from external systems or when several users need processing at once. You trade local control for API coordination, credentials, job monitoring, and output handling. Choose based on where the source files live and who owns the queue, not on image extraction alone.
Color handling causes another quiet problem. A thumbnail may look washed out when a source uses an unusual transfer characteristic or when a downstream tool interprets color metadata differently. Add an explicit pixel format when compatibility matters:
ffmpeg -ss 00:00:08 -i input.mp4 \
  -vf "format=yuv420p" \
  -frames:v 1 -q:v 2 thumbnail.jpg
This doesn't correct every color-management issue, but it creates a broadly compatible output. Also avoid selecting an average frame from a fast scene. An algorithm can find a mathematically representative image that contains motion blur, closed eyes, or an unhelpful transition.
Final Recommendations for a Robust Workflow
Build the process in this order:
- Inspect the video. Mark moments where the subject and result are clear.
- Extract candidates. Use FFmpeg with
-ssand-frames:v 1, then review nearby frames when motion is present. - Create destination versions. Preserve the intended composition for 16:9, square, or 9:16 outputs instead of stretching one master.
- Keep the visual system simple. Use one dominant subject, strong contrast, and only the text needed to add information beyond the title.
- Automate repeatable work. Pass tested FFmpeg commands to a local worker or API, attach metadata, and preserve error logs.
- Review before publishing. Reject technically valid frames that make a weak or misleading promise.
- Measure the outcome. Compare CTR by traffic source and consider watch-time quality before adopting a variant.
The technical command is only one part of how to generate thumbnail assets well. The reliable workflow connects timecode selection, image processing, platform formatting, review, and measurement. Once those steps are explicit, you can improve the system instead of repeatedly fixing the same black frames, bad crops, and unreadable overlays.
RenderIO lets you run FFmpeg-based thumbnail extraction through a cloud API, with outputs suitable for automated video workflows and batch processing. Test your local command first, then move the repeatable job into RenderIO and connect it to the systems that receive, review, and publish your videos.