Changing an image's DPI field to 300 doesn't automatically make it sharper. That popular shortcut changes how software interprets the file's physical print size, but it doesn't create missing detail. Question is whether the image contains enough pixels for the dimensions you want to print.
To answer how do I make an image 300 DPI, start with the print size, calculate the required pixel dimensions, and only then choose between a metadata update, genuine resampling, or an upscaling workflow. That order prevents the most common production mistake: sending a technically labeled file to print even though its pixel count is too small.
Table of Contents
- The Pixel Math Behind 300 DPI Printing
- Adjusting Resolution in Photoshop and GIMP
- Command Line Automation with ImageMagick and FFmpeg
- Resampling Pixels Versus Rewriting Metadata
- Evaluating Online Converters and AI Upscalers
- Choosing the Right Workflow for Your Print Project
The Pixel Math Behind 300 DPI Printing
300 DPI is a relationship between pixels and physical size, not a quality setting that adds detail to an image. Calculate the required pixel dimensions from the finished print size:
Required pixel width = print width in inches × 300
Required pixel height = print height in inches × 300
A 10-inch by 10-inch print therefore requires 3,000 by 3,000 pixels at 300 DPI, as explained in this print resolution guide from PrintNinja. An 8 by 10 inch print requires 2,400 by 3,000 pixels, while a 4 by 6 inch photo requires 1,200 by 1,800 pixels, according to this practical resolution guide.
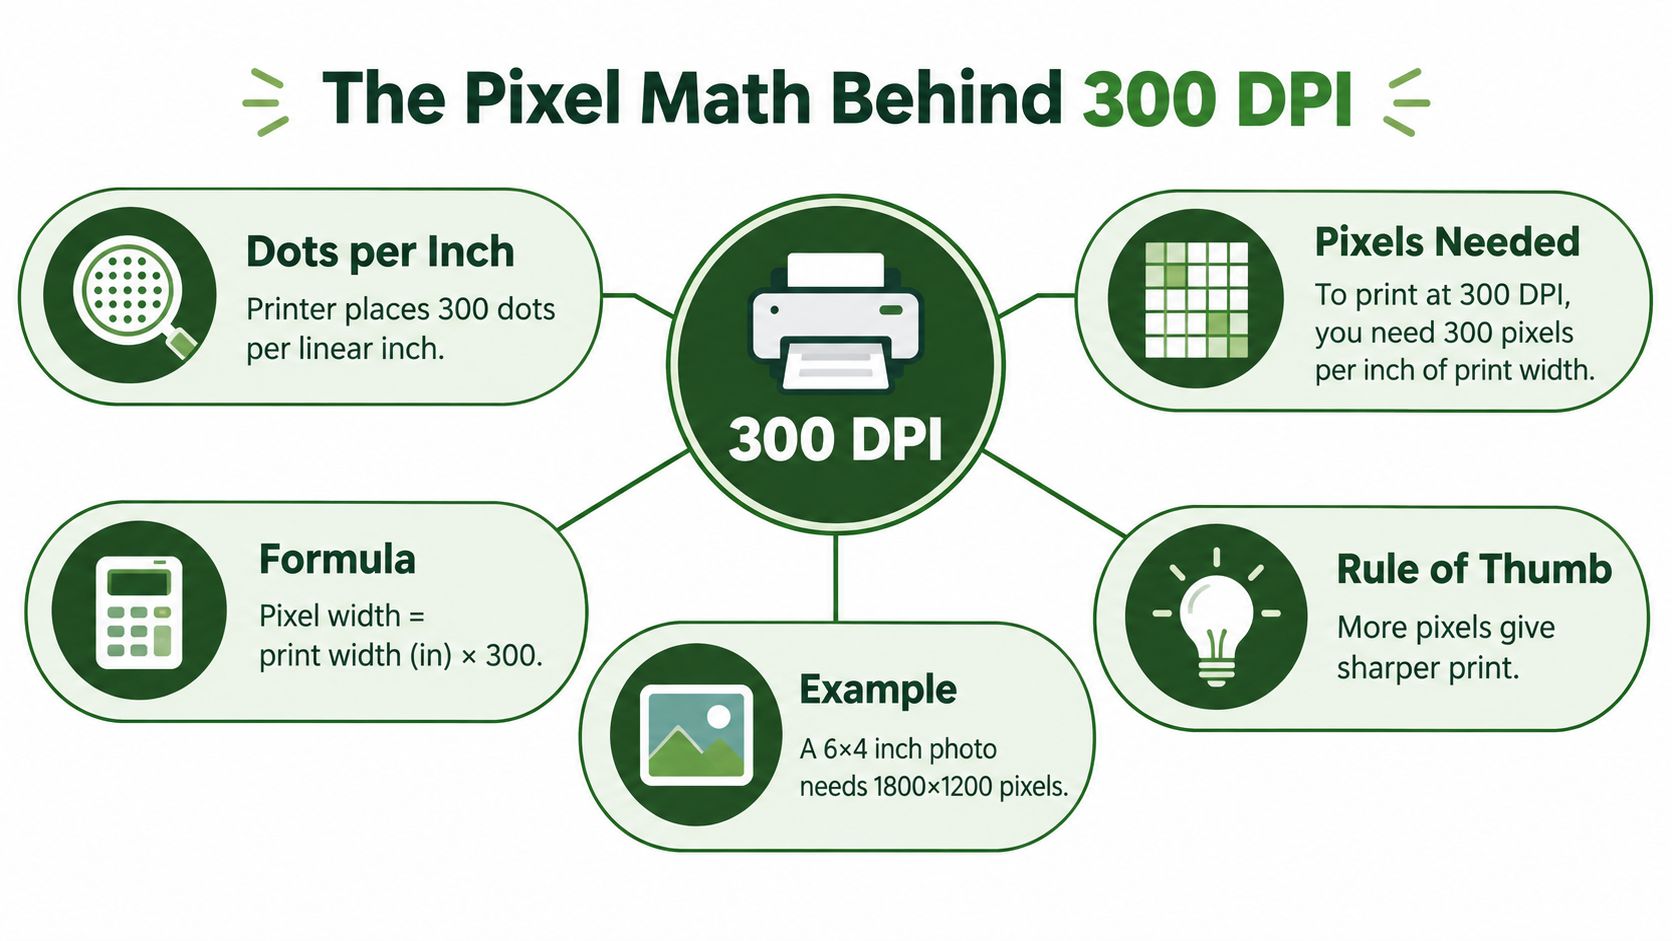
For a source image measuring 2,400 by 3,000 pixels and a target of 8 by 10 inches, the pixel count already matches the 300-pixel-per-inch requirement. Changing the resolution metadata can set the intended document size, provided the pixel dimensions and aspect ratio remain unchanged.
Practical rule: Calculate the pixel requirement before opening Photoshop, GIMP, or an online converter.
PPI is the more precise term for an image file because it describes pixels per inch. Printers convert those pixels into their own dot patterns, which is why print workflows often use DPI and PPI interchangeably. The production constraint is unchanged: divide the pixel dimensions by the intended resolution to find the physical print dimensions.
Screen labels create a separate source of confusion. HD or 4K describes display dimensions, not whether an image contains enough pixels for a particular sheet or product. This guide to the difference between 4K and HD clarifies that distinction.
300 DPI works well as a default for photographs, fine-art prints, and standard products viewed at close range. At that viewing distance, the printed dots are typically too small to distinguish. Larger graphics, posters, and signage can use a lower resolution because viewers stand farther away, so the correct target depends on both final dimensions and viewing distance. When producing files in bulk, developers can apply the same width and height formulas in a script, validate each source against the target, and flag undersized images before an editor or converter processes them.
Adjusting Resolution in Photoshop and GIMP
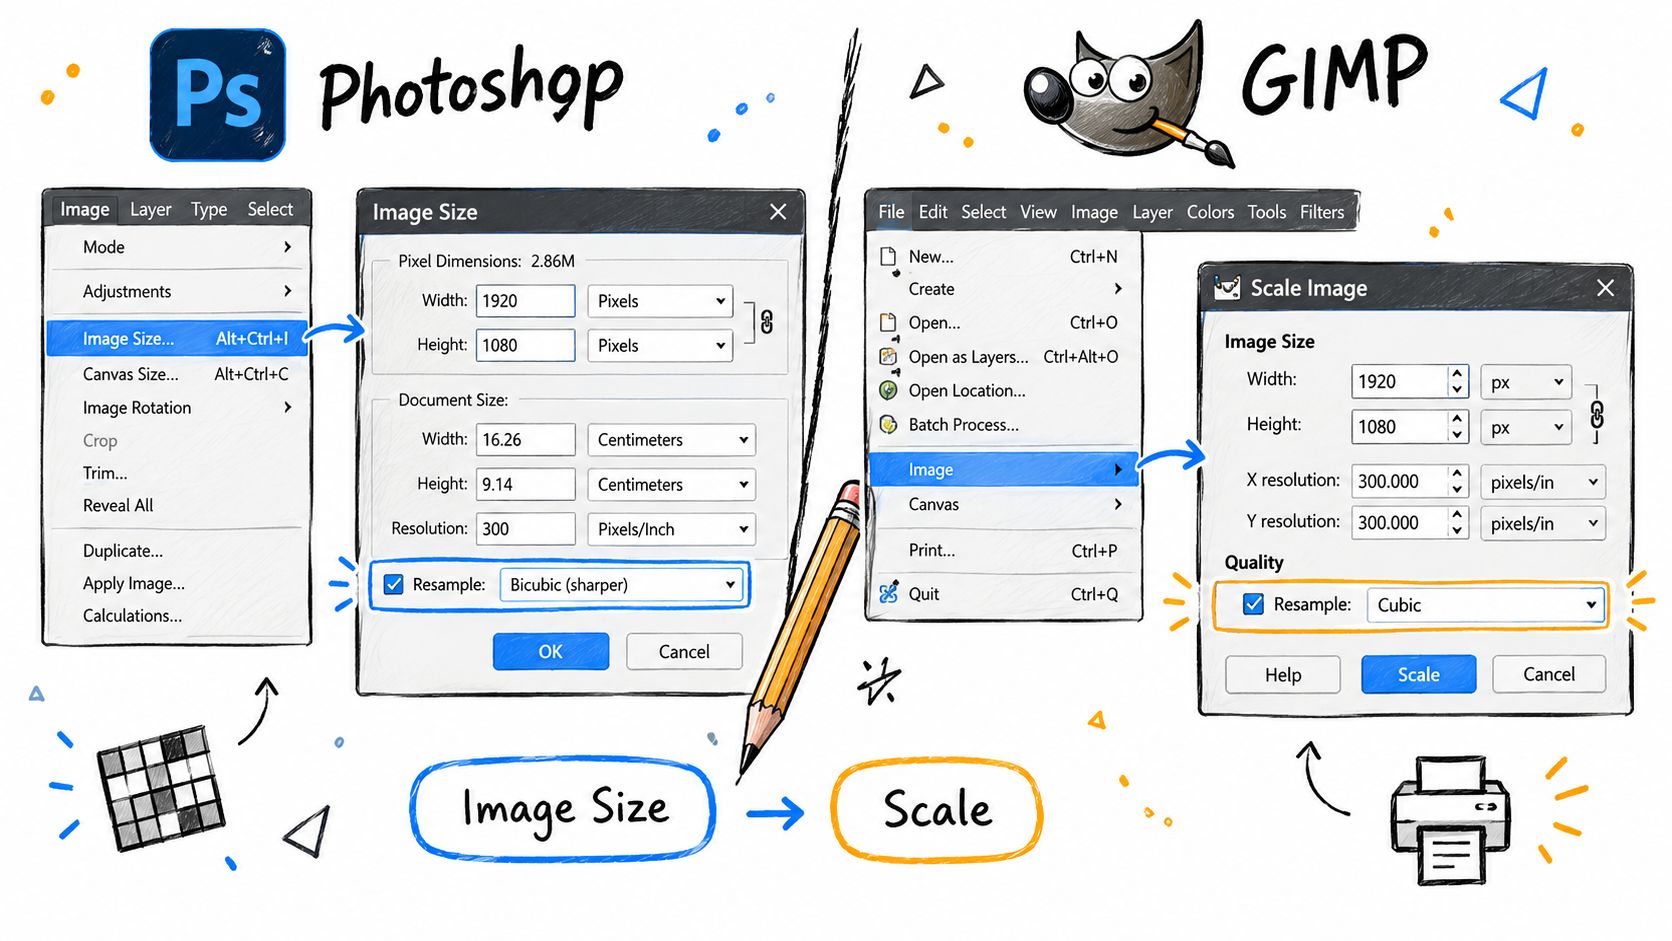
Photoshop gives you the clearest control because its Image Size dialog separates physical dimensions, resolution, and pixel resampling. Open the file, choose Image > Image Size, and inspect the pixel dimensions before changing anything.
Photoshop without adding pixels
If the image already has enough pixels for your print, turn Resample off. Enter 300 pixels/inch in the Resolution field. Photoshop will update the physical width and height while leaving the pixel dimensions unchanged.
This is the safe choice when the source image is already large enough but carries an unsuitable resolution tag. You aren't improving the image, but you are assigning its existing pixels to the correct physical output size.
If you need to preserve a specific physical size and the pixel dimensions fall short, turn Resample on. Enter the target print dimensions and resolution together, then choose an enlargement method designed for the image type. Upsampling invents intermediate pixels through interpolation. It can produce a more usable file, but it can't recover detail that the camera or original scan never captured.
GIMP's two separate controls
In GIMP, choose Image > Print Size to change the X and Y resolution metadata without changing the pixel dimensions. Set both resolution values to 300, confirm the physical size, and save a copy.
Use Image > Scale Image only when you need to alter the actual pixel count. That dialog lets you enter new pixel dimensions and select an interpolation method. Preserve the aspect ratio unless the design intentionally requires cropping, because stretching width and height independently distorts people, logos, and geometric artwork.
The workflow is simple:
- Inspect pixels: Compare the current dimensions with the calculated requirement.
- Choose Print Size: Use this for a metadata-only adjustment.
- Choose Scale Image: Use this when the source must be enlarged or reduced.
- Check the result: Confirm both pixel dimensions and intended physical size before export.
For a visual walkthrough of the resizing controls, review the Photoshop and GIMP resolution comparison.
Command Line Automation with ImageMagick and FFmpeg
A desktop editor works for a few files. It becomes inefficient when a service receives user uploads continuously or a print workflow needs consistent processing across a directory. Command-line tools let you separate metadata assignment from pixel resizing, then apply the chosen behavior repeatably.
ImageMagick uses -density to set resolution metadata and -resize to change pixel dimensions. To assign 300 DPI without changing the pixel count, use:
magick input.jpg -units PixelsPerInch -density 300 output.jpg
That command changes the file's resolution interpretation. It doesn't add detail. To create a file for a known print width, calculate the required pixels first and then resize to those dimensions:
magick input.jpg -units PixelsPerInch -density 300 -resize 2400x3000^ -gravity center -extent 2400x3000 output.jpg
The caret tells ImageMagick to cover the requested area before -extent crops the excess. Use that pattern only when cropping is acceptable. If the full image must remain visible, omit the caret and extent operation, then resize proportionally.
Batch processing with ImageMagick
Shell expansion can process a folder, but production pipelines should also handle naming, unsupported formats, and failures explicitly. A simple loop might look like:
for file in input/*.jpg; do magick "$file" -units PixelsPerInch -density 300 "output/$(basename "$file")"; done
That example performs a metadata-oriented conversion. It won't make undersized images printable at a larger physical size. A second pipeline can calculate or apply known target dimensions, but the decision should come from the print specification rather than a blind resize rule.
FFmpeg can also process still images, particularly when image handling already sits inside a media pipeline. A single-file command is:
ffmpeg -i input.jpg -vf "scale=2400:3000:force_original_aspect_ratio=decrease" -frames:v 1 output.jpg
FFmpeg is useful for format conversion and standardized filtering, but its scale filter still performs interpolation. It doesn't magically restore source detail. For developers building repeatable processing jobs, this FFmpeg command-line tutorial provides relevant command syntax and workflow context.
An automation job should record the original dimensions, calculate the requested output dimensions, preserve the aspect ratio unless cropping is approved, and flag files that require aggressive enlargement instead of degrading them.
Resampling Pixels Versus Rewriting Metadata
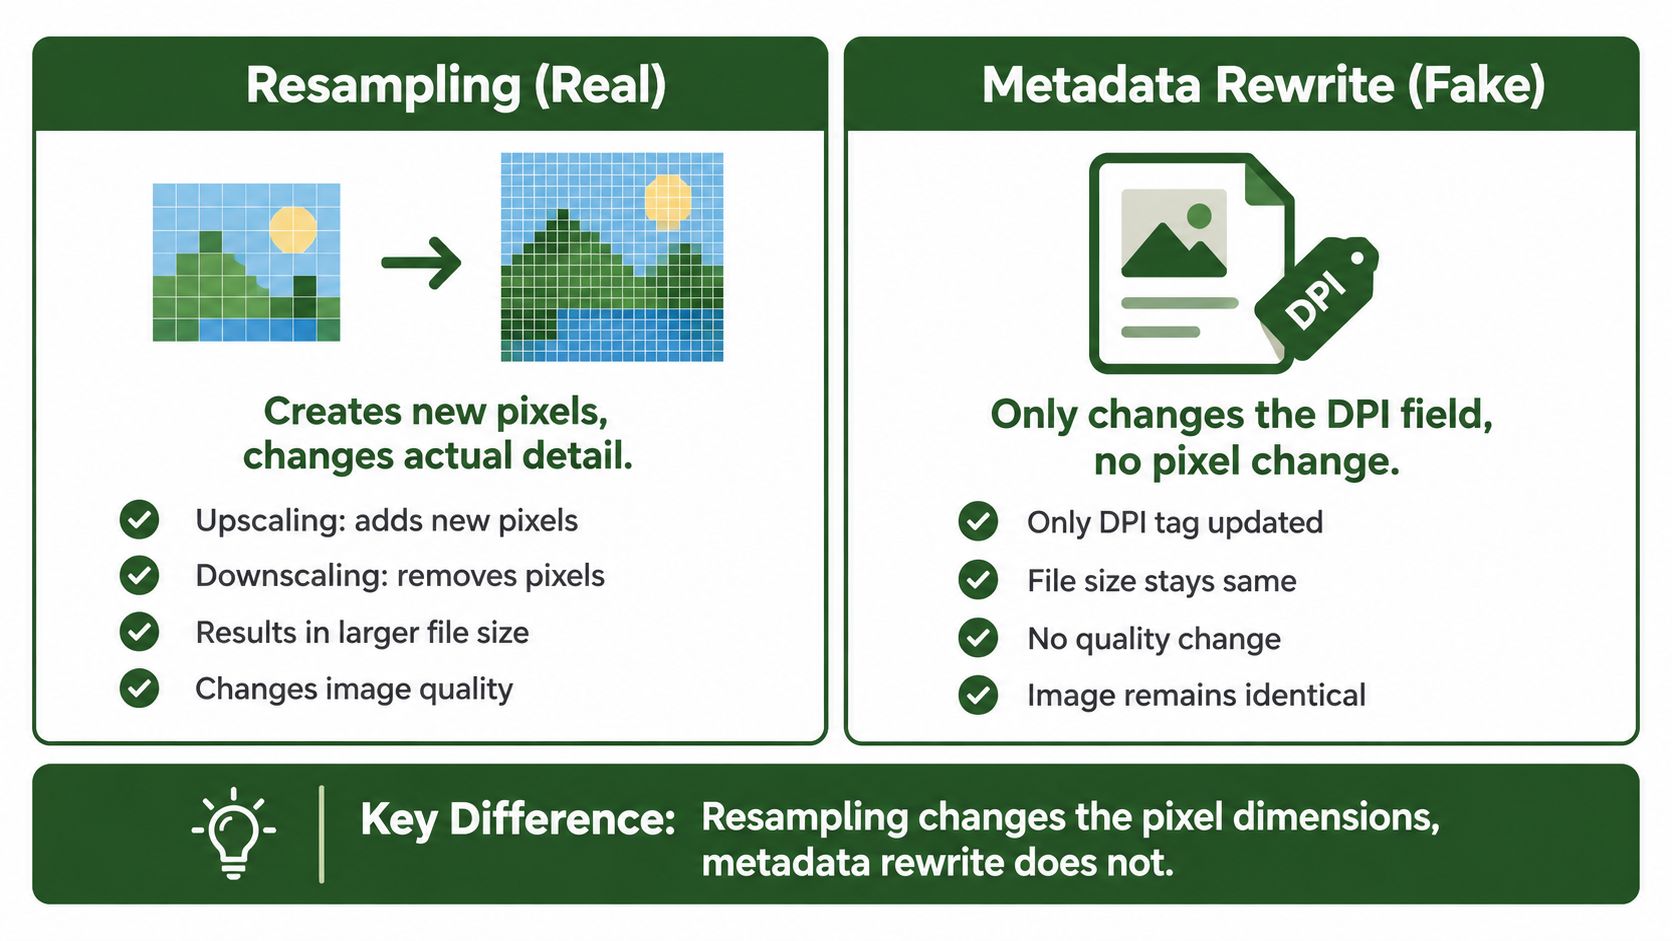
Think of an image as a rectangular grid. Metadata tells the printer how densely to map that grid onto paper. Resampling changes the grid itself. Those operations can produce similar-looking fields in an editor, but they have different consequences.
Rewriting metadata changes the DPI or PPI value while keeping the pixel dimensions identical. The file contains the same visual information, the same number of source pixels, and generally the same underlying image data. If a camera photograph already contains enough pixels for the intended print but its resolution tag is missing or unsuitable, a metadata update is appropriate.
Resampling generates a new grid. Upsampling adds pixels between existing pixels through interpolation, while downsampling removes pixels. The resulting file may have different dimensions and may occupy more or less storage, but the new pixels are calculated estimates, not newly captured detail.
The print-size test
Use the relationship print size in inches = pixels ÷ DPI. If a file is too small for the physical dimensions you've specified, changing only its DPI field won't solve the problem. It will either produce a smaller print at the desired density or force the printer to spread insufficient pixels over a larger area.
For example, a file with 1,200 pixels across can support a 4-inch width at 300 pixels per inch. It can't support an 8-inch width at that same density without resampling. The metadata can describe an 8-inch output, but it can't supply the missing image information.
The resolution field is a measurement instruction, not a detail generator.
This is why print shops may inspect both the embedded resolution and the actual pixel dimensions. A file can display “300 DPI” and still be unsuitable for the requested format. Before delivery, verify the physical size and pixel count together, not separately.
You can inspect and edit image metadata with ExifTool Online, but metadata inspection should support the pixel calculation, not replace it. When the source is insufficient, decide whether reducing the print size, accepting softer output, or using a carefully controlled upscale best matches the project.
Evaluating Online Converters and AI Upscalers
Online DPI converters fall into two very different categories. Some only rewrite the resolution tag, which is useful when the pixel dimensions are already sufficient. Others also resize the image, which means they perform actual resampling and potentially alter the image's visual quality.
Check the output, not the marketing label. Upload a copy, compare the before-and-after pixel dimensions, and inspect the downloaded file's physical size at the requested resolution. If the pixel dimensions haven't changed, the service hasn't performed a genuine upscale.
A practical evaluation checklist
- Pixel dimensions: Confirm that the output width and height meet your calculated requirement.
- Aspect ratio: Make sure the tool hasn't stretched the image to fit a box.
- Cropping behavior: Check whether edges were removed automatically.
- File format: Preserve transparency, color handling, and the format required by the printer.
- Privacy terms: Don't upload sensitive client or customer images without understanding retention and deletion practices.
- Preview quality: Inspect faces, fine lines, small text, and repeated patterns for interpolation artifacts.
AI upscalers are different from metadata converters because they use learned patterns to estimate plausible detail. They can help when the resolution gap is too large for a basic interpolation method, particularly with photographs. They can also create halos, unnatural textures, invented facial details, or distorted lettering. Those defects matter more in logos, screenshots, technical diagrams, and typography than in soft photographic backgrounds.
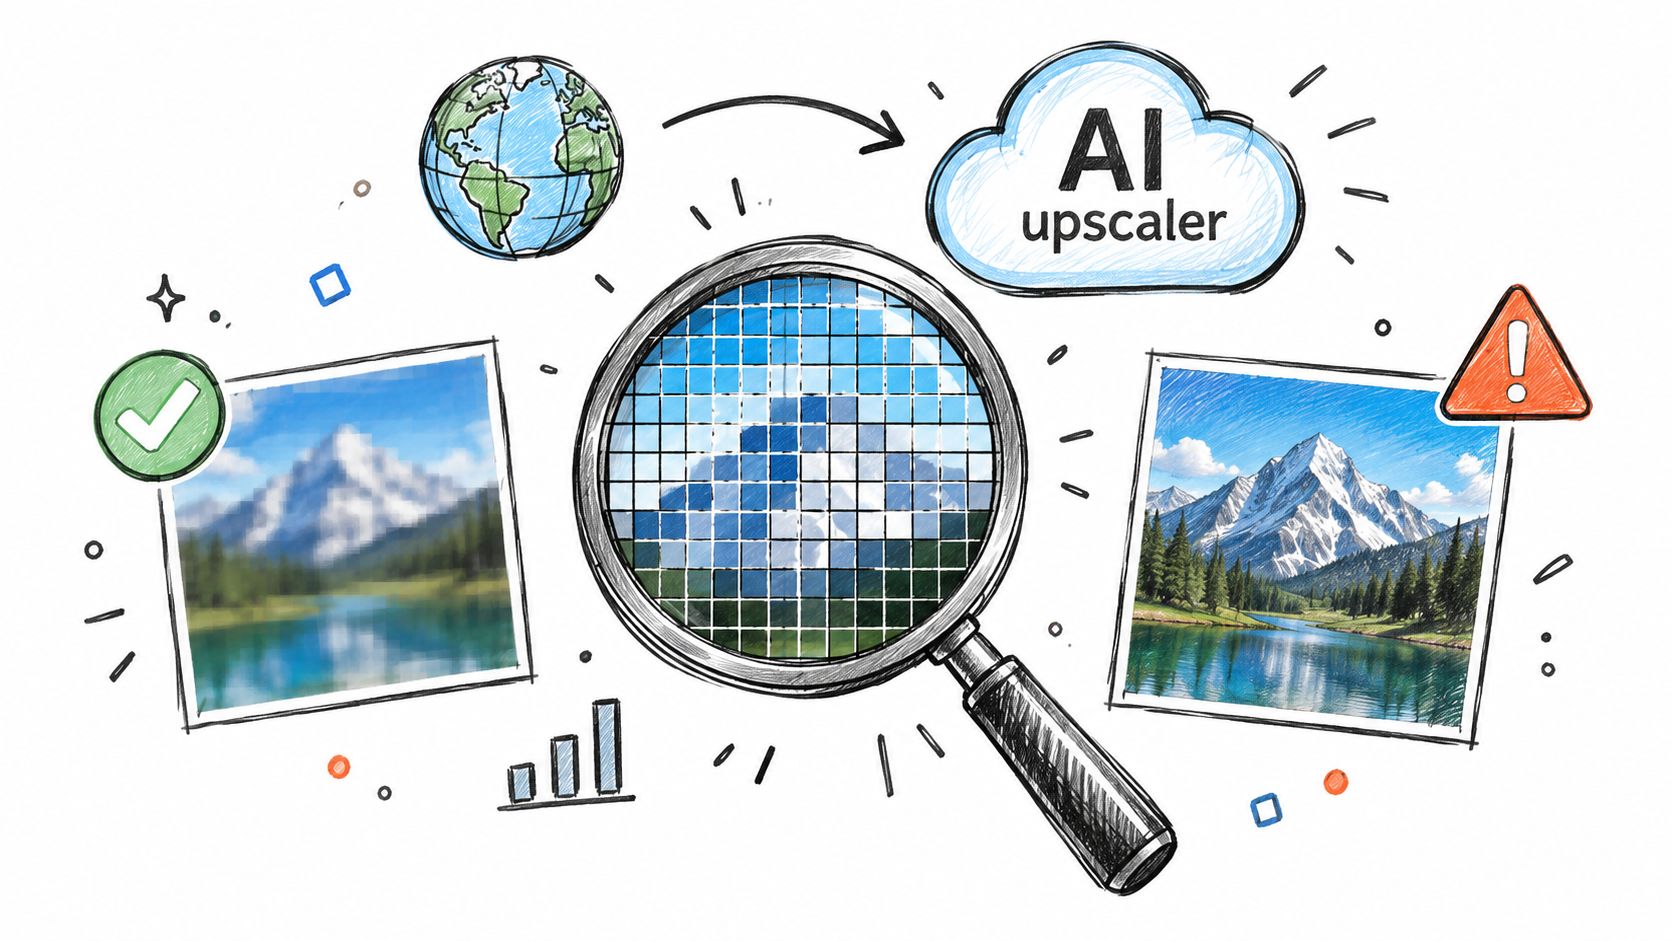
Use ordinary resampling when the gap is modest and the source is clean. Consider AI enlargement when the source is undersized and the project can tolerate estimated detail, but review the full-size output before approving it. No upscaler can turn a low-resolution original into an exact replacement for a properly captured high-resolution image.
Choosing the Right Workflow for Your Print Project
Your best method depends on pixel sufficiency, technical comfort, and processing volume.
For one photograph, calculate the target dimensions first. If the pixel count already meets the requirement, use Photoshop's Image Size dialog with Resample disabled, or GIMP's Print Size command. If it doesn't, reduce the print dimensions or make a deliberate resampling decision.
For a batch of files, ImageMagick provides repeatable local processing and clear separation between metadata updates and resizing. Developers can place the same logic behind an upload service, where the system records source dimensions, calculates target pixels, and routes borderline files for review instead of carelessly enlarging everything.
For a low-resolution web image, first ask whether the source is legally and technically suitable for print. If it is, an AI upscaler may produce an acceptable result for a forgiving photographic use, but text and logos should usually be rebuilt from vector or higher-quality originals.
Print requirements also include bleed, cropping, color, and file format. Skup's guide to design for print on demand is a useful companion when the image will be placed inside a complete product design rather than printed alone.
The reliable sequence is always the same: define the physical size, calculate pixels, inspect the source, choose metadata or resampling, then proof the output. That process works better than chasing a DPI label after the design is finished.
If you need to prepare image and media assets automatically, RenderIO lets you run FFmpeg-based transformations through an API instead of managing local processing infrastructure. Use it to build repeatable resizing and conversion workflows around uploaded assets, then validate the resulting pixel dimensions before sending files to print.