You export a video that looks clean in Premiere or Resolve. Then you upload it to Instagram and get one of three bad outcomes: the frame is cropped in the wrong place, thin text turns soft, or the whole thing picks up ugly bars you never intended.
That usually isn't one mistake. It's a chain of small mismatches between your source, your export, and the placement you chose. If you want to format video for Instagram without losing quality, stop thinking in terms of one universal file. Think in terms of placements. Reels and Stories want one canvas. Feed usually wants another. Instagram will still recompress what you upload, so the job is to give its encoder a file that survives that second pass.
I've seen this most often when teams cut one horizontal master, then try to force it everywhere. It works badly for product demos, talking-head clips, and especially for social proof content where captions, faces, and name tags matter. If you're producing customer stories, this breakdown on creating testimonial videos that convert is a useful companion read because testimonial edits fail fast when the framing isn't built for mobile.
Table of Contents
- Why Instagram Rejects or Ruins Your Video
- Instagram Video Specs by Placement Made Simple
- How to Resize Crop and Letterbox Without Guessing
- Codecs Bitrates and Settings That Survive Compression
- Automate Instagram Formatting With RenderIO and No-Code Tools
- Final Checklist Before You Hit Publish
Why Instagram Rejects or Ruins Your Video
Instagram rarely rewards lazy repurposing. A vertical file dropped into a vertical slot might upload fine, but “uploads” and “looks right” are different things.
The usual failure pattern looks like this:
- Wrong canvas: You upload a horizontal master to Reels, and Instagram scales it into a vertical player.
- Unsafe composition: Captions sit too low or too high, then the UI or crop hides them.
- Weak source export: Your file is already compressed before Instagram touches it, so the second encode makes logos, gradients, and subtitles worse.
The real problem is placement mismatch
Current Instagram guidance is heavily centered on vertical delivery. Reels and Stories are widely published at 1080×1920 in a 9:16 frame, while feed video commonly uses 1080×1350 at 4:5. Instagram Reels also accepts an aspect-ratio range from 1.91:1 to 9:16, with 720 pixels minimum resolution and 30 FPS minimum frame rate according to the spec roundup from Hootsuite's Instagram video sizes guide.
That shift matters because it changed the practical default from mixed square publishing to mobile-first vertical video. If you're still cutting one master and hoping it fits Feed, Stories, and Reels unchanged, Instagram will make framing decisions for you.
Practical rule: Export for the placement you're posting to, not the timeline you happened to edit in.
One master, multiple deliveries
A better workflow is simple. Keep a high-quality master. Then derive at least two exports from it:
- Vertical 9:16 for Reels and Stories
- Feed-first 4:5 for in-feed playback and preview
That sounds like extra work, but it's less work than fixing a post after upload. Once you adopt this mental model, FFmpeg starts making sense. You're not “converting a video.” You're creating placement-specific deliverables that preserve the same creative intent across different Instagram surfaces.
Instagram Video Specs by Placement Made Simple
Before touching FFmpeg, lock the target. Most quality problems start before encoding.
The formats that matter most
For Reels, the most reliable workflow is to build natively at 1080 × 1920 pixels in a 9:16 vertical canvas, then export as MP4 with H.264 video and AAC audio at 30 fps. That combination is the lowest-risk path because it avoids unnecessary cropping and codec surprises, as outlined in this Instagram Reels production workflow.
Feed is different. The common working size is 1080 × 1350 at 4:5. Square 1:1 and 16:9 are still supported in many placements, but if your goal is reliable in-feed presentation, 4:5 is the practical default.
For a broader creator-facing reference, this guide to short-form video specs for creators is handy. For an FFmpeg-specific workflow, RenderIO also documents Instagram Reels video format.
Instagram Placement Specs at a Glance
| Placement | Resolution and Ratio | Codec and FPS |
|---|---|---|
| Reels | 1080×1920, 9:16. Accepted range 1.91:1 to 9:16 | MP4 or MOV, H.264 is the safe baseline, 30 FPS |
| Stories | 1080×1920, 9:16 | MP4 or MOV, H.264, 30 FPS |
| Feed video | 1080×1350, 4:5 commonly used. 1:1 and 16:9 are also supported in many placements | MP4 or MOV, H.264, 30 FPS |
Why one asset often needs two exports
A lot of editors ask whether one 9:16 file can cover both Reels and Stories. Usually yes. The trouble starts when they assume the same 9:16 file will also look ideal in Feed.
Feed is where reframing matters. A vertical clip may still play, but your composition may feel cramped, your text may sit too high, and your preview can become awkward. A dedicated 4:5 export usually fixes that.
Use a simple safe-area habit:
- Keep faces centered: Don't park a speaker near the top or bottom edge.
- Keep captions inboard: Give text breathing room from all edges.
- Protect CTAs: Buttons, arrows, lower-thirds, and offer text shouldn't live near crop-prone boundaries.
If your edit contains text, compose for the center first. Edges are where Instagram and device UI start taking control away from you.
The compatibility baseline
When teams want one answer they can trust, I give them this: MP4, H.264, AAC, 30 fps, exported to the native canvas for the placement. It's boring. That's why it works.
MOV often uploads fine, but MP4 tends to create fewer surprises across tools, automation steps, and approval chains. If your pipeline includes browser uploads, cloud rendering, or no-code automations, sticking to the most common delivery baseline keeps debugging shorter.
How to Resize Crop and Letterbox Without Guessing
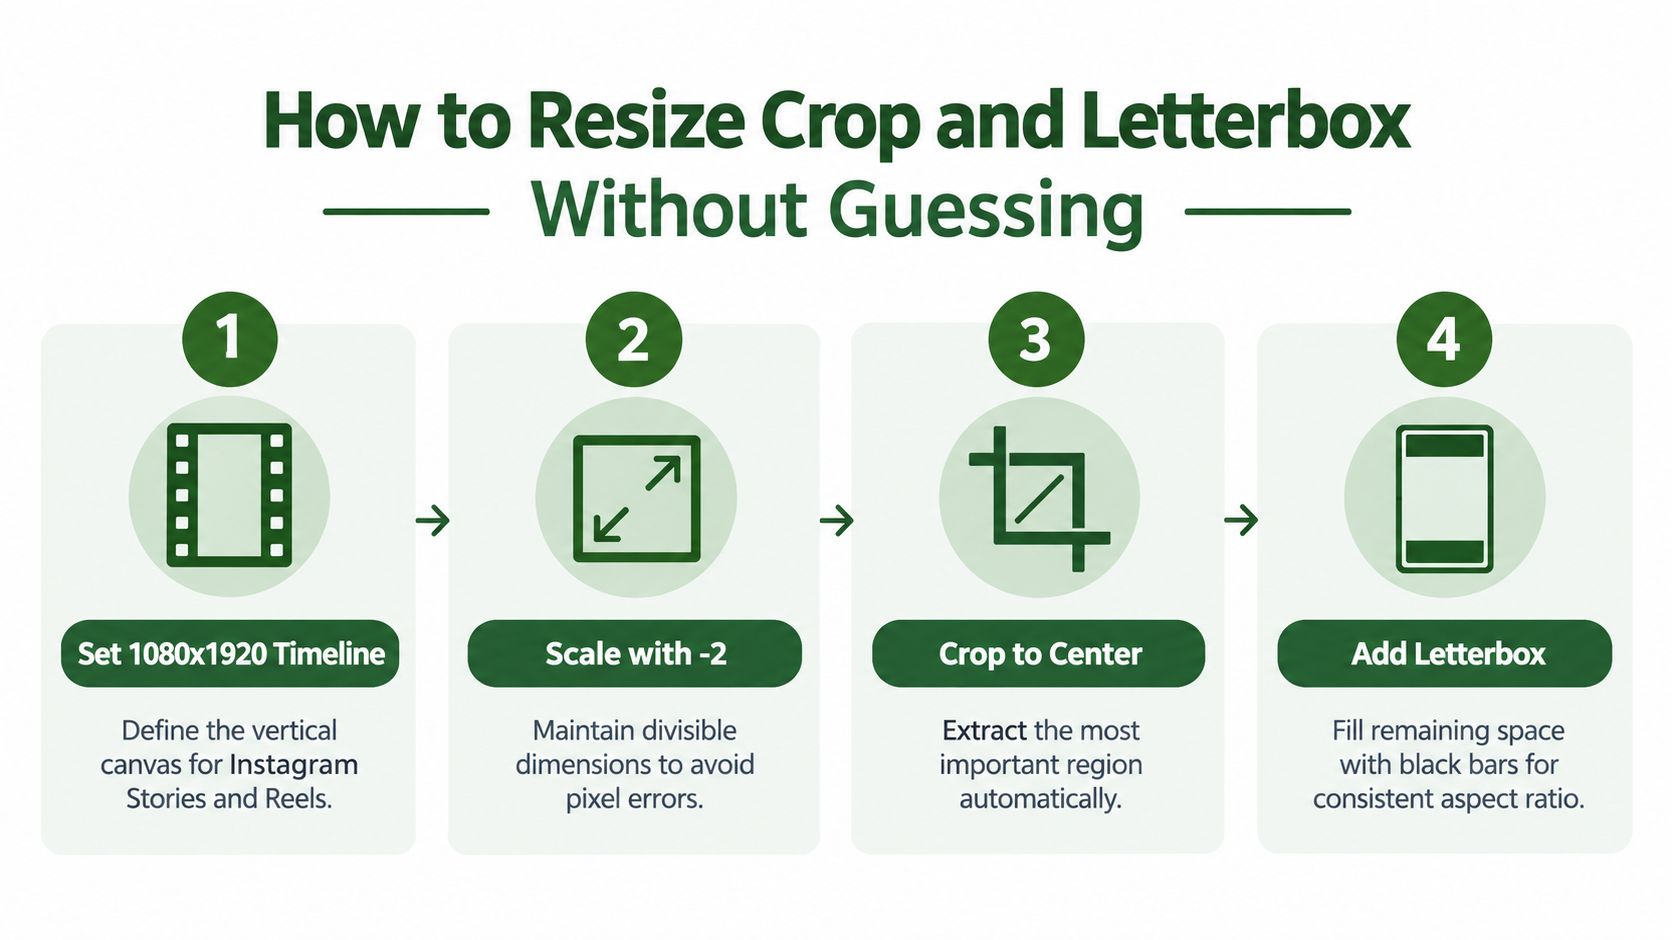
Resizing for Instagram gets easier when you separate three operations: scale, crop, and pad. Most broken exports happen because people try to solve all three with one random preset.
Here's the visual version of that workflow.
Start with a real target canvas
For Reels or Stories, your target is a 1080×1920 vertical frame. In FFmpeg, that means you either scale your source to fill that frame, crop the excess, or pad the missing area.
Here's the cleanest center-crop for a horizontal source into vertical 9:16:
ffmpeg -i input.mp4 -vf "scale=1080:-2,crop=1080:1920" -c:v libx264 -pix_fmt yuv420p -c:a aac output-reel.mp4
What that does:
scale=1080:-2sets width to 1080 and lets FFmpeg calculate height while keeping dimensions encoder-friendlycrop=1080:1920takes the centered vertical cutoutyuv420pavoids playback weirdness on older clients and some upload paths
This works when the important action is already near center. It fails when your subject sits off to one side.
Use padding when cropping would destroy the shot
If your source is wide and the edges matter, letterbox or pillarbox intentionally instead of letting Instagram improvise.
For a source intended for a standard frame inside a vertical frame with black fill:
ffmpeg -i input.mp4 -vf "scale=1080:-2,pad=1080:1920:(ow-iw)/2:(oh-ih)/2:black" -c:v libx264 -pix_fmt yuv420p -c:a aac output-padded-reel.mp4
That command preserves the whole frame. The trade-off is obvious. You keep composition, but you give up full-screen immersion.
Cropping is for attention. Padding is for preservation. Pick based on what the viewer must see.
Build a blurred background version instead of hard bars
For many brand videos, a blurred fill looks better than black bars. This is my default when I need vertical output from a horizontal interview, product demo, or webinar clip.
ffmpeg -i input.mp4 -filter_complex "[0:v]scale=1080:1920:force_original_aspect_ratio=increase,boxblur=20:10,crop=1080:1920[bg];[0:v]scale=1080:-2:force_original_aspect_ratio=decrease[fg];[bg][fg]overlay=(W-w)/2:(H-h)/2" -c:v libx264 -pix_fmt yuv420p -c:a aac output-blurfill-reel.mp4
That creates two layers:
- A blurred background that fills 1080×1920
- A clean foreground scaled to fit inside it
This approach is often better for talking-head footage, especially if your team doesn't have time for a manual mobile reframing pass.
If you'd rather understand the design side of bars and fill before coding it, this breakdown of letterbox aspect ratio is worth bookmarking. Teams that need help choosing where to crop, when to blur, and how to preserve captions can also compare specialist video editing services for overflow work.
After you've seen the commands, this walkthrough is a useful visual companion:
Feed export from the same master
For Feed, I usually derive a separate 4:5 file from the same source instead of reusing the Reel export.
From horizontal to feed portrait:
ffmpeg -i input.mp4 -vf "scale=1080:-2,crop=1080:1350" -c:v libx264 -pix_fmt yuv420p -c:a aac output-feed-4x5.mp4
From square to feed portrait with padding:
ffmpeg -i input.mp4 -vf "scale=1080:1080,pad=1080:1350:0:(oh-ih)/2:black" -c:v libx264 -pix_fmt yuv420p -c:a aac output-feed-padded.mp4
Safe-area discipline matters more than clever filters
The biggest mistake isn't technical. It's compositional. Editors often crop first, then notice the speaker's eyes are too high, subtitles are clipped, or product UI is half gone.
If the footage matters, do a quick reframing pass. Nudge the crop window. Burn subtitles only after you know where the final frame lands. Instagram is unforgiving when text rides the edges.
Codecs Bitrates and Settings That Survive Compression
Once framing is right, the quality battle moves to encoding. People lose sharpness before Instagram even starts its own transcode.
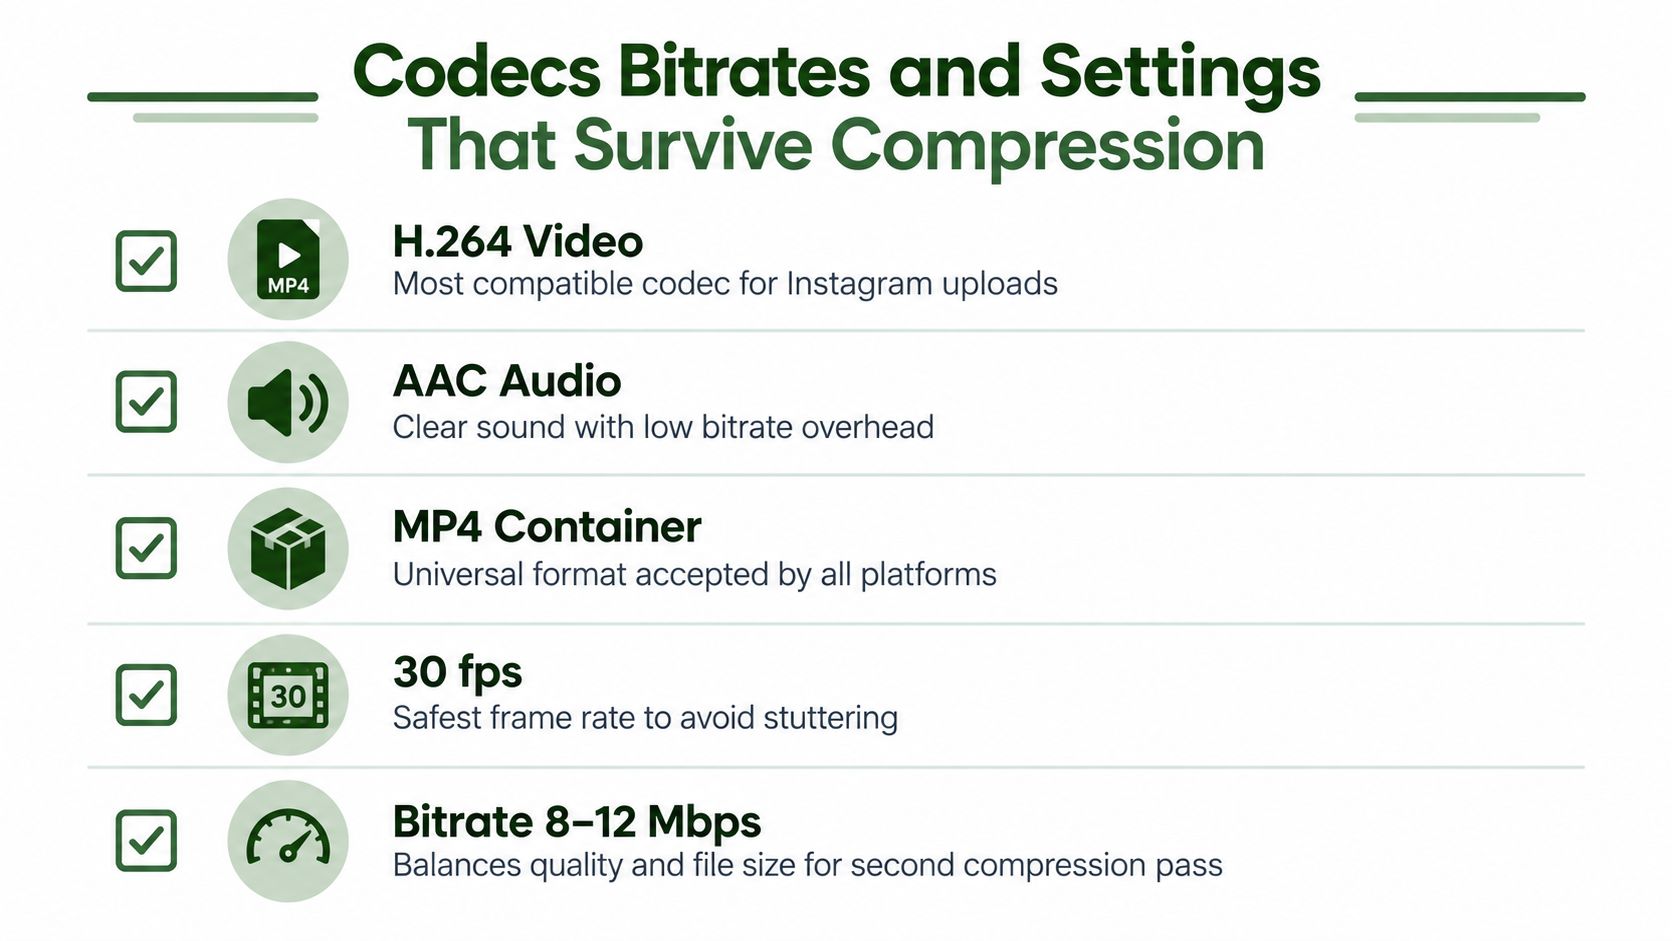
The checklist is straightforward.
The safest delivery settings
For quality control on 1080 × 1920 Reels, multiple expert guides recommend a practical bitrate range of 8–12 Mbps, with about 10 Mbps as a safe midpoint. Lower targets around 3.5 Mbps can still upload, but they carry a higher risk of visible artifacts after Instagram recompresses the file, according to this Instagram Reels format and spec guide.
That matches what I trust in production. For broad compatibility, I stick to:
- Container: MP4
- Video codec: H.264
- Audio codec: AAC
- Frame rate: 30 fps
- Bitrate target for 1080×1920 Reels: around the range above, with the midpoint as a practical default
If you need a codec refresher before tuning flags, this explanation of what a video codec is is useful.
A copy-paste FFmpeg export that usually holds up
For a Reel or Story export:
ffmpeg -i input.mov -c:v libx264 -pix_fmt yuv420p -profile:v high -level 4.1 -r 30 -b:v 10M -maxrate 12M -bufsize 20M -c:a aac -movflags +faststart output-instagram-reel.mp4
Why these flags matter:
-r 30keeps to the safest default frame rate-b:v 10Mgives you the practical midpoint for a 1080×1920 delivery-maxrate 12M -bufsize 20Mreins in bitrate spikes-movflags +faststarthelps with stream-friendly MP4 structure
CRF versus target bitrate
If you already know x264, you might prefer CRF-based exports. That's fine for your archive master. For Instagram delivery, I usually want a predictable upload file that lands in the quality window I'm targeting.
CRF can undershoot on simple scenes and overshoot on noisy ones. A capped bitrate export is easier to standardize across a large batch of social variants. The mistake is exporting too lean, then letting Instagram compress an already compressed file again.
Export a strong source file once. Don't make Instagram rescue a weak one.
A quality-control loop that catches the real failures
The fastest QC pass is visual, not theoretical. Check the spots Instagram tends to damage first:
- Gradients and flat backgrounds: Watch for banding after export.
- Thin type and subtitles: Zoom in and inspect edge sharpness.
- Logos and UI captures: Look for macroblocking around hard edges.
- Fast motion: Make sure motion cadence still looks clean at your chosen frame rate.
Then do a test upload before you publish at scale. Instagram's transcode can exaggerate weaknesses that don't jump out in QuickTime or VLC.
A few practical extras help:
- Burn subtitles after reframing: Otherwise you may crop them later.
- Extract thumbnails deliberately: Don't leave cover selection to chance if the first frame is weak.
- Normalize audio sensibly: Clean dialogue survives better than over-limited mixes.
Automate Instagram Formatting With RenderIO and No-Code Tools
Manual FFmpeg is fine until the same video needs Reel, Story, and Feed variants every day. At that point, the bottleneck isn't encoding. It's repeatability.
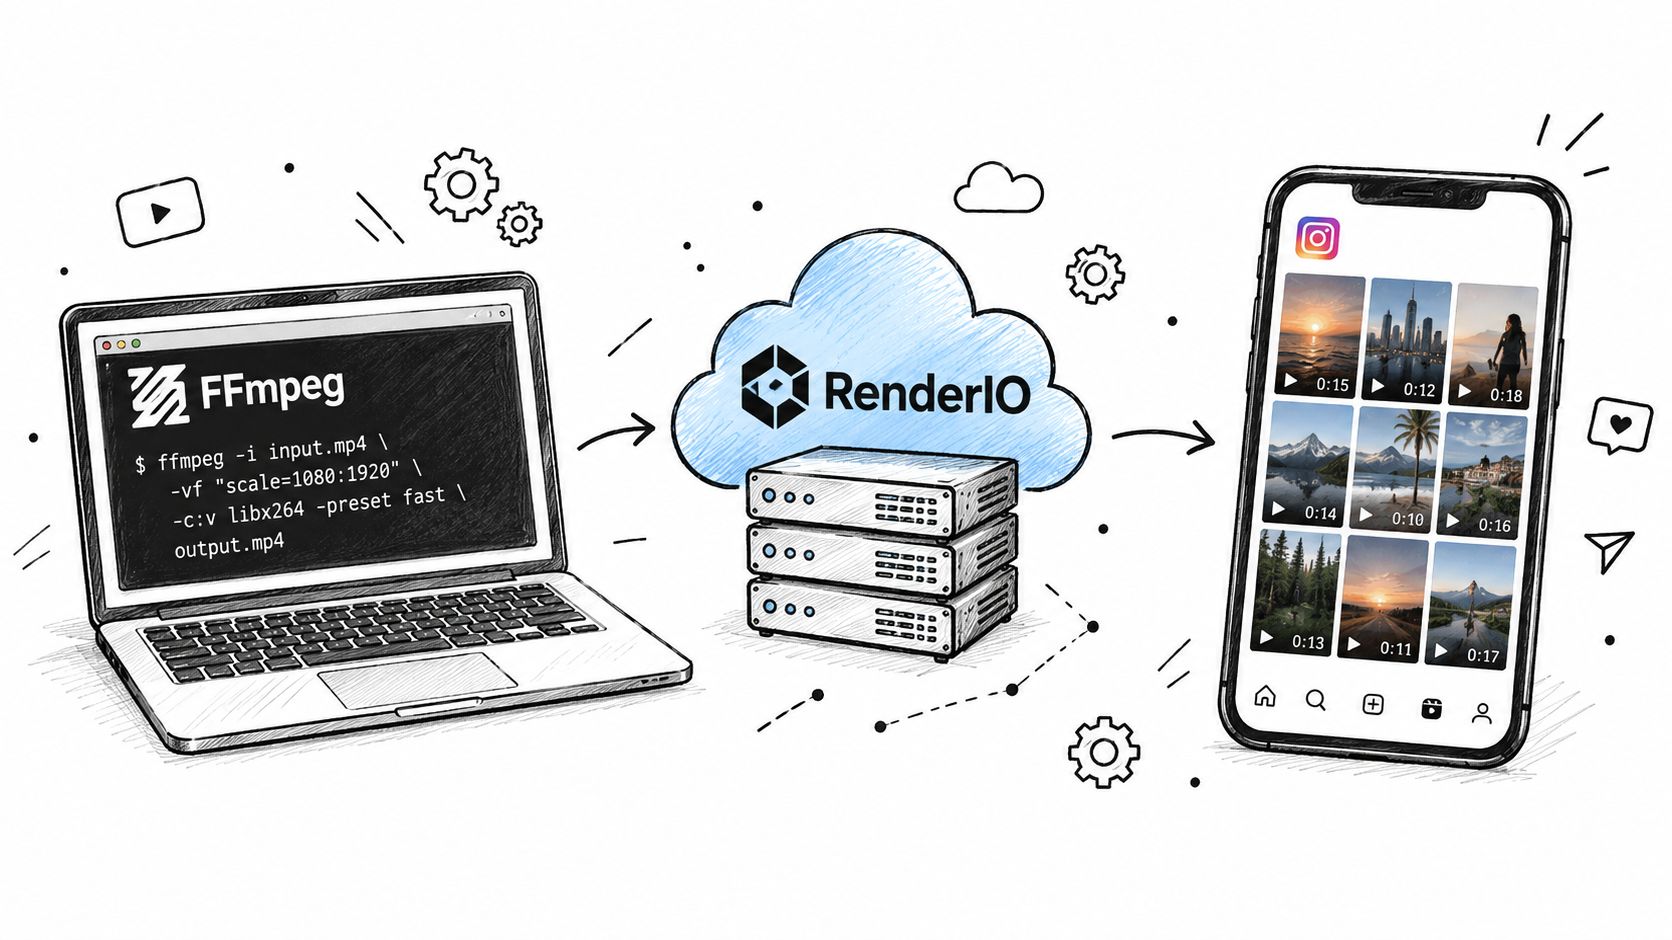
Turn one source into multiple Instagram outputs
A practical automation pattern looks like this:
- An upload or webhook drops a master file into your pipeline.
- One branch creates a 9:16 Reel/Story export.
- Another creates a 4:5 Feed export.
- Optional steps add watermarking, subtitle burn-in, and thumbnail extraction.
- Your workflow sends outputs to storage, approval, or publishing tools.
That pattern works whether you're scripting FFmpeg yourself, calling a render API, or using no-code orchestration.
What to automate first
The biggest wins usually come from automating the decisions you already repeat by hand:
- Placement-specific commands: Keep separate templates for vertical and feed outputs.
- Batch conversions: Process multiple clips from one campaign in parallel.
- Error handling: Capture stderr so failed filter graphs don't vanish into a vague “conversion failed” message.
- Idempotent jobs: Prevent the same trigger from generating duplicate exports.
For teams that don't want to manage their own workers, RenderIO exposes a REST endpoint for FFmpeg 7.x commands and supports n8n and Zapier directly, with webhook-based patterns that also fit Make and Pipedream. That's useful when you want one incoming master to fan out into Instagram-ready variants without maintaining your own render queue.
A realistic no-code flow
An n8n or Zapier automation for repurposing a long-form master usually looks like this:
- Trigger: New uploaded source or approved edit
- Transform: Send a vertical FFmpeg command and a separate 4:5 command
- Enrich: Generate a poster frame and optional subtitle-burned version
- Notify: Return output URLs to Slack, a CMS, or your scheduler
- Retry: Re-run only the failed variant if one placement export breaks
The important part isn't the tool. It's the discipline of storing your FFmpeg commands as reusable templates instead of rebuilding them from memory every time.
Final Checklist Before You Hit Publish
A clean Instagram export usually comes down to a short preflight, not a heroic fix after upload.
Run this check every time
- Canvas matches placement: Reel and Story exports should use the vertical canvas you prepared. Feed should use its own framed export.
- Codec choice is boring on purpose: H.264 video, AAC audio, MP4 container.
- Frame rate is stable: Keep it at the safe baseline unless the footage gives you a real reason not to.
- Text stays inside the safe area: Check subtitles, CTAs, and lower-thirds on a phone-sized preview.
- Compression looks acceptable: Inspect gradients, logos, and thin typography before upload.
- Thumbnail is intentional: Don't let an accidental blink frame become your cover.
One last test prevents most surprises
Upload a test version to a private or low-risk account first. Watch it on the phone, not just on your editing monitor. Instagram's player is where the verdict happens.
Good Instagram formatting isn't a trick. It's a repeatable export system.
Once you've got placement-specific commands, a sane bitrate target, and a quick QC pass, formatting stops being guesswork. It becomes part of the pipeline.
If you're tired of running these FFmpeg steps by hand, RenderIO gives you a way to send the same Instagram formatting commands through an API and get back ready-to-publish outputs. It fits the workflow in this guide well when you need repeatable Reel, Story, and Feed exports, especially inside n8n, Zapier, or custom app pipelines.